This is really a section where you should play around yourself to try and create interesting colours and styles, but I'll demonstrate some options for completeness.
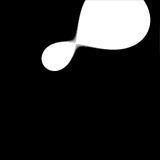
First of all is the obvious approach: subtract our value from 255. This results in blobs like this:
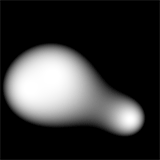
Hmm... not bad, but a bit too fuzzy for my liking. I prefer my blobs to look like real physical blobs of goo rather than bobbing lights. Think back to that picture of the curve all the way back at the start of this article. Remember those blue lines that clipped the brightness into a particular range? Why not try to shift the range of values - in this case, I'll try taking our distance value away from 512 rather than 255, and instead we get this:

Much better! Problem is, as we stretch our values higher and higher we have the unfortunate effect of making the dark bits brighter too and so the blobs get larger. What we need to do is make the cutoff point much sharper - which can be done with a multiplication. Multiply the distance2 by a constant and it makes the whole thing much sharper, reducing the size of the blobs as well. Here's an example where I multiply the total value by 64 before subtracting it from 4096 to get our pixel brightness value:
Of course, adding this extra multiplication step is simple. When we multiply all the distances together in the earlier part of the code, we start off with distance_squared = 1. If I set this to 64 instead of 1 now it has the same effect as multiplying it by 64 later!
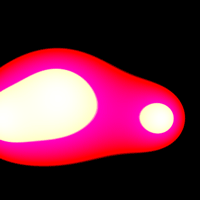
Greyscale blobs are quite dull, really, so making them glow a colour would be nice. Notice how in mine the blob is a greeny blue and glows blue? This is because I am mixing together the RGB value of the colours together by using a bright, sharp, crisp brightness (like the bottom picture) for the G and a dim, smooth, fuzzy brightness for the blue (like the top picture) before writing the pixel to the screen. With a bit of experimentation, you can create some truly odd effects.