Connecting an old receiver/amplifier to an HDMI television, apropos achieving surround sound
Sunday, 16th August 2020
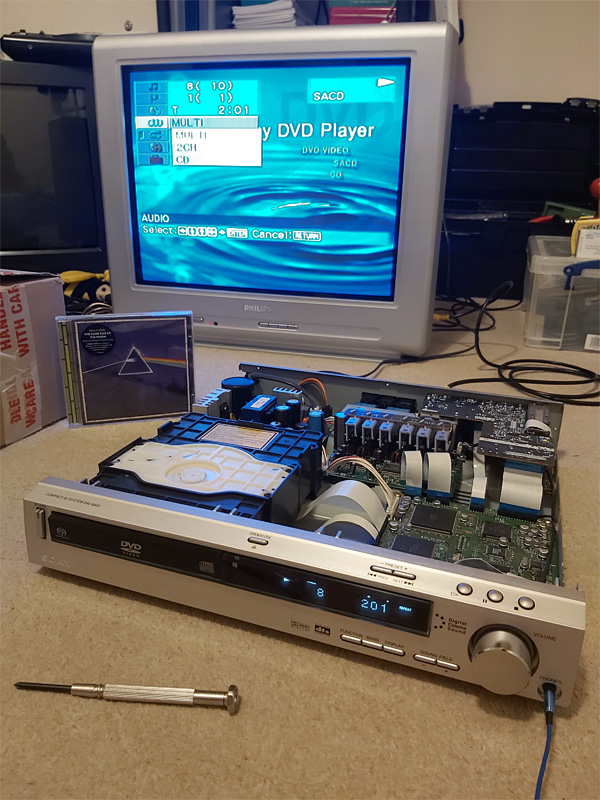
Now that the charity shops have reopened in the UK I enjoy hunting for good bargains and recently picked up a DAV-S400, a home cinema system originally sold back in 2002. I was not particularly interested in its DVD playback capabilities, especially as it only outputs composite video, but the integrated 5.1 surround sound amplifier and optical input made me think that I could use it to replace my current stereo amplifier for a better home cinema experience. The inclusion of SACD support was an added bonus as I'd bought myself a copy of The Dark Side of the Moon in that format back in 2004 and only been able to listen to it once, so if I couldn't get the home cinema side working at least the SACD part was self-contained and I'd be able to enjoy that.
This ended up being quite the learning project for me and I had to solve quite a few problems along the way. I'm still not entirely sure if I've found the best solutions in places but I thought I'd write this post in case it helps anyone else hooking up an old receiver/amplifier to a modern HDMI system!
The proposed setup
I watch most media using my Windows PC as a source. The PC is in one room and the TV is in another and long HDMI and USB cables run between both under the floorboards. An HDMI splitter is also used near the PC so it can drive its main monitor and the TV in the other room simultaneously.
I was previously running analogue stereo audio from the headphone socket of the TV to a stereo amplifier with a line level "super woofer" output that ran to a separate amplified subwoofer for 2.1 sound.
I knew that HDMI could carry digital audio, and both my monitor and TV have digital outputs. As the DAV-S400 has a digital input, I could just connect that to the digital output from the TV (instead of the headphone output) and in my naivety assumed that's all it would take to have glorious multichannel digital audio. Of course, things are rarely that easy…
My TV only has coaxial digital audio out via an RCA connector and the receiver has an optical input via a TOSLINK socket. Fortunately, my PC monitor has an optical output so I connected that to the receiver for the sake of testing. When I played media on my PC sound came out of the speakers, however only in stereo, even from 5.1 sources. What was going on?
Capabilities of S/PDIF
The digital output from the monitor/TV and the digital input of the amplifier operate with S/PDIF digital audio. This can carry two channels of uncompressed PCM audio for regular stereo. To carry 5.1 multichannel audio the data needs to be compressed using Dolby Digital or DTS. The DAV-S400 supports both, but you need to find a way to transfer that compressed signal to the receiver first.
Foiled by the EDID
Here is the biggest fly in the ointment! Extended Display Identification Data (EDID) is metadata that an HDMI display provides to describe what sort of video resolutions and sound formats it supports. All three of my HDMI devices (the HDMI splitter and both displays) report that they support two-channel PCM audio but nothing else.
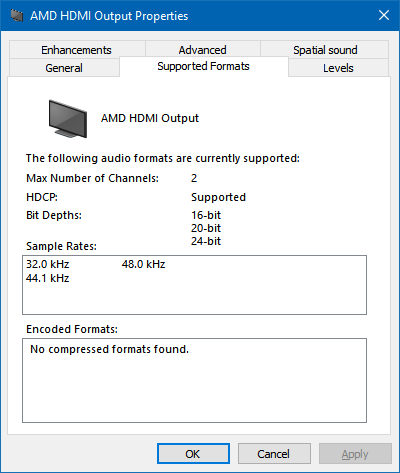
As a result, devices will only try to send stereo PCM audio to them and not Dolby Digital or DTS. If you have a sound card with an S/PDIF output you will notice that you can go in to its "Supported Formats" tab in Windows and tick which features the receiver supports – this is as the receiver can't tell the sound device which formats it supports automatically like an HDMI device can via its EDID. Unfortunately, Windows trusts the EDID and doesn't let you go in and enable support for features the display doesn't claim to provide. An easy solution here would be to just use my sound card's S/PDIF output but I didn't fancy taking the floorboards up again to run another cable…
A custom monitor driver to override the EDID
Fortunately you can create a custom monitor driver with a "fixed" EDID that advertises support for Dolby Digital and AC3 using a couple of easy tools.
The first piece of software you'll need to use is EnTech's Monitor Asset Manager – this will allow you to extract the current EDID to a file and will later let us turn the updated EDID back into an installable driver.
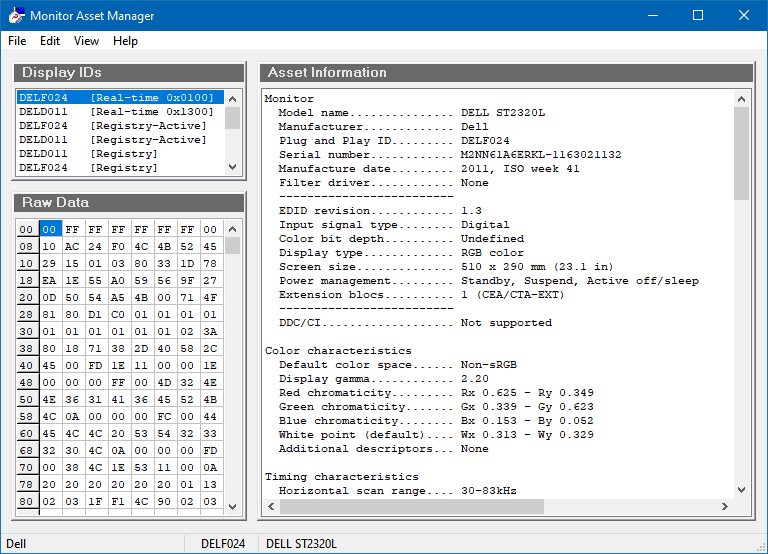
Run the software and find the monitor that is connected to the HDMI port that you are going to be outputting sound to from the list in the top left. In my case that's my HDMI splitter (which for some reason identifies itself as a DELL ST2320L). Save the EDID to a .bin file via the File→Save as menu item.
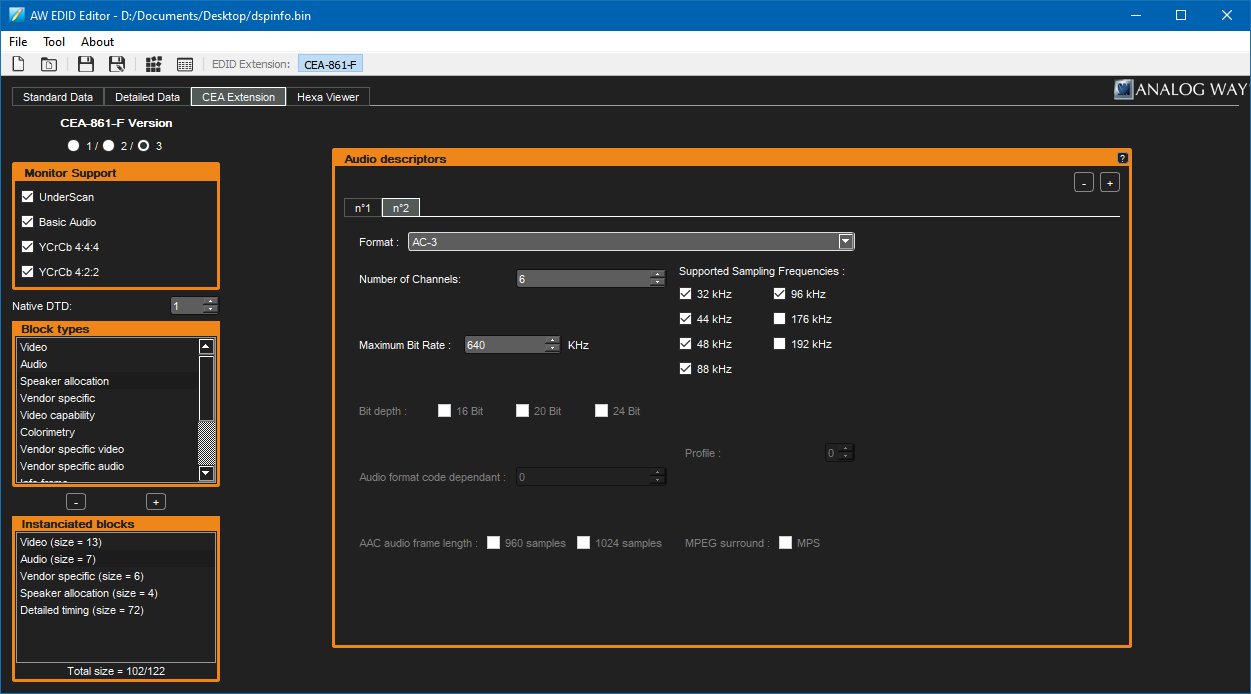
Now that you have your EDID data exported to a file, you'll need to edit it. A nice idiot-proof way to do so is with Analog Way's AW EDID Editor. Run the software and open the .bin file for the EDID file you just saved. Switch to the CEA Extension tab and you will probably see that it only reports support for stereo uncompressed PCM when you look at the "Audio" block.
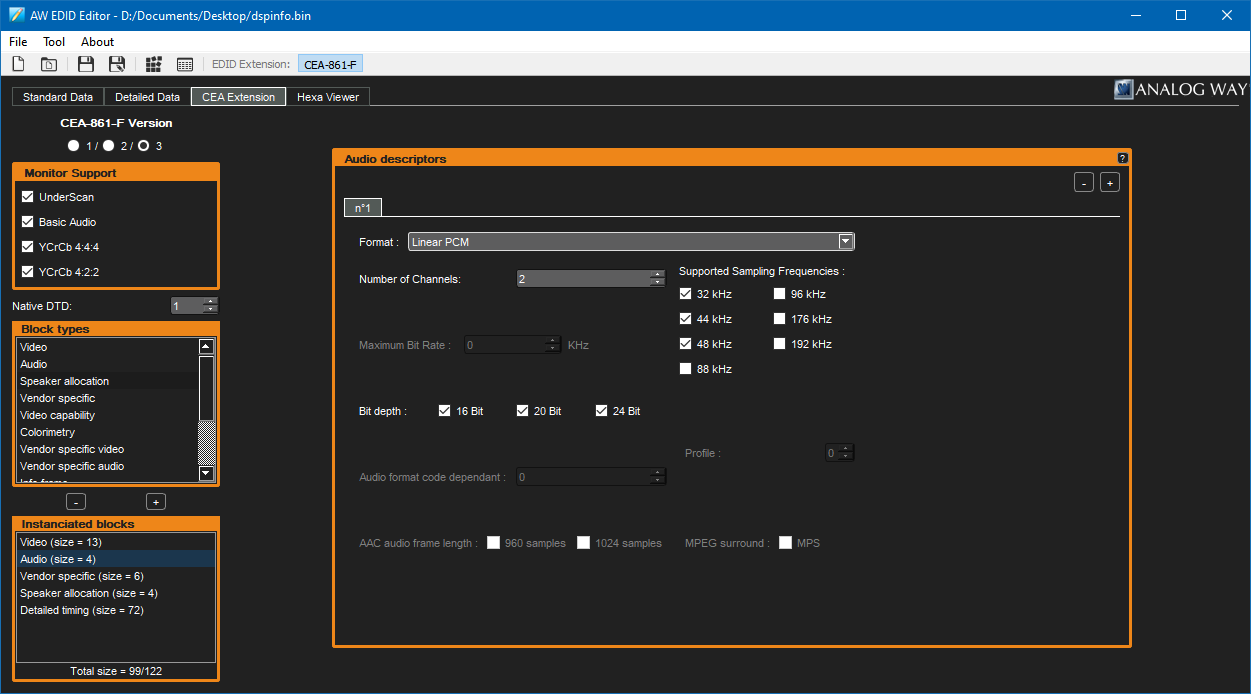
At this point, you can add audio descriptors according to the capabilities of your receiver. I'm not entirely sure what the best values to enter here are, especially when it comes to bitrate – as far as I'm aware DVDs usually use up to 448kbps for Dolby Digital AC-3 and up to 768kpbs for DTS but there's a more concrete limit of 640kbps for AC-3 and 1536kbps for DTS so these are the values I've used when setting up my EDID.

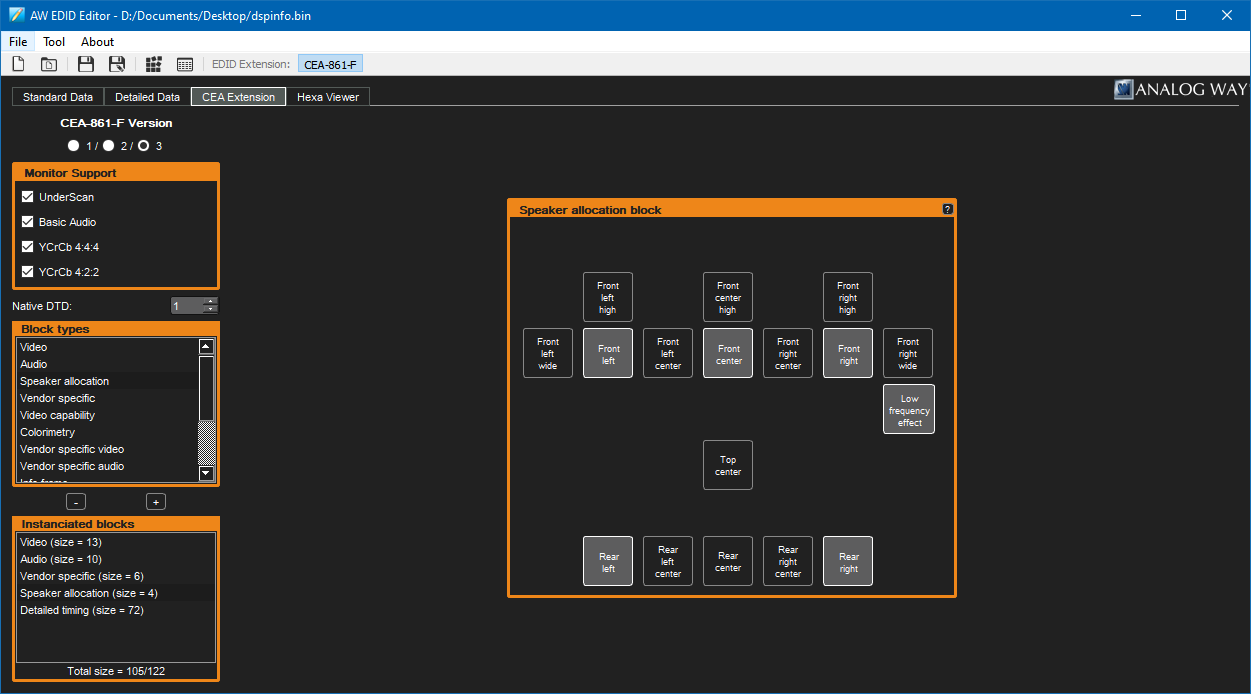
You can also use the "Speaker allocation" block to specify which speakers your device has attached – in my case I've set this up to match my 5.1 setup. Save the EDID at this point, and you're ready to create the custom monitor driver!
Go back to EnTech's Monitor Asset Manager and open the saved .bin file for your new EDID. Click File→Create INF and save the INF to create your new monitor driver. Easy!
What's less easy now is installing that driver on a modern 64-bit version of Windows, as the driver is unsigned and Windows will not let you install unsigned drivers normally. To save headaches at this point I'd recommend looking up how to enable the installation of unsigned drivers, but at the time of writing this is how it's done in Windows 10 (this will involve restarting your computer):
- Click Start→Power
- Hold Shift, then click "Restart".
- At the "Choose an option" screen, select "Troubleshoot".
- At the "Troubleshoot" screen, select "Advanced options".
- At the "Advanced options" screen, select "Start-up Settings".
- At the "Start-up Settings" screen, click "Restart".
- Once the computer has restarted, select the "Disable driver signature enforcement" option (F7).
When the computer has restarted, you should be able to install your unsigned monitor driver. To do this, go into Device Manager and find the entry for your HDMI device in the "Monitors" section.
- Right-click your device and select "Update driver".
- Select "Browse my computer for drivers".
- Click "Let me pick from a list of available drivers on my computer".
- Click the "Have Disk..." button.
- Browse for the monitor.inf file you created previously, then click OK.
- Select the EDID Override option that appears in the list and click "Next".
- Click "Install this driver software anyway" when prompted by the unsigned driver warning dialog box.
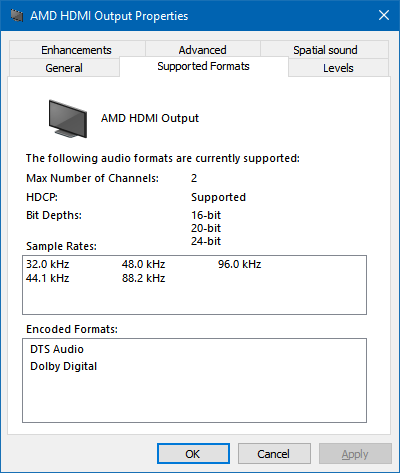
At this point, you will likely need to restart again but all being well after doing so you should now see that Dolby Digital and DTS Audio are now listed as supported encoded formats in the Sound control panel.
Passing through Dolby Digital and DTS without conversion to PCM
Getting Windows to believe that your receiver supports Dolby Digital and DTS over HDMI is the trickiest problem, but you still need to ensure that the compressed audio gets through every step of the way from the media to the receiver.
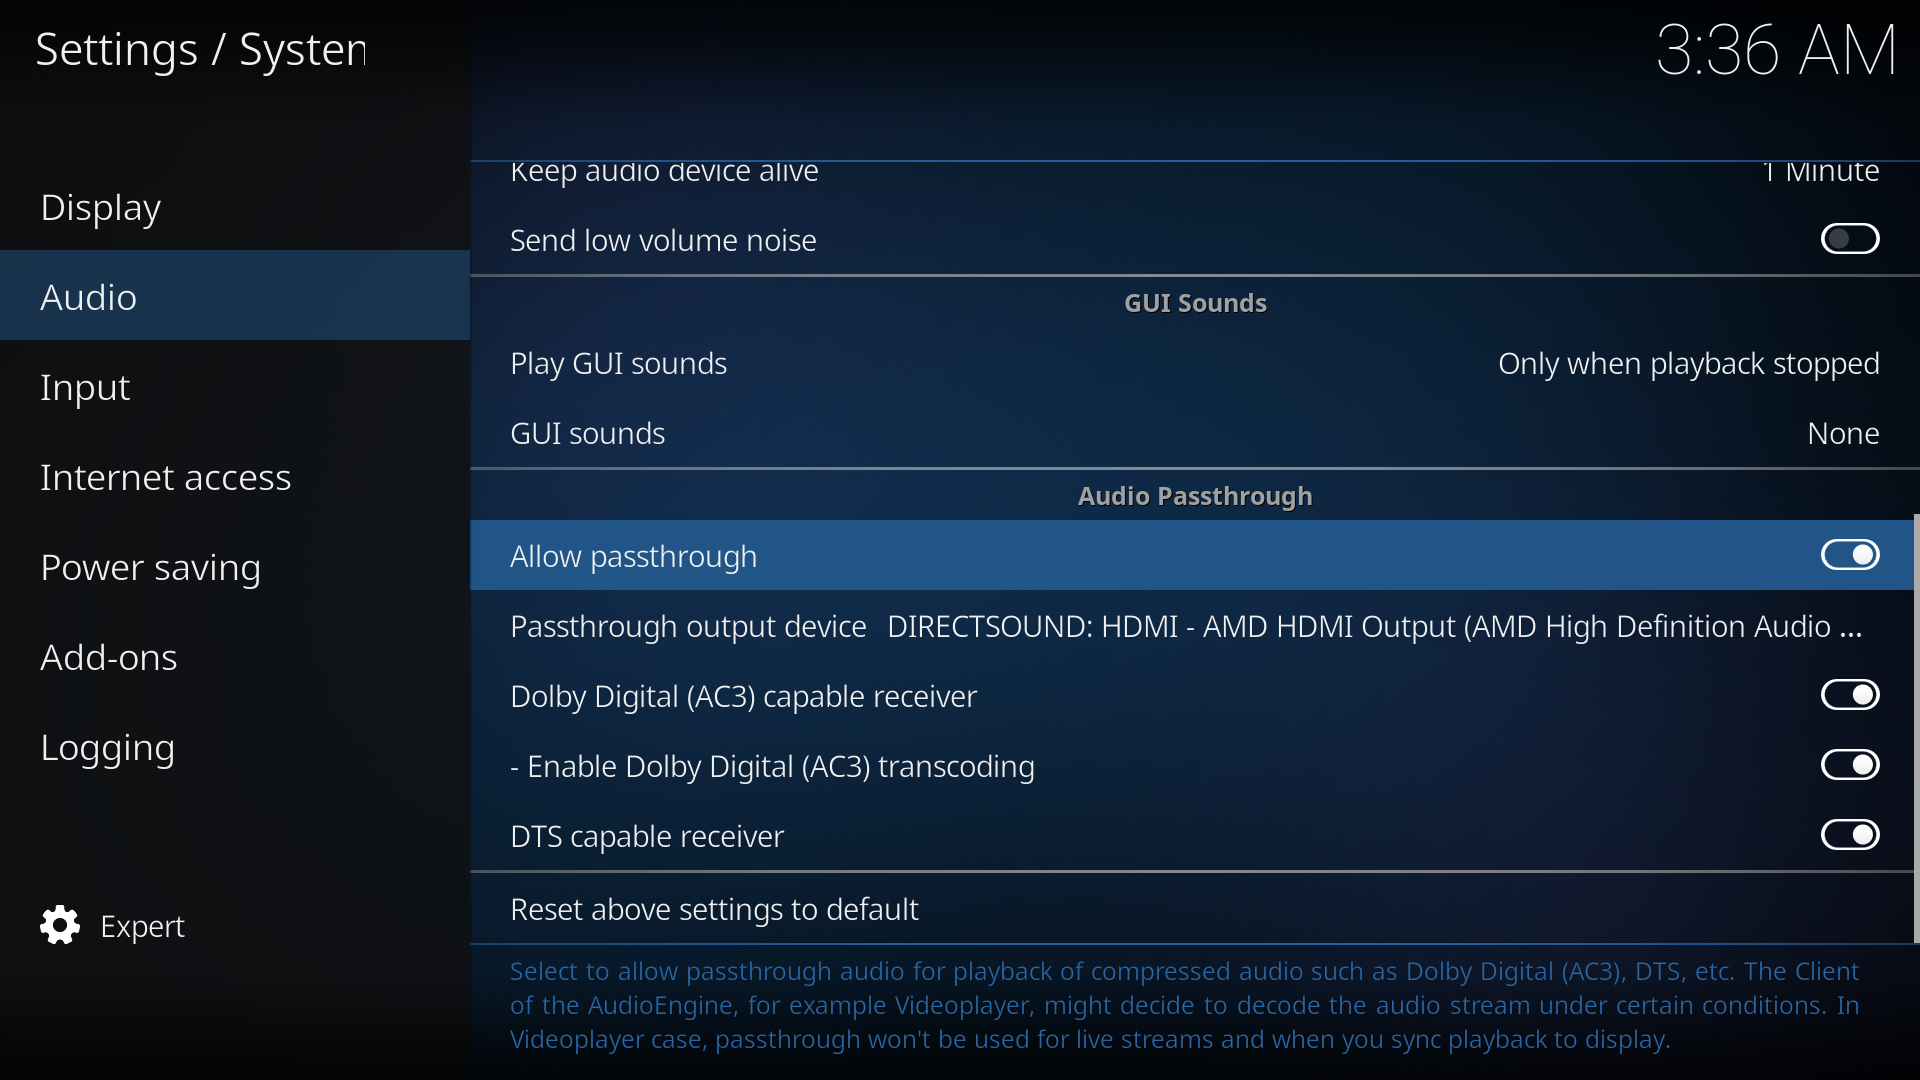
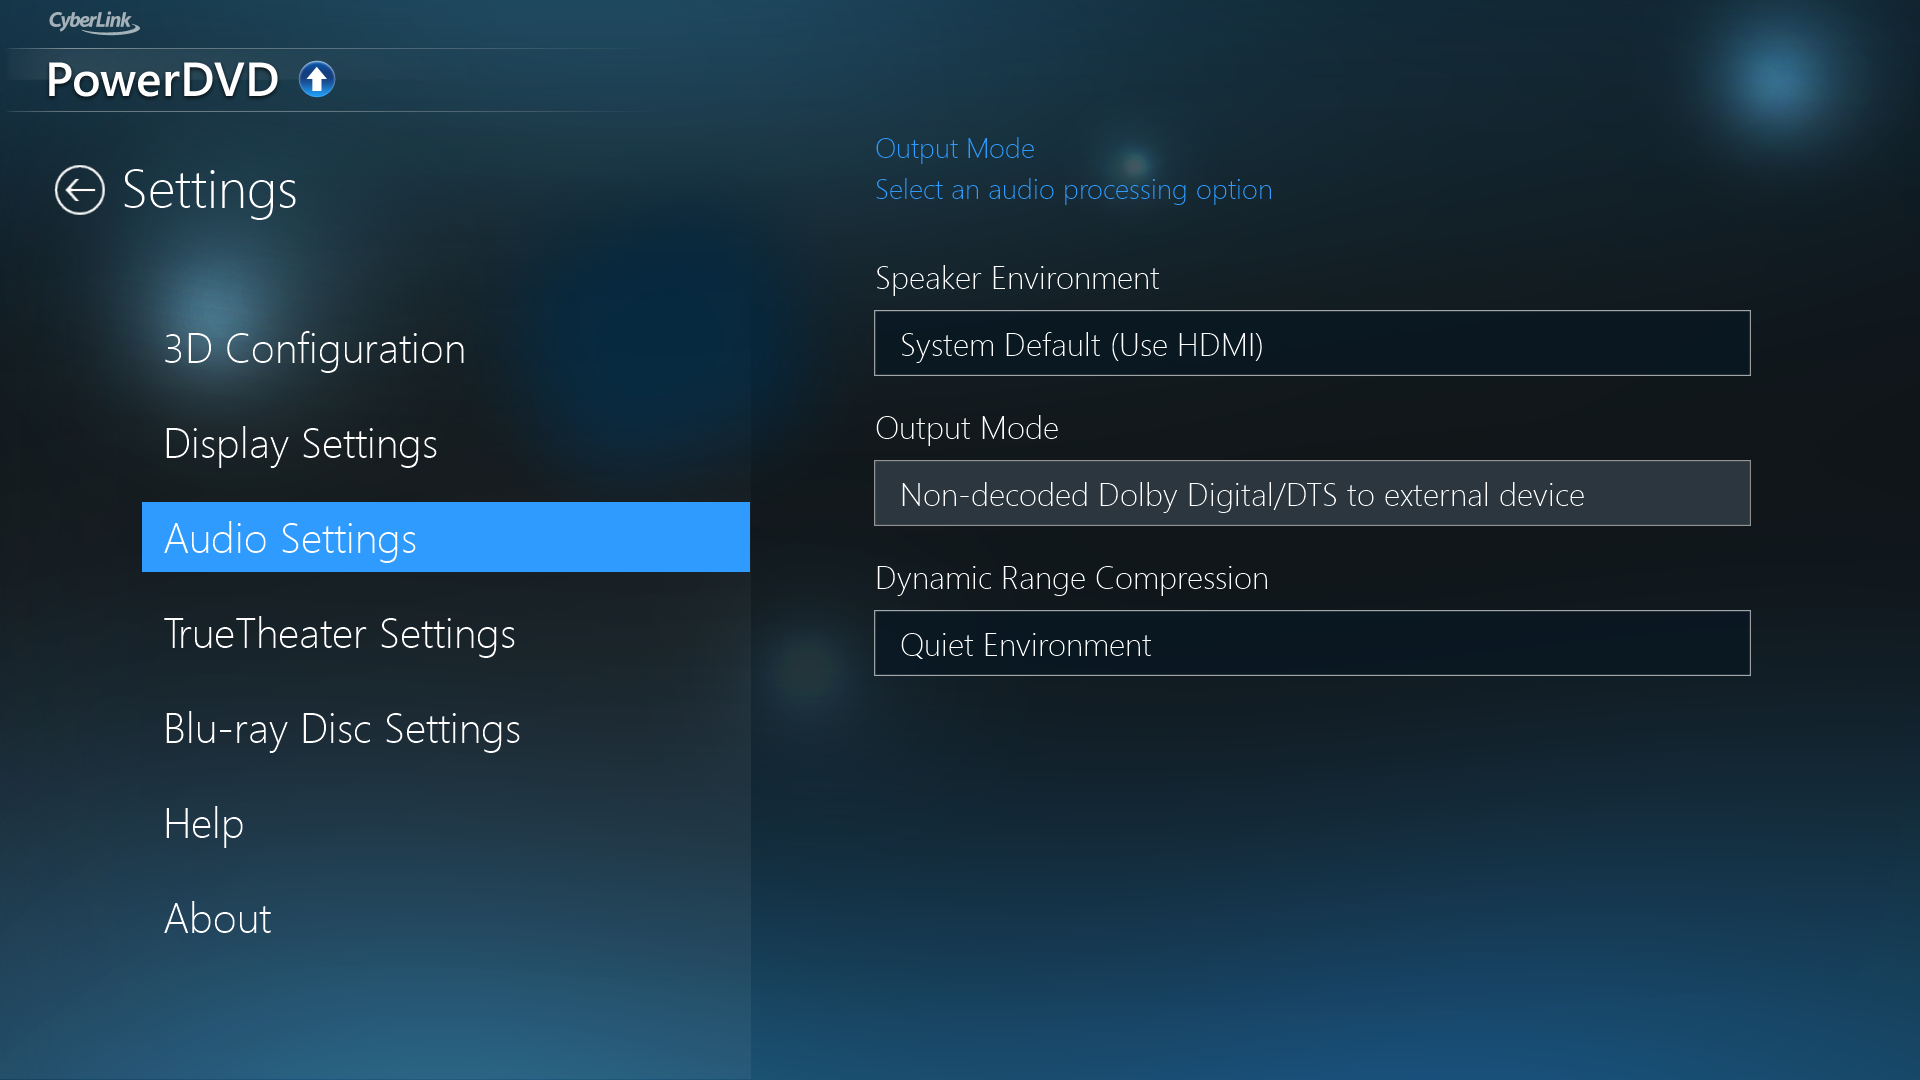
You will need to ensure that your media playback software is configured to pass through the audio directly rather than decoding it to PCM. If your software has an audio settings menu option, ensure that that is set to allow non-decoded audio to pass through.
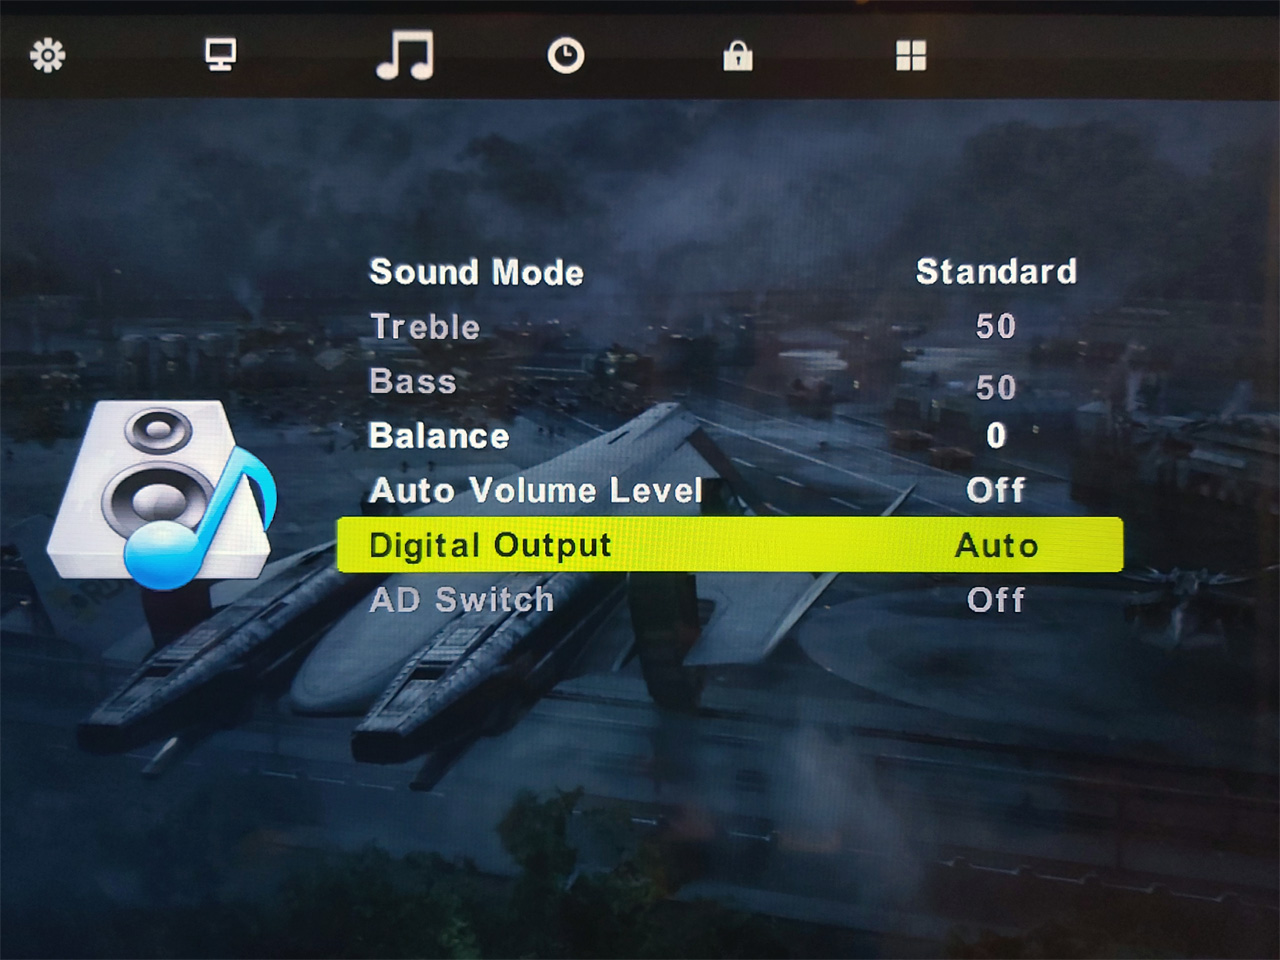
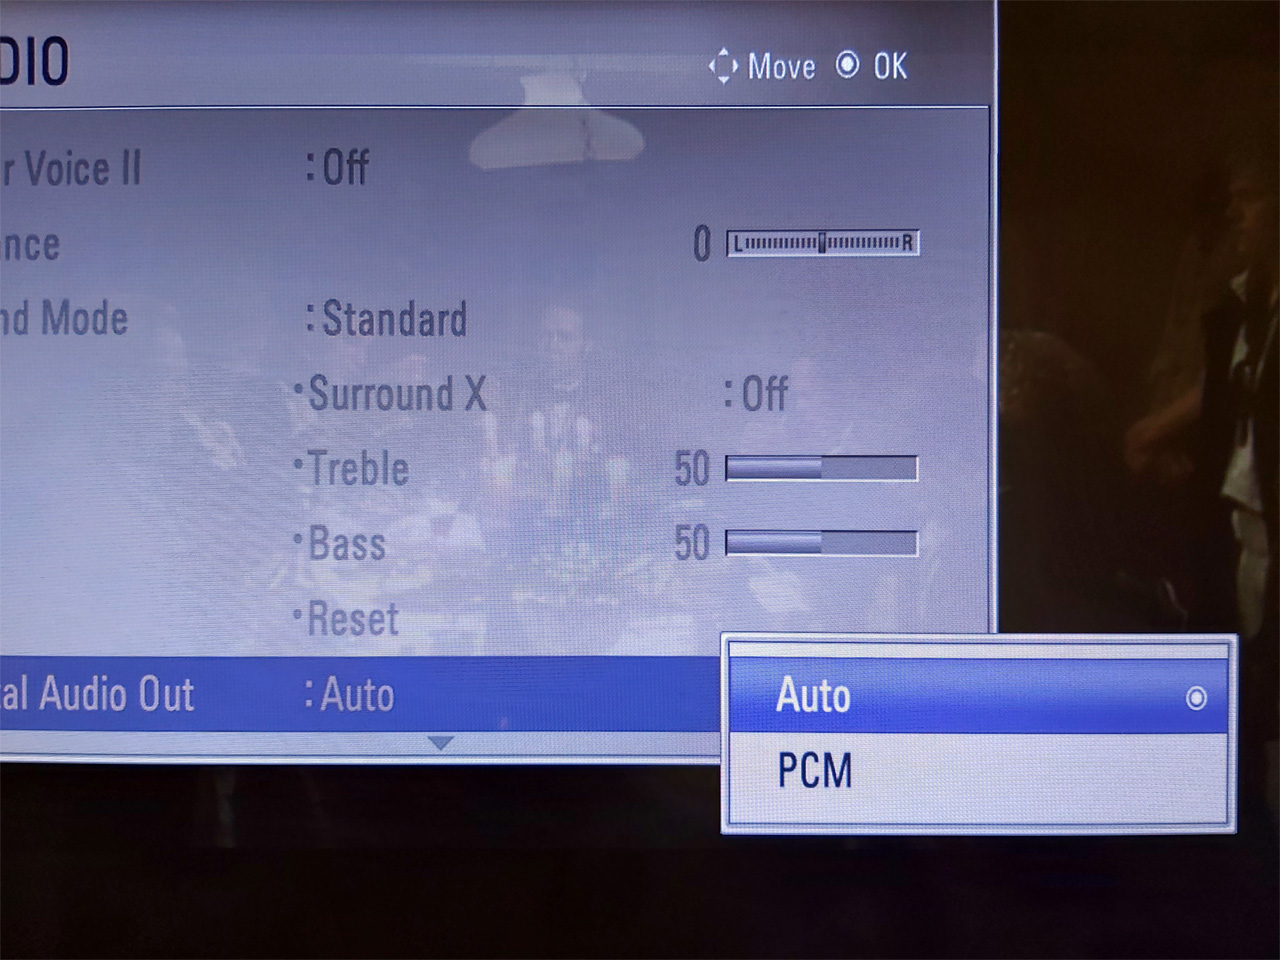
You will also need to ensure that your display is configured to pass through the audio without decoding it to PCM – check its sound menus for the relevant options, and change any settings to "Auto" or the appropriate equivalent instead of "PCM".
In my case I was testing with the receiver connected to my PC monitor via its optical output. Dolby Digital worked fine, however DTS was not working at all. I found that if I enabled the monitor's internal speaker it would output sound when fed Dolby Digital but not when fed DTS, however my TV would output sound when fed either. It seems that my PC monitor genuinely lacks support for DTS and won't even pass it out of the digital output port – fortunately when I acquired a coax to optical adaptor for my TV I found that it passed through DTS just fine!
The Windows 10 application version of Netflix also supports 5.1 audio over Dolby Digital and didn't need any further configuration. If you search the library for "Test" there's a useful selection of test patterns that can be used to ensure your speakers are set up correctly.

Other notes
I have a separate Blu-ray player attached to my TV as my PC's video card displays corrupt video when decoding Blu-ray 3D unless I install very old versions of its drivers and I thought a separate Blu-ray player was an easier option than dual-booting into Windows Vista. Unfortunately, my Blu-ray player believes my TV's EDID and refuses to pass-through Dolby Digital or DTS over HDMI even when set to output "bitstream" audio. Fortunately it has a separate coaxial digital audio out that outputs Dolby Digital or DTS even when it's outputting PCM over HDMI but it does mean I need to add a switch box for the single digital input into the receiver which is slightly less elegant than running everything through the TV. There are standalone EDID spoofers that plug in between your device and the monitor that may be able to resolve this issue in the same way the custom PC driver did but these are not inexpensive so I have not been able to test this myself.
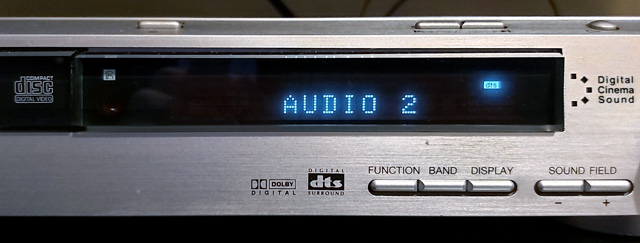
The DAV-S400 is extremely fussy about reading hybrid SACDs, and will often detect them as regular CDs. Ejecting and closing the tray persuades the machine to re-scan the disc, so if you have problems press the "DVD Display" button to ensure the OSD is visible and double-tap the eject button to quickly eject and close the tray until the indicator in the top right of the screen reads "SACD" instead of "CD".
If it does detect it as an SACD it will then play it absolutely flawlessly, the issue only seems to be with the initial format identification. I was able to improve the success rate with Dark Side of the Moon by carefully cleaning the drive lens, however I couldn't get Brothers in Arms to be detected at all until I went into the service menu and recalibrated the drive. You can do this by switching the machine on in DVD mode, holding the Stop+Display buttons on the unit together and rotating the volume wheel clockwise. From here go into "Drive Auto Adjustment". I initially tried calibrating with an SACD (labelled "LCD" in the menu) but this didn't help, so I tried the "All" menu option which prompts you to insert a single-layer DVD (DVD-SL), CD, then dual-layer DVD (DVD-DL). After this point it doesn't automatically prompt for an SACD so I left this in the default settings rather than calibrating and to my surprise found that Brothers in Arms now works (and, once detected, plays flawlessly). This inability to handle hybrid SACDs correctly seems to be a common flaw with Sony players of this vintage, unfortunately.
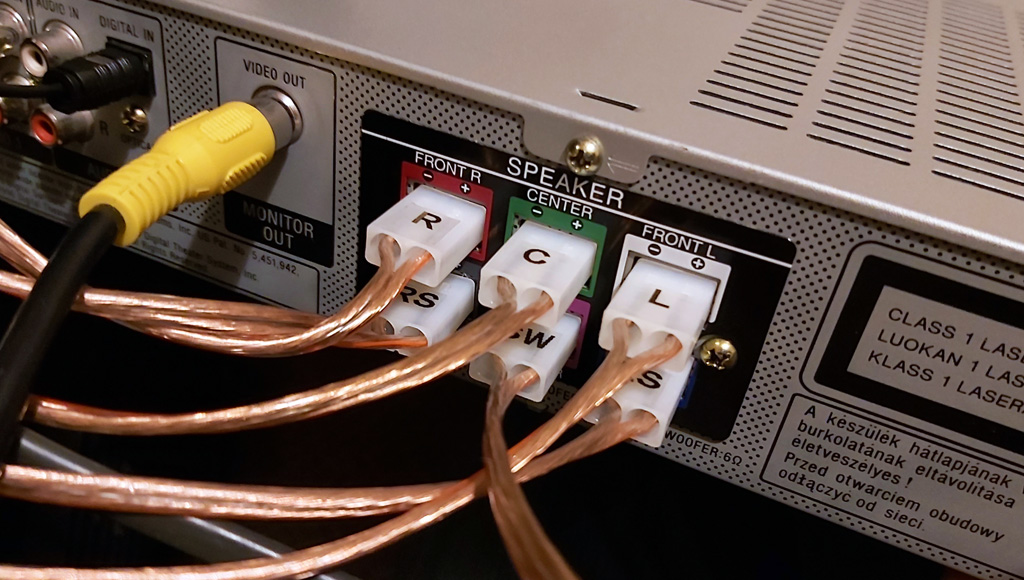
On a more practical note, I needed to find a way to attach my speakers to the amplifier, which had connectors that exposed a pair of pins around 6mm apart. Following a hunch I bought some Tamiya power connectors and found these to be a good fit once you cut off the retaining clip!
I did however find that a couple of the audio channels were intermittent and when I took the case lid off was surprised to see that one of the electrolytic capacitors on the amplifier board was barely held in by any solder at all and when I touched it it let out a big fat noisy spark! I resoldered it in along with all of the audio transformers, connectors and relays on the amplifier PCB which fortunately restored all audio channels back to their former glory.
All in all this has been quite a learning experience, though having now watched Terminator 2 and Mad Max: Fury Road with 5.1 surround sound I can definitely say it was worth it.