Refining the tape interface for BBC BASIC on the Sega Master System
Tuesday, 28th September 2021
It's been quite a while since my last post but work has continued with the version of BBC BASIC (Z80) for the Sega Master System. Most of the features I have been working have not been particularly exciting to write about on their own, but here are some of the notable changes:
- All VDU code (for text and graphics output) has been moved to a separate ROM bank, freeing up around 16KB of extra ROM space. It makes calling the code slightly more complicated but in the previous post I mentioned that I had less than 100 bytes of free ROM space so this was definitely required.
- Simplified the video mode driver interface. Each video mode has its own driver code which exposes a number of different functions. Previously, each function had its own vector in RAM which was fast but consumed a lot of precious work RAM. Now only a couple of functions (which need to be called frequently and as quickly as possible) are vectored, and all of the other functions are called via a single generic function with a parameter for which specific operation to carry out (e.g. "reset the graphics viewport", "change the text colour").
- Rewrote the triangle filling routine and line drawing routine to ensure that the same pixels are covered whether you fill a triangle or trace its outline – previously there would be some stray pixels that leaked outside the perimeter of a filled triangle.
- Changed the output resolution for most video modes to 240×192 with a logical to physical pixel scale factor of 5⅓ for a total logical resolution of 1280×1024, the same as the BBC Micro – graphics programs designed for the BBC Micro now properly fit on the screen.
- Changed MODE 2 to use a smaller resolution of 160×128 with a pixel scale factor of 8. Unfortunately, there is not enough video RAM to have a unique pattern in VRAM for every character position on-screen when using all 16 colours (as in mode 2) at the higher 240×192 resolution. The new lower resolution avoids screen corruption that previously occurred when running out of VRAM:


MODE 2 graphics at the full-screen 240×192 and reduced 160×128 resolutions
- Added support for scrolling the text viewport down as well as up, this is used by the line editor which now allows very long lines to be edited in small viewports by scrolling and repainting as necessary.
- Reworked the keyboard input routines for greater reliability and performance, including proper mapping of key codes in *FX 4,1 and *FX 4,2 and removal of "clever" (but flawed) interrupt-based detection of when a key is available (that had a habit of dropping keys and resulted in worse performance than just periodically polling the keyboard anyway).
The most significant changes have been all to do with loading and saving from tape, though. Since my previous post I have been doing a lot of work testing and refining both the hardware and software of the tape cassette interface. The hardware has now been tested with a couple of different tape recorders, as well as a pocket digital recorder, my mobile phone and my PC's sound card. The loader is much more robust and if a single block fails to load from the tape you can usually just rewind the tape a short way and it will try again, no need to rewind back to the start and start from scratch. I was previously counting the duration of half-wave cycles from the tape and comparing these to some fixed thresholds baked into the code to determine the difference between a "0" and a "1", I've now changed this to measure full-wave cycles (which aren't affected by any duty-cycle shifts in the recordings) and to calibrate the thresholds during the initial carrier tone, which allows the code to compensate for tape recorders that aren't quite running at the correct speed. On a more practical basis I've also added the ability to save to tape, motor control via a reed relay (so the tape will automatically stop after a file is loaded), and support for opening files on tape for reading or writing and accessing them on a byte-by-byte basis. As tapes are sequential access there are some limitations to this (for example, you can only advance the read pointer later in the file, you can't seek backwards) but it works quite well otherwise.
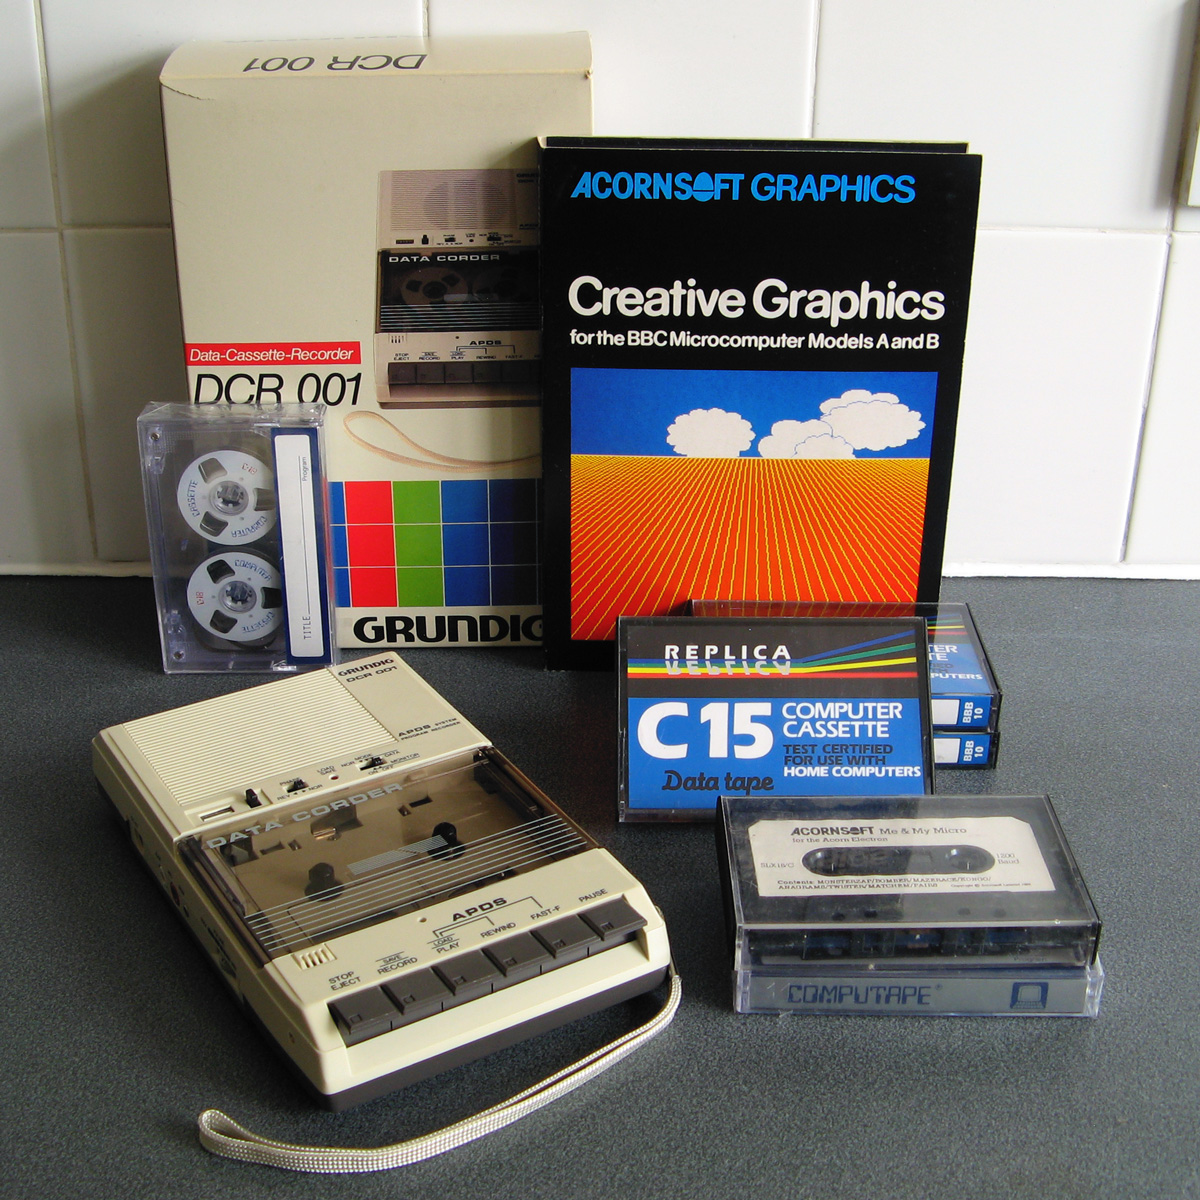
Of course, to test all of this I needed a tape recorder! I purchased the above Grundig DCR 001 data cassette recorder as well as some blank cassettes and a couple of commercially-prerecorded ones to do so. The DCR 001 has a few nice features that make it great for loading programs:
- A dedicated "data" mode that sets the output level at an appropriate fixed level – no need to guess about finding a suitable volume level.
- An optional "monitor" in data mode that lets you listen to the data on the tape as it's loading.
- A "phase" switch that can be used to reverse the phase output, to compensate for the case where the data has been recorded with a 180° phase shift.
- An "Automatic Programme Detecting System" that lets you skip ahead to the next program or back to the previous one by pressing Rewind or Fast Forward when Play is pressed – this stops when it detects a silent gap between recorded sections of data on the tape.
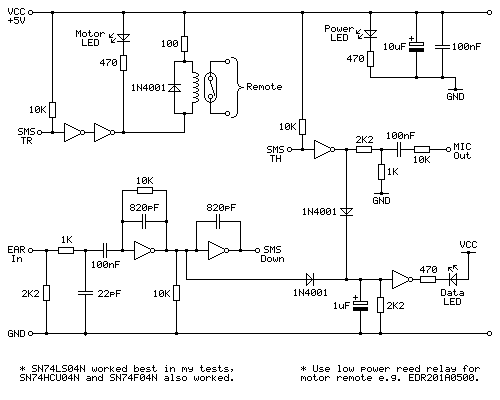
Above is the cassette interface circuit I came up with. It's quite simple and has a notable lack of analogue sections (no op-amp chips here!) – it uses a NOT gate with a 10KΩ negative feedback resistor to turn the analogue signal from the tape recorder's earphone output into a clean digital signal that can be fed into the Sega Master System. I've tested this with an SN74LS04N, SN74HCU04N and SN74F04N and all worked well, however for best results I'd recommend the SN74LS04N. The filtering capacitors clean up some high-frequency pulses/glitches that may otherwise end up on the output; this is not something I found was much of a problem with a cassette recorder or the audio output from my phone or PC, but a pocket digital voice recorder I have seems to produce glitchy high-frequency pulses in its output (I'm not sure if that's an artefact of its DAC or in the MP3 compression it uses for its voice clips) and those capacitors clean up the signal enough to be able to read it reliably.
The remote motor control relay is a reed relay, and must be a low current device to avoid overloading the Master System's controller power supply and to also allow it to be driven directly by the hex inverter chip. I found the EDR201A0500 perfect for this role!
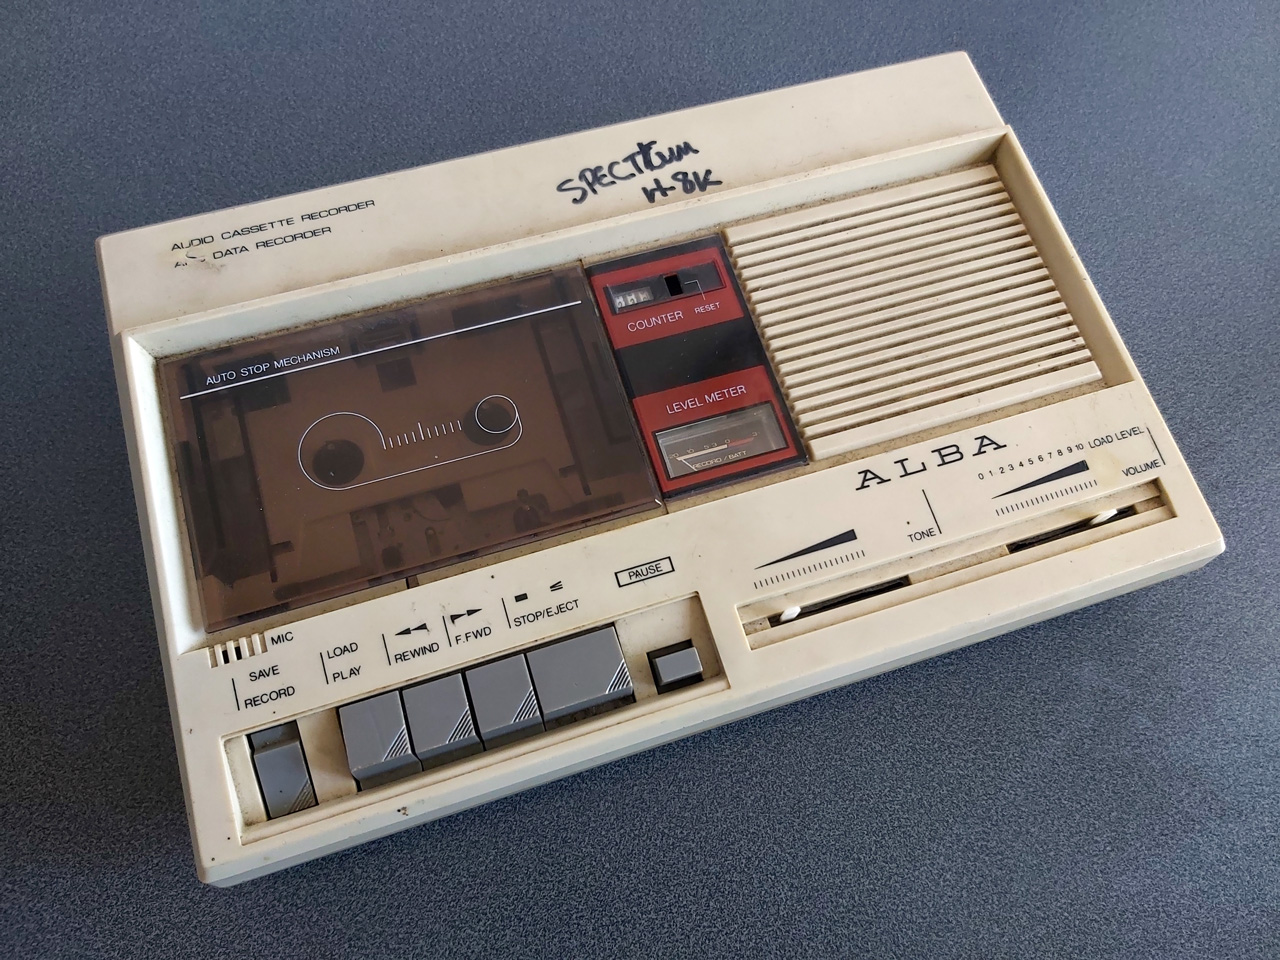
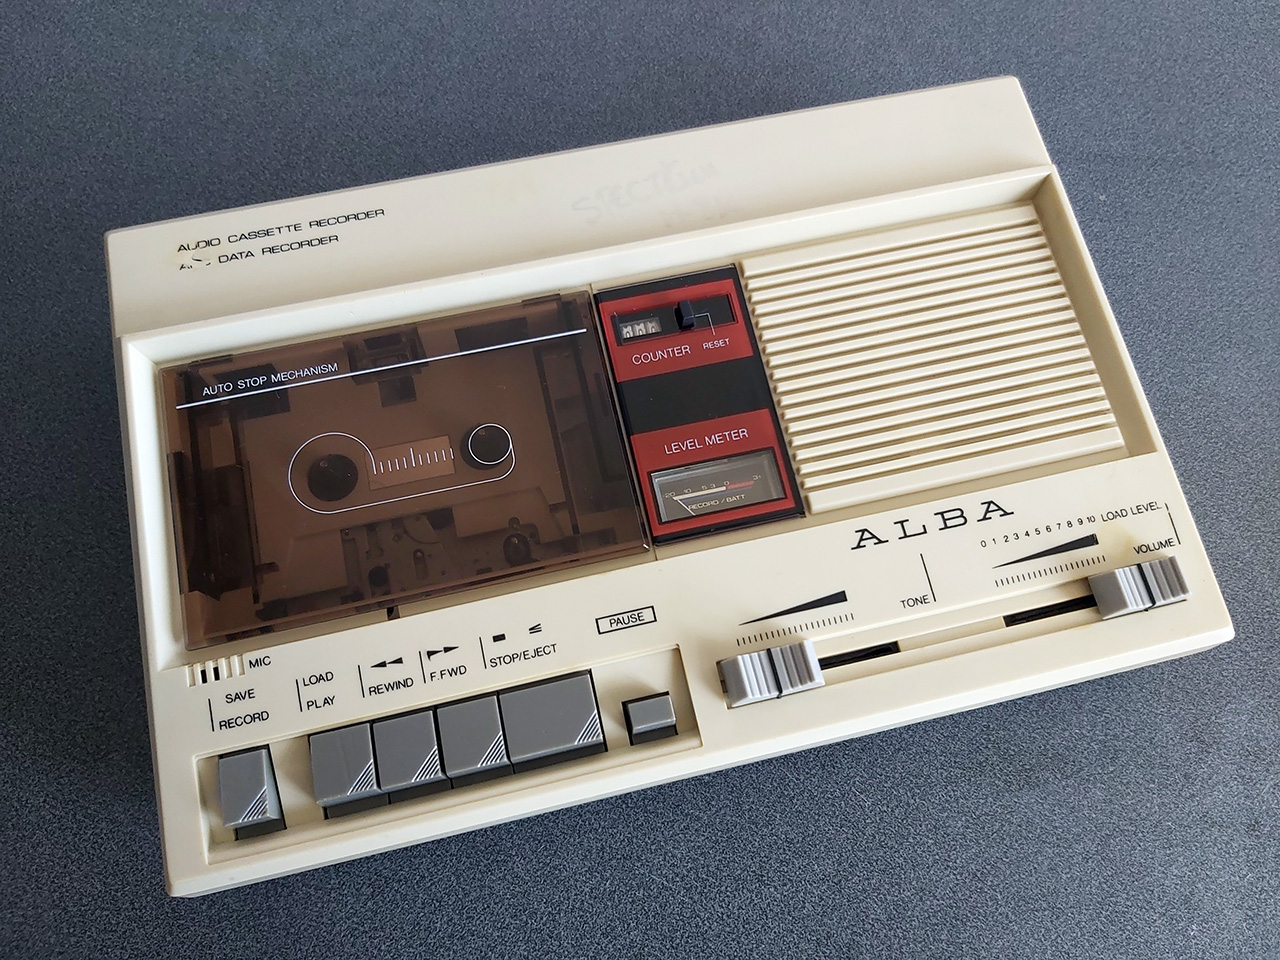
Being able to save and load back programs on one cassette recorder is fair enough, but to really be sure my hardware and software are working as they should I thought I should see if I was able to save a program to tape on one tape recorder and then load the same program back on a different tape recorder. To this end I bought the above cassette recorder. It was clear from the listing that the record button and counter reset button were damaged, and the whole thing was quite grubby, but I thought it worth a punt.
Getting inside was very easy as all but one of the screws was missing, and it was clear that someone had got there before me as the damaged plastic parts (including two of the main screw posts as well as the snapped-off parts of the record button and counter reset mechanism) had been removed at some point. After giving the tape path a very thorough clean and replacing one of the drive belts that was turning into a tarry mess I was able to get it to play a tape, so I took everything out of the enclosure to give that a good scrub and prepared to fix the damaged plastic parts.
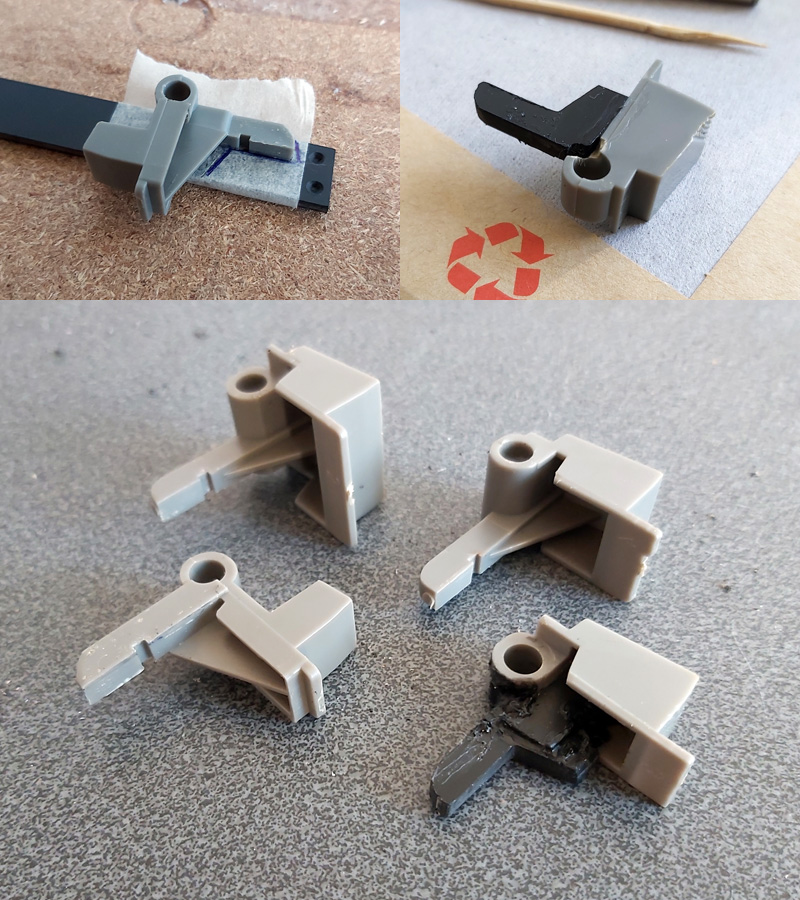
By tracing the arm from one of the other buttons onto a piece of scrap ABS plastic I was able to make a replacement arm for the damaged record button, which I then glued on with cyanoacrylate and some two-part epoxy resin to fill in the gaps. The result is not especially pretty but it does the job and my blobby repair is not going to be visible unless you take the recorder apart.
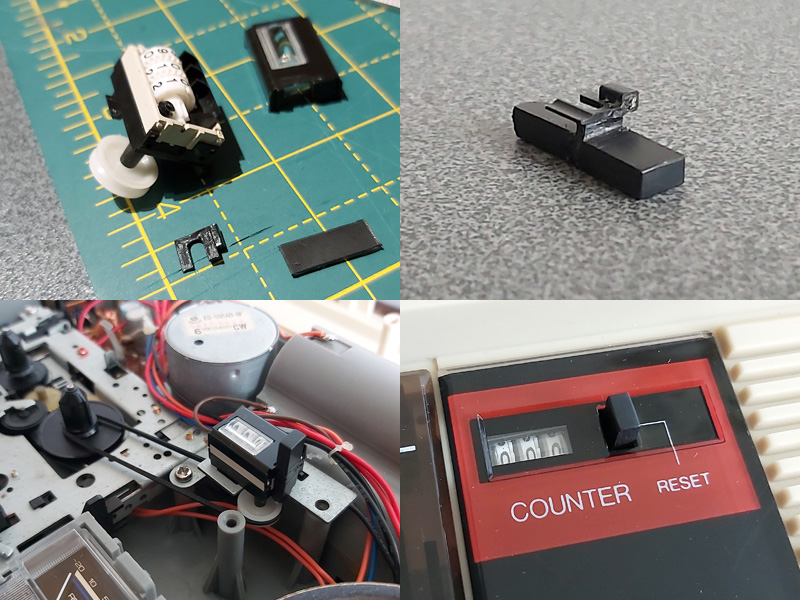
The counter reset button was a bit more fiddly; the reset mechanism seems to rely on the "n" shaped bit of plastic shown above in the top left photo, and though it looked like something used to be attached to it that had snapped off I wasn't sure what it would have originally looked like. I cut up some more scraps of ABS sheet to make up a new counter reset button which seems to work pretty well, though!
The final addition was a couple of new knobs for the tone and volume sliders – these are cheap generic parts and they don't quite line up with the markings (the original sliders have off-centre indicators) but overall I think this turned out pretty well, and my main concern – being able to save a program to tape on one machine and then load it back from another – has been thoroughly tested now and I'm happy with the results. My next task is to transplant the circuit from its current breadboard layout to a neat project box!