Infrared
Download the latest version. Developed for MaxCoderz.
If you wish to deal with Sony infrared remote controls (via the SIRCS protocol), you might want to take a look at the SonyIR project.
Software
The first part of this document refers to the program 'Infrared', not the library in general. For information about the library, as well as building the hardware, read the second part of this page.
Installation
There are two TI-83+ binaries provided. One is for MirageOS (and compatible) shells, the other for Ion (and compatible) shells. Send either to your calculator.
The only difference is that the MirageOS one comes with a 15×15 icon.
In the Layouts directory can be found a few sample layout files. You don't need to send any of these to your calculator, as the program can be used to create and edit custom layouts anyway.
Consult the documentation for your TI-83+, linking program and shell for more detailed instructions.
Basic Use
The software makes extensive use of dialogs to present information with lots of text, so I hope you find this program easy to use!
Most dialogs can be dismissed by pressing 2nd, Enter or Clear (it doesn't matter which you press).
At the bottom edge of the screen are five actions that can be carried out by pressing the softkey (F1 to F5 - or Y= to Graph, if you prefer) underneath them.
To enter text, just type on the keypad. Press Del to erase a character, or Clear to erase the entire line. Press Alpha to cycle between input modes - a capital A for uppercase text, a lowercase a for lowercase text, a solid block for numeric input (what's printed on the key) and an upwards-pointing arrow for special characters (the yellow text printed above a key).
Layouts
The software allows you to set up multiple device profiles, or layouts - each corresponds to particular remote control protocol and key layout, and each is stored in its own program file.
If you start the software without any layout files installed you will be prompted to create a new one following the wizard.
First, enter the profile name. This is the name given to the program created on your calculator, so it must be unique and given a valid name. The name of the device that appears on the display can be edited at a later date, but for the moment it is the same as the program name.
Once given a name, the software needs to work out the protocol used by the remote control unit. To do this it needs to analyze a sample from the remote control.
It is important that you do not press a key on the remote control until after you have closed the information dialog and the Waiting… dialog has appeared.
The reason for this is that some remote controls do not transmit the signal repeatedly when a key is held - they send it once, then send smaller, simpler signals afterwards to indicate that the receiver should repeat the last command.
If there is an error or the software doesn't receive any input within a short amount of time, an error dialog is displayed and you will have to repeat the process.
If the software receives a signal it can understand, however, it will display a screen of information about the protocol.
Data Bits refers to the number of bits in the command word, excluding the start bit. The other values are all times. The unit is the one used internally - the length of a complete 40kHz cycle, which is 25µs.
For the three different bit timings, there are two values - an on time (during which the IR LED outputs a 40kHz signal) and an off time (during which the output is silent). In the above example, for example, a start bit is 9mS of 40kHz signal followed by 4.5mS of silence.
Bit 0 and Bit 1 might not correspond to the 'real' timings for 0 and 1 bits - they could be the wrong way around. There is no way to detect which is which, but it doesn't make any difference.
Home Screen
The screen you start up in provides access to the main functions of the software.
In the middle of the display is the name of the current device. At the bottom edge are the different functions.
- Device — Advance to the next layout file.
- New — Create a new layout file.
- Edit — Edit the active layout file.
- About — Display an about dialog.
- Quit — Exit the software.
Pressing any keys that have been associated with a command for the active layout file will transmit an IR signal.
A dialog will momentarily appear on the display whilst a key is held down.
Editor
The editor provides functions to edit the active layout file.
By default it is in Keys mode.
- Keys — Press a calculator key, then receive a new command from the remote control to change a key's association.
- Del. (Delete) — Remove a key association.
- Prtcl. (Protocol) — Try and decipher the protocol again (if you're having problems). If the newly received protocol data doesn't use the same number of data bits as the existing one, it is rejected. After using this you might have to reassociate keys.
- Name — Change the descriptive name that appears on the homescreen for the current layout file.
- Back — Return to the home screen.
The software can use a layout file that has been archived - however, you can't edit a file directly in the archive so it will be unarchived for you whilst you're editing it.
The dialog box should serve as a reminder to archive it yourself afterwards (I can't really handle Garbage Collect? messages cleanly from a program).
Troubleshooting
For problems relating to the general sending or receiving of data, see the section in the manual.

Most of the interaction with the software is via dialog boxes, which should tell you what's going on. Each has an icon on it.
| Icon | Meaning |
|---|---|
| The dialog reports some information. It can also serve as a prompt. | |
| The dialog contains a warning - something went wrong, but not seriously so. | |
| The dialog reports an error - something went wrong, and the software can't continue with a particular task. | |
| The software is trying to communicate with a device over infrared (either sending or receiving). Also appears on the about dialog. |
Library
The following documentation regards the Infrared library.
Background
Infrared signals are sent by transmitting timed bursts of infrared light modulated at a particular frequency.
This library generates a 38kHz carrier - this is the frequency used by the SIRCS protocol (Sony).
A remote control will transmit a burst of IR followed by silence for each bit. It is the length of the burst and the silence that is important.
For example, with SIRCS, to send a '0' the remote sends 0.6mS of 38kHz modulated IR followed by 0.6mS of silence; to send a '1' the remote sends 1.2mS of IR followed by 0.6mS of silence.
As well as this pattern for each bit, the signal will typically have a start bit - a long IR burst followed by silence (2.4mS then 0.6mS for SIRCS) - that is transmitted before anything else.
Different manufacturers use different command word lengths and different time bases. Providing a specialised library for each would be a very time consuming task!
Following my work on a SIRCS-only library, I've written this general purpose library.
Rather than focus on a particular protocol, it can (at the most basic level) record and play back ("stupidly") raw IR signals. That is, it can log the delays between the IR bursts and silences, and then play them back out.
This works very well, but results in huge logs! On top of this is provided a way to compress and decompress the logs to and from a simple stream of bits. You need to provide a protocol descriptor, which details timing information for a protocol, to be able to use this functions.
The descriptor follows the following format, and is usually 16 bytes long.
| Size | Description | Comments | Example |
|---|---|---|---|
| Byte | Flags | If the least significant bit set it indicates that the protocol uses a start bit. | .db %00000001 |
| Byte | Word Length | How many bits of data follow the start bit (if present). | .db 43 |
| Word | Signal Length | How long the complete signal is. | .dw 4320 |
| Word, Word | '0' Bit Timing | Timing for a '0' bit. | .dw 20, 20 |
| Word, Word | '1' Bit Timing | Timing for a '1' bit. | .dw 20, 60 |
| Word, Word | Start Bit Timing | Timing for the start bit. | .dw 360, 120 |
All times are in 38kHz cycles. To calculate the length, multiply the time (in mS) by 38; so 0.5mS becomes 19.
Bit timings are made up of two values; the first specifies how long the burst of modulated IR output should be, the second is the length of the delay until the next one.
The space saved by using such a descriptor is substantial - the above would only use 6 bytes per command on top of the 16 byte descriptor; uncompressed each command would take up 177 bytes - which is unacceptable!
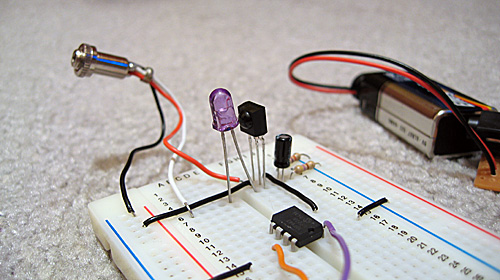
Hardware
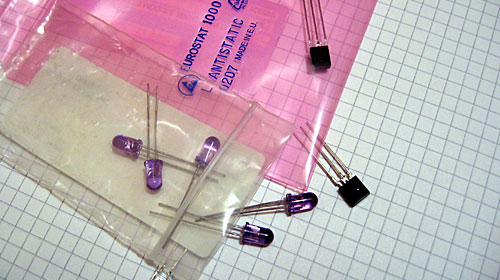
For the transmitter, you need the following parts:
| Part | Rating/Part Number |
|---|---|
| Infrared LED | SFH 484 or SFH 485 |
| Current-Limiting Resistor | 330Ω |
The receiver is more complex, and requires the following parts:
| Part | Rating/Part Number |
|---|---|
| Infrared Module | HRM538BB5100 (38kHz) |
| Smoothing Capacitor | 4.7µF |
| Current-Limiting Resistor | 330Ω |
| Pull-Up Resistor | 4.7KΩ |
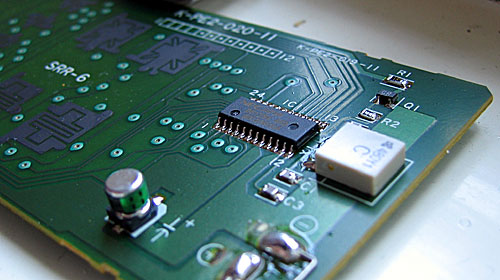
The circuit layout is as follows. It has been presented as a suggestion; check the datasheets for your parts and adjust the layout or ratings of components to suit.
If you have already constructed a PS/2 adapter for your calculator, you can plug the components into that instead (viewed from the PS/2 socket):
Tests
To test this library I rounded up all of the remote controls I could lay my hands on.
I have tested the library with the following devices (with which it works):
- Sony TV (SIRCS).
- Sony PlayStation 2 (SIRCS) (external infrared module).
- Matsui TV 28M2.
- Matsui VCR (different protocol to TV).
- Sanyo TV.
- Aiwa hi-fi XR-M25.
- Schneider hi-fi amplifier.
- Panasonic DVD camcorder.
- PICAXE-08M microcontroller (SIRCS).
The library doesn't work with the following devices:
- Digilogic DVD/VCR combination (not sure why yet).
- Daewoo TV GB14H1TS (irregular bit pattern not supported by the compressor).
- Cable TV box (doesn't use a ~38kHz carrier frequency).
Limitations
There are two notable limitations in this library (neither apply when you're using the raw recording and playback functions, however).
The first involves signals with an irregular pattern of bits. Here's an example from a Daewoo television:

As well as clearly defined start, 0 and 1 bit patterns, you can see there's an extra long gap roughly in the middle of the data stream.
The library can't cope with that sort of thing, and will end up rounding to the closest regular value, which when played back will probably not work.

Another problem is remotes that do not repeat the entire signal whilst the button is held down, and instead send a special repeat pattern.
The side-effect of this appears to be that buttons that should only be handled once (such as power buttons or channel up/down buttons) and handled multiple times, so the device skips up and down channels quickly or switches on then immediately off again.
Troubleshooting
The easiest way to work out why something isn't working is to look at the signals sent by the infrared remote control on an oscilloscope.
Such an expensive piece of kit is probably beyond the budgets of most people reading this, so a good alternative is the humble PC sound card.

Here I'm measuring the length of the start of a start bit. Try and use as high a sample rate as possible.
Using this method you can compare the results of the DecipherProtocol function with reality, and see that it's getting the timing right.
Ideally check the output of the calculator with the output of the IR remote rather than trying to use the absolute timing values reported.