Windows Console
The Windows console is a fairly simple way to display text — but with a bit of know-how, you can easily tap into it to produce ASCII-art graphics and use it to read keyboard or mouse input.
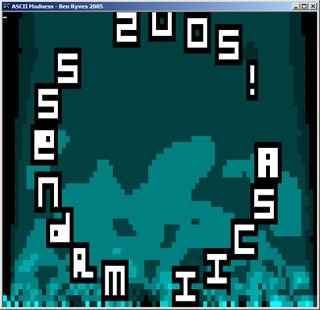
ASCII Madness used the Windows console to display the effects.
Creating our Window
If you create a standard Win32 console project and run it, it will flash up a console window then close automatically. You can set a breakpoint on the closing brace to stop the program from closing. Run it again, and you'll see that it's not a great window — just the default size. You'll likely also notice that there is a scrollbar on the right hand size. This is because the size of the text buffer for the console can be much larger than the actual size of the console window. We don't really want this — we want to create a window that is a fixed size that we decide on, and to have a buffer that is the same size.
For the purposes of this tutorial, I will use 80 columns and 50 rows of characters, as this is a fairly decent size.
When you create the window, we need to grab two handles from it. A handle is a variable that references part of the console (such as the input and output) and is used with the various function calls that deal with consoles to tell it which console to deal with. We need two handles — a handle to write to the console (sending text and other controlling information to it), which we'll call wHnd — and a handle to read from the console (handling keyboard and mouse events, for example), which we'll call rHnd. The type of wHnd and rHnd is HANDLE, which is defined in Windows.h. We can set up these two variables correctly using the function GetStdHandle(...) (from ),using the constants STD_OUTPUT_HANDLE and STD_INPUT_HANDLE to point it at the right handles for writing to and reading from. The code for this so far is quite simply:
#include <stdlib.h>
#include <Windows.h>
#include <Tchar.h>

HANDLE wHnd;    // Handle to write to the console.
HANDLE rHnd;    // Handle to read from the console.

int _tmain(int argc, _TCHAR* argv[]) {

    // Set up the handles for reading/writing:
    wHnd = GetStdHandle(STD_OUTPUT_HANDLE);
    rHnd = GetStdHandle(STD_INPUT_HANDLE);

}
It's still not very exciting, though, is it? However, now we have access to the console via its handles, we can control it!
One of the simplest things to change on our console window is the text in the title bar. We don't even have to pass a console handle to it! Simply add the line SetConsoleTitle(TEXT("My shiny new title bar!")); to your program after setting the handles.
However, our window is still the wrong size. Fortunately, the SetConsoleWindowInfo(...) function can come to our aid. It takes three arguments:
- The write handle to console window;
- A boolean flag to say whether we are setting an absolute size or a relative one based on the current size;
- A pointer to a SMALL_RECT that contains the new size information.
A SMALL_RECT is made up of four short integers which correspond to the left, top, right and bottom coordinates of a rectangle. As we're setting up our console window freshly, we'll want to use the absolute values. As we'll be using a 80x50 window, we want our coordinates to range from (0,0) to (79,49). When building the SMALL_RECT to pass to the function you can manually set the .Left, .Top, .Right and .Bottom coordinates manually, or can just use the {.Left, .Top, .Right, .Bottom} syntax as illustrated in the example below:
#include <stdlib.h>
#include <Windows.h>
#include <Tchar.h>

HANDLE wHnd;    // Handle to write to the console.
HANDLE rHnd;    // Handle to read from the console.

int _tmain(int argc, _TCHAR* argv[]) {

    // Set up the handles for reading/writing:
    wHnd = GetStdHandle(STD_OUTPUT_HANDLE);
    rHnd = GetStdHandle(STD_INPUT_HANDLE);

    // Change the window title:
    SetConsoleTitle(TEXT("Win32 Console Control Demo"));

    // Set up the required window size:
    SMALL_RECT windowSize = {0, 0, 79, 49};

    // Change the console window size:
    SetConsoleWindowInfo(wHnd, TRUE, &windowSize);

}
Well, that's all very well and good, but if you run it you'll notice one glaring problem — even though our console is the right size now (right click the title bar and click "Properties" to verify this) you'll notice that it's still got that scroll bar and is not 50 lines tall internally (by default it may be 300). We need to fix that!
There is another function to get with grips now — SetConsoleScreenBufferSize(...). This accepts two parameters, this time:
- The console write handle.
- A COORD which specifies the size of the buffer.
A COORD is made up of two short integers, X and Y. In this case, X is the width of the console buffer and Y is the height of the console buffer. As with the SMALL_RECT, we can set the values of the COORD using {X, Y} style notation. To set the buffer size for our console app, add the lines:
    // Create a COORD to hold the buffer size:
    COORD bufferSize = {80, 50};

    // Change the internal buffer size:
    SetConsoleScreenBufferSize(wHnd, bufferSize);
Run the program and — huzzah — it seems to have been set up properly and is the correct size!
Writing to the Console
We could use functions like printf(...) as usual, but they lack the control we need. We need to get slightly lower-level to have decent control of the console text.
Each character block on the console is represented by a structure called CHAR_INFO. This structure contains both the character we want to display and the colour we want to display it with. The colour information is held in the property Attributes and consists of a background and foreground colour (and a few other things we'll pass on, such as border options) and the character information can either be held as an ANSI character in the property Char.AsciiChar or as a Unicode "wide" character in the property Char.UnicodeChar.

Let's try and recreate the character above. We can use 'A' as a character literal to represent the letter; alternatively, we can use the ANSI code for it — here is a list of all of the ones available to us in the default code page (850) on an English edition of Windows:
All the values (to the left of each character) are in hexadecimal — so we could set the character 'A' with Char.AsciiChar = 0x41;
When creating colours, we have access to these predefined bits as constants:
- FOREGROUND_BLUE
- FOREGROUND_GREEN
- FOREGROUND_RED
- FOREGROUND_INTENSITY
When setting the background we swap FOREGROUND_ for BACKGROUND_. The foreground color here is clearly a nice bright red, so we'd use FOREGROUND_RED | FOREGROUND_INTENSITY. However, working out the background is a bit trickier — to make yellow, we need to mix red and green. The final Attribute would look like:
FOREGROUND_RED | FOREGROUND_INTENSITY |
BACKGROUND_RED | BACKGROUND_GREEN | BACKGROUND_INTENSITY
The function we need to use to output ANSI characters to the console is WriteConsoleOutputA(...). This fairly chunky function requires quite a bit of setting up, as we need to pass it:
- The write handle to the console window.
- A pointer to the CHAR_INFO buffer we want to display.
- The width and height of that buffer.
- The coordinate we want to start outputting to on the console.
- A pointer to a SMALL_RECT that dictates which area on the console we're writing to.
For Unicode characters you would use WriteConsoleOutputW(...).
In our case, we're only outputting one character, so our character buffer size coord will be {1,1}, the coordinate we're outputting to is going to be {0,0} and the SMALL_RECT that dictates the area we're writing to is simply {0,0,0,0}.
Implemented, the full code is:
#include <stdlib.h>
#include <stdio.h>
#include <Windows.h>
#include <Tchar.h>

HANDLE wHnd;    // Handle to write to the console.
HANDLE rHnd;    // Handle to read from the console.

int _tmain(int argc, _TCHAR* argv[]) {

    // Set up the handles for reading/writing:
    wHnd = GetStdHandle(STD_OUTPUT_HANDLE);
    rHnd = GetStdHandle(STD_INPUT_HANDLE);

    // Change the window title:
    SetConsoleTitle(TEXT("Win32 Console Control Demo"));

    // Set up the required window size:
    SMALL_RECT windowSize = {0, 0, 79, 49};

    // Change the console window size:
    SetConsoleWindowInfo(wHnd, TRUE, &windowSize);

    // Create a COORD to hold the buffer size:
    COORD bufferSize = {80, 50};

    // Change the internal buffer size:
    SetConsoleScreenBufferSize(wHnd, bufferSize);

    // Set up the character:
    CHAR_INFO letterA;
    letterA.Char.AsciiChar = 'A';

    letterA.Attributes =
        FOREGROUND_RED | FOREGROUND_INTENSITY |
        BACKGROUND_RED | BACKGROUND_GREEN | BACKGROUND_INTENSITY;

    // Set up the positions:
    COORD charBufSize = {1,1};
    COORD characterPos = {0,0};
    SMALL_RECT writeArea = {0,0,0,0};

    // Write the character:
    WriteConsoleOutputA(wHnd, &letterA, charBufSize, characterPos, &writeArea);

    // Move the cursor down a row so we can see the character:
    printf("\n");

}
Note the the addition of an extra #include directive for stdio.h, which is required for the printf(...) function.
When run, you should end up with something like the above screenshot. Seems like overkill just for the one character, no? Well, it's really easy to change that.
If you're used to graphics programming, you'll know that it's usually best to perform all the drawing on an off-screen buffer, then copy that over to the display in one go — this eliminates the flicker as the image is built up. We can easily use this double-buffering system to write a full screen of text and colour information to the console in one go.
Naturally, we'll have to change the data we copy to the display from a singe CHAR_INFO to an array of CHAR_INFOs. As we're using 80x50, it needs to be of size 80*50=4000 elements. We'll have to change the charBufSize to be 80x50 as well, and also change the writeArea to fill the entire display. In short, what we now have is this:
     // Set up the character buffer:
    CHAR_INFO consoleBuffer[80 * 50];

    // We'll fill the console buffer with random data:
    for (int y = 0; y < 50; ++y) {
        for (int x = 0; x < 80; ++x) {

            // An ANSI character is in the range 0-255,
            // so use % to keep it in this range.
            consoleBuffer[x + 80 * y].Char.AsciiChar = rand() % 256;

            // The colour is also in the range 0-255,
            // as it is a pair of 4-bit colours.
            consoleBuffer[x + 80 * y].Attributes = rand() % 256;
        }
    }

    // Set up the positions:
    COORD charBufSize = {80,50};
    COORD characterPos = {0,0};
    SMALL_RECT writeArea = {0,0,79,49};

    // Write the characters:
    WriteConsoleOutputA(wHnd, consoleBuffer, charBufSize, characterPos, &writeArea);
Hopefully you can see where the new code comes from. We have to use a linear array instead of a two-dimensional one for the buffer, which is why we use the formula
array_index = x + array_width * y
to change the (x,y) coordinates we're writing to into the index for the one-dimensional array.
Now, while this in itself is useful, it would be a good plan to see how we can get input from the user so we can put this knowledge to good use!
Handling Events
We've done a lot of work with the wHnd we found for writing to the console — how can we read from it, using our rHnd handle? The answer is that it is in fact very easy! We need to use two function calls, GetNumberOfConsoleInputEvents(...) to find out how many console input events have happened — and then ReadConsoleInput(...) to read them into a buffer so we can finally cycle through each event and decide what to do with it.
GetNumberOfConsoleInputEvents(...) requires two arguments — a HANDLE to the console input handle, and a pointer to a DWORD that will store the number of events that really happened. Once we have done that, and if the number of events that happened was not zero, we create an array of INPUT_RECORDs big enough to hold all the events, then use ReadConsoleInput(...) to copy the events into the buffer. ReadConsoleInput(...) takes four arguments:
- Read handle for the console window;
- Pointer to the buffer to store the INPUT_RECORD data for each event to. An INPUT_RECORD is made up of two properties — .EventType, which holds the type of event (was it a key press? Did the mouse move?) and .Event, which holds the specific information for that particular event (was the key pressed or released, and which key was it? Where did the mouse move to?)
- How many events we need to read.
- Pointer to a DWORD to save how many events were actually read.
Here is some code that illustrates the ideas above in motion. Note that for this sort of thing, an IDE capabale of intellisense (I am using Visual Studio) is very useful for working out what all the event types are...
#include <stdlib.h>
#include <stdio.h>
#include <Windows.h>
#include <Tchar.h>

HANDLE wHnd;    // Handle to write to the console.
HANDLE rHnd;    // Handle to read from the console.

int _tmain(int argc, _TCHAR* argv[]) {

    // ... code removed ...

    // Write the characters:
    WriteConsoleOutputA(wHnd, consoleBuffer, charBufSize, characterPos, &writeArea);

    // How many events have happened?
    DWORD numEvents = 0;

    // How many events have we read from the console?
    DWORD numEventsRead = 0;

    // Boolean flag to state whether app is running or not.
    bool appIsRunning = true;

    // If we set appIsRunning to false, the program will end!
    while (appIsRunning) {

        // Find out how many console events have happened:
        GetNumberOfConsoleInputEvents(rHnd, &numEvents);

        // If it's not zero (something happened...)
        if (numEvents != 0) {

            // Create a buffer of that size to store the events
            INPUT_RECORD *eventBuffer = new INPUT_RECORD[numEvents];

            // Read the console events into that buffer, and save how
            // many events have been read into numEventsRead.
            ReadConsoleInput(rHnd, eventBuffer, numEvents, &numEventsRead);

            // Now, cycle through all the events that have happened:
            for (DWORD i = 0; i < numEventsRead; ++i) {

                // Check the event type: was it a key?
                if (eventBuffer[i].EventType == KEY_EVENT) {

                    // Yes! Was the key code the escape key?
                    if (eventBuffer[i].Event.KeyEvent.wVirtualKeyCode==VK_ESCAPE) {

                        // Yes, it was, so set the appIsRunning to false.
                        appIsRunning = false;
                    }
                }
            }

            // Clean up our event buffer:
            delete[] eventBuffer;
        }
    }
}
All this does is find out how many events happened, allocates a buffer for them, reads them into it, then cycles through all the ones that was read, checking for a keypress, then checking for the escape key. Once it has done this, it deletes the event buffer and loops, providing appIsRunning is still true.
The available .EventTypes are:
- KEY_EVENT — keyboard event;
- MOUSE_EVENT — mouse event;
- WINDOW_BUFFER_SIZE_EVENT — an event dealing with a resize of the window;
- MENU_EVENT and FOCUS_EVENT — internal events which should be ignored.
The two event types we'll be concentrating on are KEY_EVENT and MOUSE_EVENT. The following information is lifted almost directly from MSDN.
Keyboard Events
The .Event structure contains the following members:
- bKeyDown- If the key is pressed, this member is TRUE. Otherwise, this member is FALSE (the key is released).
- wRepeatCount — Count indicating that a key is being held down. For example, when a key is held down, you might get five events with this member equal to 1, one event with this member equal to 5, or multiple events with this member greater than or equal to 1.
- wVirtualKeyCode — Virtual-key code that identifies the given key in a device-independent manner.
- wVirtualScanCode — Virtual scan code of the given key that represents the device-dependent value generated by the keyboard hardware.
- uChar — Translated Unicode or ANSI character, depending on whether the wide-character (Unicode) or ANSI version of the ReadConsoleInput function was used (this depends on project/compiler settings).
- dwControlKeyState — State of the control keys. This member can
be one or more of the following values:
- CAPSLOCK_ON — The CAPS LOCK light is on.
- ENHANCED_KEY — The key is enhanced.
- LEFT_ALT_PRESSED — The left ALT key is pressed.
- LEFT_CTRL_PRESSED — The left CTRL key is pressed.
- NUMLOCK_ON — The NUM LOCK light is on.
- RIGHT_ALT_PRESSED — The right ALT key is pressed.
- RIGHT_CTRL_PRESSED — The right CTRL key is pressed.
- SCROLLLOCK_ON — The SCROLL LOCK light is on.
- SHIFT_PRESSED — The SHIFT key is pressed.
Mouse Events
The .Event structure contains the following members:
- dwMousePosition — A COORD structure that contains the location of the cursor, in terms of the console screen buffer's character-cell coordinates.
- dwButtonState — Status of the mouse buttons. The least significant
bit corresponds to the leftmost mouse button. The next least significant bit
corresponds to the rightmost mouse button. The next bit indicates the next-to-leftmost
mouse button. The bits then correspond left to right to the mouse buttons.
A bit is 1 if the button was pressed. The following constants are defined
for the first five mouse buttons:
- FROM_LEFT_1ST_BUTTON_PRESSED
- RIGHTMOST_BUTTON_PRESSED
- FROM_LEFT_2ND_BUTTON_PRESSED
- FROM_LEFT_3RD_BUTTON_PRESSED
- FROM_LEFT_4TH_BUTTON_PRESSED
- dwControlKeyState — State of the control keys. This member can
be one or more of the following values.
- RIGHT_ALT_PRESSED — The right ALT key is pressed.
- LEFT_ALT_PRESSED — The left ALT key is pressed.
- RIGHT_CTRL_PRESSED — The right CTRL key is pressed.
- LEFT_CTRL_PRESSED — The left CTRL key is pressed.
- CAPSLOCK_ON — The CAPS LOCK light is on.
- ENHANCED_KEY — The key is enhanced.
- NUMLOCK_ON — The NUM LOCK light is on.
- SCROLLLOCK_ON — The SCROLL LOCK light is on.
- SHIFT_PRESSED — The SHIFT key is pressed.
- dwEventFlags — Type of mouse event. If this value is zero, it indicates
a mouse button being pressed or released. Otherwise, this member is one of
the following values.
- DOUBLE_CLICK — The second click (button press) of a double-click occurred. The first click is returned as a regular button-press event.
- MOUSE_MOVED — A change in mouse position occurred.
- MOUSE_WHEELED — The mouse wheel was rolled.
Using the Keyboard, Mouse and Buffer
Here's an idea — let's see if we can create a simple painting program. We'll need to handle keyboard and mouse input, and will write to a buffer rather than directly to the console.
Firstly, we need to clear our drawing canvas. Where currently you fill the 80×50 CHAR_INFO buffer with random data, fill it instead with white-background spaces.
    // Clear the CHAR_INFO buffer:
    for (int i=0; i < 80 * 50; ++i) {

        // Fill it with white-backgrounded spaces
        consoleBuffer[i].Char.AsciiChar = ' ';
        consoleBuffer[i].Attributes =
            BACKGROUND_BLUE |
            BACKGROUND_GREEN |
            BACKGROUND_RED |
            BACKGROUND_INTENSITY;
    }
Well, that's easy enough. How can we draw to it? We need to handle mouse events. What we'll do is check to see if the left mouse button is held down, and if so we'll set the Char.AsciiChar of the corresponding CHAR_INFO in our consoleBuffer to something fitting — I rather like the solid block 0xDB. You might rather use the smiley faces!
To check for mouse buttons, you should use bitwise logic on the returned button status to mask out the button you are checking for. In our case, the following code is pretty good:
    if (eventBuffer[i].EventType == KEY_EVENT) {
        // Existing code to handle pressing Escape....
    } else if (eventBuffer[i].EventType == MOUSE_EVENT) {
        // Set the index to our buffer of CHAR_INFO
        int offsetPos =
            eventBuffer[i].Event.MouseEvent.dwMousePosition.X +
            80 * eventBuffer[i].Event.MouseEvent.dwMousePosition.Y;

        // Is it a left click?
        if (eventBuffer[i].Event.MouseEvent.dwButtonState & FROM_LEFT_1ST_BUTTON_PRESSED) {

            // Yep, so set with character 0xDB.
            consoleBuffer[offsetPos].Char.AsciiChar = 0xDB;

            // Redraw our buffer:
            WriteConsoleOutputA(wHnd, consoleBuffer, charBufSize, characterPos, &writeArea);
        }
    }
In fact, I'm also going to make it write character 0xB1 if I right-click, so I can have a dithered effect, and middle-clicking will erase (set back to space). Pressing the letter 'c' on the keyboard will clear the "image" back to white. Here is the full source code for the console-based painting program:
#include <stdlib.h>
#include <stdio.h>
#include <Windows.h>
#include <Tchar.h>

HANDLE wHnd;    // Handle to write to the console.
HANDLE rHnd;    // Handle to read from the console.

int _tmain(int argc, _TCHAR* argv[]) {

    // Set up the handles for reading/writing:
    wHnd = GetStdHandle(STD_OUTPUT_HANDLE);
    rHnd = GetStdHandle(STD_INPUT_HANDLE);

    // Change the window title:
    SetConsoleTitle(TEXT("Win32 Console Control Demo"));

    // Set up the required window size:
    SMALL_RECT windowSize = {0, 0, 79, 49};

    // Change the console window size:
    SetConsoleWindowInfo(wHnd, TRUE, &windowSize);

    // Create a COORD to hold the buffer size:
    COORD bufferSize = {80, 50};

    // Change the internal buffer size:
    SetConsoleScreenBufferSize(wHnd, bufferSize);

    // Set up the character buffer:
    CHAR_INFO consoleBuffer[80 * 50];

    // Clear the CHAR_INFO buffer:
    for (int i=0; i < 80 * 50; ++i) {

        // Fill it with white-backgrounded spaces
        consoleBuffer[i].Char.AsciiChar = ' ';
        consoleBuffer[i].Attributes =
            BACKGROUND_BLUE |
            BACKGROUND_GREEN |
            BACKGROUND_RED |
            BACKGROUND_INTENSITY;
    }

    // Set up the positions:
    COORD charBufSize = {80,50};
    COORD characterPos = {0,0};
    SMALL_RECT writeArea = {0,0,79,49};

    // Copy to display:
    WriteConsoleOutputA(wHnd, consoleBuffer, charBufSize, characterPos, &writeArea);

    // How many events have happened?
    DWORD numEvents = 0;

    // How many events have we read from the console?
    DWORD numEventsRead = 0;

    // Boolean flag to state whether app is running or not.
    bool appIsRunning = true;

    // If we set appIsRunning to false, the program will end!
    while (appIsRunning) {

        // Find out how many console events have happened:
        GetNumberOfConsoleInputEvents(rHnd, &numEvents);

        // If it's not zero (something happened...)
        if (numEvents != 0) {

            // Create a buffer of that size to store the events
            INPUT_RECORD *eventBuffer = new INPUT_RECORD[numEvents];

            // Read the console events into that buffer, and save how
            // many events have been read into numEventsRead.
            ReadConsoleInput(rHnd, eventBuffer, numEvents, &numEventsRead);

            // Now, cycle through all the events that have happened:
            for (DWORD i = 0; i < numEventsRead; ++i) {

                // Check the event type: was it a key?
                if (eventBuffer[i].EventType == KEY_EVENT) {

                    // Yes! Was the key code the escape key?
                    if (eventBuffer[i].Event.KeyEvent.wVirtualKeyCode==VK_ESCAPE) {

                        // Yes, it was, so set the appIsRunning to false.
                        appIsRunning = false;

                    // Was if the 'c' key?
                    } else if (eventBuffer[i].Event.KeyEvent.uChar.AsciiChar=='c') {

                        // Yes, so clear the buffer to spaces:
                        for (int i = 0; i < 80 * 50; ++i) {
                            consoleBuffer[i].Char.AsciiChar = ' ';
                        }

                        // Redraw our buffer:
                        WriteConsoleOutputA(wHnd, consoleBuffer, charBufSize, characterPos, &writeArea);

                    }

                } else if (eventBuffer[i].EventType == MOUSE_EVENT) {

                    // Set the index to our buffer of CHAR_INFO
                    int offsetPos =
                        eventBuffer[i].Event.MouseEvent.dwMousePosition.X
                        + 80 * eventBuffer[i].Event.MouseEvent.dwMousePosition.Y;

                    // Is it a left click?
                    if (eventBuffer[i].Event.MouseEvent.dwButtonState & FROM_LEFT_1ST_BUTTON_PRESSED) {

                        // Yep, so set with character 0xDB (solid block)
                        consoleBuffer[offsetPos].Char.AsciiChar = (char)0xDB;

                        // Redraw our buffer:
                        WriteConsoleOutputA(wHnd, consoleBuffer, charBufSize, characterPos, &writeArea);

                    // Is it a right click?
                    } else if (eventBuffer[i].Event.MouseEvent.dwButtonState & RIGHTMOST_BUTTON_PRESSED) {

                        // Yep, so set with character 0xB1 (50% block)
                        consoleBuffer[offsetPos].Char.AsciiChar = (char)0xB1;

                        // Redraw our buffer:
                        WriteConsoleOutputA(wHnd, consoleBuffer, charBufSize, characterPos, &writeArea);

                    // Is it a middle click?
                    } else if (eventBuffer[i].Event.MouseEvent.dwButtonState & FROM_LEFT_2ND_BUTTON_PRESSED) {

                        // Yep, so set with character space.
                        consoleBuffer[offsetPos].Char.AsciiChar = ' ';

                        // Redraw our buffer:
                        WriteConsoleOutputA(wHnd, consoleBuffer, charBufSize, characterPos, &writeArea);
                    }
                }
            }

            // Clean up our event buffer:
            delete[] eventBuffer;
        }
    }

}
When run, you should be able to sketch away...

Bah, who needs Photoshop when you can create stunning self-portraits like the one above?
Finishing Up
I have covered how to create, write to and read from a Windows console window. It's now up to you to do something with this knowledge - it is beyond the scope of this text to show you how to perform 2D graphics operations such as line drawing or polygon filling within the console. Setting "pixels" on the console (well, setting the characters and the backgrounds) is an easy enough task via our buffer of CHAR_INFOs, and there are many other articles and resources out there on how to perform more advanced 2D operations.