Brass 3.0.0.0 Beta 1
Monday, 5th November 2007
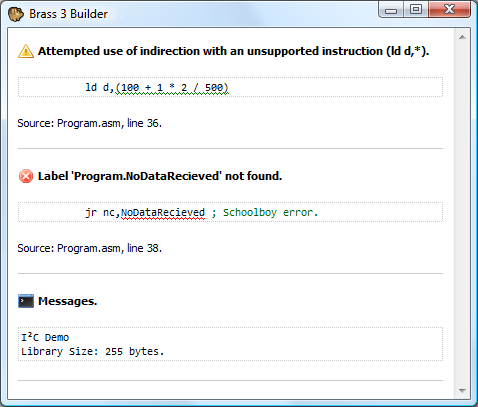
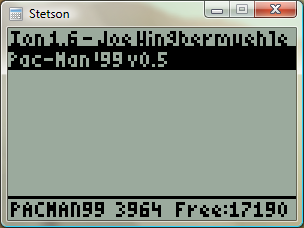
I've released a beta version of the new assembler. It comes with the compiler, a GUI builder (see the above screenshot) and the help viewer; it also comes bundled with a number of plugins.
I've also knocked together a quick demo project that can be built directly from Explorer once Brass is installed.

There are a number of missing features (such as a project editor, project templates and multiple build configurations) and no doubt broken, incomplete or untested components - but at least it's out in the wild now, which gives me an incentive to fix it!
Emulating TI-OS 1.15 and a greyscale LCD
Monday, 29th October 2007
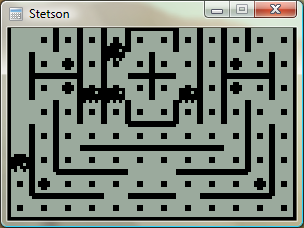
OS 1.15 appears to boot, and if I run an OS in Pindur TI, archive the files (copy them to Flash ROM) then use that ROM dump in my emulator the files are still there, where they can be copied to RAM.
Trying to re-archive them results in a fairly un-helpful message, as I haven't implemented any Flash ROM emulation (nor can I find any information on it)...
Applications (which are only ever stored and executed on Flash ROM) work well, though.
I've also updated the LCD emulation a little to simulate the LCD delay; greyscale programs (that flicker pixels on and off) work pretty well now.


Brass 3 and TI-83+ Emulation
Friday, 26th October 2007
Brass 3 development continues; the latest documentation (automatically generated from plugins marked with attributes via reflection) is here. The compiler is becoming increasibly powerful - and labels can now directly store string values, resulting in things like an eval() function for powerful macros (see also clearpage for an example where a single function is passed two strings of assembly source and it uses the smallest one when compiled).
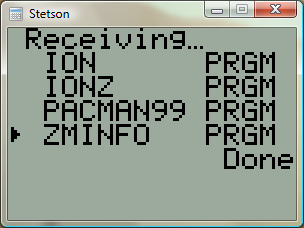
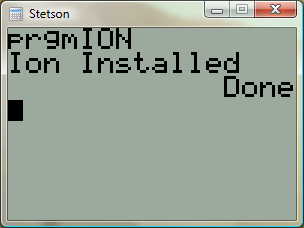
Thanks to a series of hints posted by CoBB and Jim e I rewrote my TI-83+ emulator (using the SMS emulator's Z80 library) and it now boots and runs pretty well. The Flash ROM archive isn't implemented, so I'm stuck with OS 1.12 for the moment (later versions I've dumped lock up at "Defragmenting..."). I also haven't implemented software linking, and so to transfer files I need to plug in my real calculator to the parallel port and send files manually.
Brass 3
Tuesday, 2nd October 2007
Quake isn't dead, but I've shifted my concentration to trying to get Brass 3 (the assembler project) out.
Brass 2 didn't really work, but I've taken a lot of its ideas - namely the plugin system - and kept some of the simplicity from Brass 1. The result works, and is easy to extend and maintain. Last night I got it to compile all of the programs I used for testing Brass 1 against TASM successfully.
I'm taking advantage of .NET's excellent reflection capabilities; one such example is marking plugin functions with attributes for documentation purposes, meaning that all you need to get Brass documentation is to drop your plugin collection assemblies (DLLs) into the Brass directory then open the help viewer app.
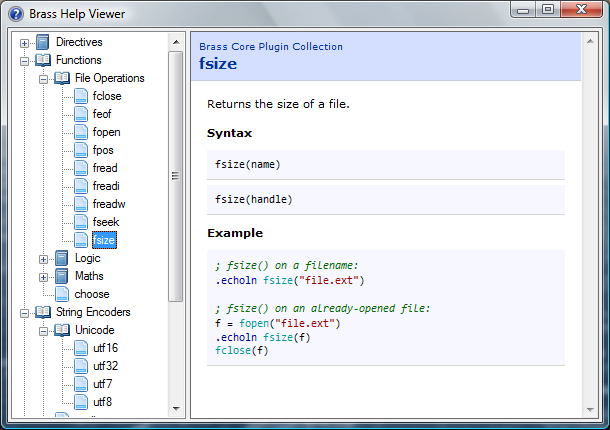
The source code examples are embedded as text, but compiled by the viewer (and thus syntax-highlighted) so you can click on directives or functions and it'll jump to their definitions automatically.
Native function support and a much-improved parser means that complex control structures can be built up, like:
file = fopen("somefile.txt")

#while !feof(file)
    .db fread(file)
#loop

fclose(file)
The compiler invokes the plugins, and the plugins talk back to the compiler ("remember your current position", "OK, we need to loop, so go back to this position", "this loop fails, so switch yourself off until you hit the #loop directive again").
The compiler natively works with project files (rather than some horrible command-line syntax) which specify which plugins to load, which include directories to search and so on and so forth. There are a number of different plugin classes:
- IAssembler - CPU-specific assembler.
- IDirective - assembler directive.
- IFunction - functions like abs() or fopen().
- IOutputWriter - writes the object file to disk (eg raw, intel hex, TI-83+ .8xp).
- IOutputModifier - modifies each output byte (eg "unsquishing" bytes to two ASCII charcters for the TI-83).
- IStringEncoder - handles the conversion of strings to byte[] arrays (ascii, utf8, arcane mappings for strange OS).
Unlike Brass 2, though, I actually have working output from this, so hopefully it'll get released!
As a bonus, to compare outputs between this and TASM (to check it was assembling properly) I hacked together a binary diff tool from the algorithm on Wikipedia (with the recursion removed) - it's not great, but it's been useful to me. 
using System;
using System.Collections.Generic;
using System.Text;
using System.IO;

namespace Differ {
	class Program {
		static void Main(string[] args) {

			// Prompt syntax:
			if (args.Length != 2) {
				Console.WriteLine("Usage: Differ <file1> <file2>");
				return;
			}

			// Load both files into byte arrays (sloppy, but whatever).
			byte[][] Data = new byte[2][];

			for (int i = 0; i < Data.Length; ++i) {
				try {
					byte[] Source = File.ReadAllBytes(args[i]);
					Data[i] = new byte[Source.Length + 1];
					Array.Copy(Source, 0, Data[i], 1, Source.Length);
				} catch (Exception ex) {
					Console.WriteLine("File load error: " + args[i] + " (" + ex.Message + ")");
					return;
				}
			}

			// Quick-and-dirty equality test:
			if (Data[0].Length == Data[1].Length) {
				bool IsIdentical = true;
				for (int i = 0; i < Data[0].Length; ++i) {
					if (Data[0][i] != Data[1][i]) {
						IsIdentical = false;
						break;
					}
				}
				if (IsIdentical) {
					Console.WriteLine("Files are identical.");
					return;
				}
			}

			if (Data[0].Length != Data[1].Length) {
				Console.WriteLine("Files are different sizes.");
			}

			// Analysis:
			int[,] C = new int[Data[0].Length, Data[1].Length];
			for (int i = 1; i < Data[0].Length; ++i) {
				if ((i - 1) % 1000 == 0) Console.Write("\rAnalysing: {0:P}...", (float)i / (float)Data[0].Length);
				for (int j = 1; j < Data[1].Length; ++j) {
					if (Data[0][i] == Data[1][j]) {
						C[i, j] = C[i - 1, j - 1] + 1;
					} else {
						C[i, j] = Math.Max(C[i, j - 1], C[i - 1, j]);
					}
				}
			}
			Console.WriteLine("\rResults:".PadRight(Console.BufferWidth - 1));

			List<DiffData> CollectedDiffData = new List<DiffData>(Math.Max(Data[0].Length, Data[1].Length));

			for (int i = Data[0].Length - 1, j = Data[1].Length - 1; ; ) {
				if (i > 0 && j > 0 && Data[0][i] == Data[1][j]) {
					CollectedDiffData.Add(new DiffData(DiffData.DiffType.NoChange, Data[0][i], i, j));
					--i; --j;
				} else {
					if (j > 0 && (i == 0 || C[i, j - 1] >= C[i - 1, j])) {
						CollectedDiffData.Add(new DiffData(DiffData.DiffType.Addition, Data[1][j], i, j));
						--j;
					} else if (i > 0 && (j == 0 || C[i, j - 1] < C[i - 1, j])) {
						CollectedDiffData.Add(new DiffData(DiffData.DiffType.Removal, Data[0][i], i, j));
						--i;
					} else {
						CollectedDiffData.Reverse();
						break; // Done!
					}
				}
			}


			DiffData.DiffType LastType = (DiffData.DiffType)(-1);

			int PrintedData = 0;
			foreach (DiffData D in CollectedDiffData) {
				if (LastType != D.Type) {
					Console.WriteLine();
					Console.Write("{0:X4}:{1:X4}", D.AddressA - 1, D.AddressB - 1);
					LastType = D.Type;
					PrintedData = 0;
				} else if (PrintedData >= 16) {
					Console.WriteLine();
					Console.Write("         ");
					PrintedData = 0;
				}
				ConsoleColor OldColour = Console.ForegroundColor;

				switch (D.Type) {
					case DiffData.DiffType.NoChange:
						Console.ForegroundColor = ConsoleColor.White;
						break;
					case DiffData.DiffType.Addition:
						Console.ForegroundColor = ConsoleColor.Green;
						break;
					case DiffData.DiffType.Removal:
						Console.ForegroundColor = ConsoleColor.Red;
						break;
				}
				Console.Write(" " + D.Data.ToString("X2"));
				++PrintedData;
				Console.ForegroundColor = OldColour;
			}
			Console.WriteLine();

		}

		private struct DiffData {

			public enum DiffType {
				NoChange,
				Addition,
				Removal,
			}

			public DiffType Type;

			public byte Data;

			public int AddressA;
			public int AddressB;

			public DiffData(DiffType type, byte data, int addressA, int addressB) {
				this.Type = type;
				this.Data = data;
				this.AddressA = addressA;
				this.AddressB = addressB;
			}


		}
	}
}
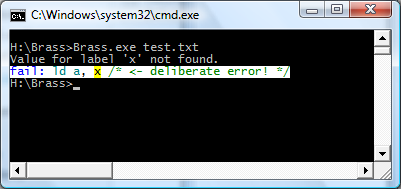
Removals are shown in red, additions are shown in green, data that's the same is in white.
Dynamic Lighting
Tuesday, 18th September 2007
Quake has a few dynamic lights - some projectiles, explosions and the fireballs light up their surroundings.
Fortunately, the method used is very simple: take the brightness of the projectile, divide it by the distance between the point on the wall and the light and add it to the light level for that point. This is made evident by pausing the early versions of Quake; when paused the areas around dynamic lights get brighter and brighter as the surface cache gets overwritten multiple times.
The next problem is that a light on the far side of a thin wall will light up both sides! Happily, this bug wasn't fixed in Quake, and is very evident in the start level where you can see the light spots from the fireballs in the Hard hall on the walls of the Medium hall.
I'd noticed that fireball-spawning entites would occasionally spawn a still fireball then remove it some seconds later. Looking over the Quake source code, it would appear that in each update the game iterates over all entities, checks their movetype property, then applies physics as applicable. Fireballs don't seem to have any real physics to speak of (they can pass through walls) beyond adding gravity each update to their velocity.
This required some further changes to get the VM working, including console variable support (gravity is defined in the sv_gravity console variable - this allows for the special low-gravity Ziggurat Vertigo).

For some reason the pickups seem to have their movetype set to TOSS resulting in all of the pickups flying away when the level started (not to mention abysmal performance). I added a hack to the droptofloor() QuakeC function that sets their on-floor flag (and hence disables their physics), but I'm not sure what the best course of action is going to be. I'm having to dig deeper and deeper into Quake's source, now...