SmartBox experimentation with DOS, RISC OS and C#/WinForms
Monday, 6th November 2023
My latest eBay purchase was influenced by a desire for some practical test/prototype equipment, a bit of nostalgia and a desire to learn something new.
A lot of my projects involve some sort of microcontroller running some software that will take inputs, perform decisions on them, and produce outputs. Getting to that stage tends to involve quite a lot of "boilerplate" hardware and software setup, and I'd quite like something that I can just plug in and get cracking with and write some quick test code instead of having to assemble a circuit on a breadboard or faff around with a clumsy IDE.
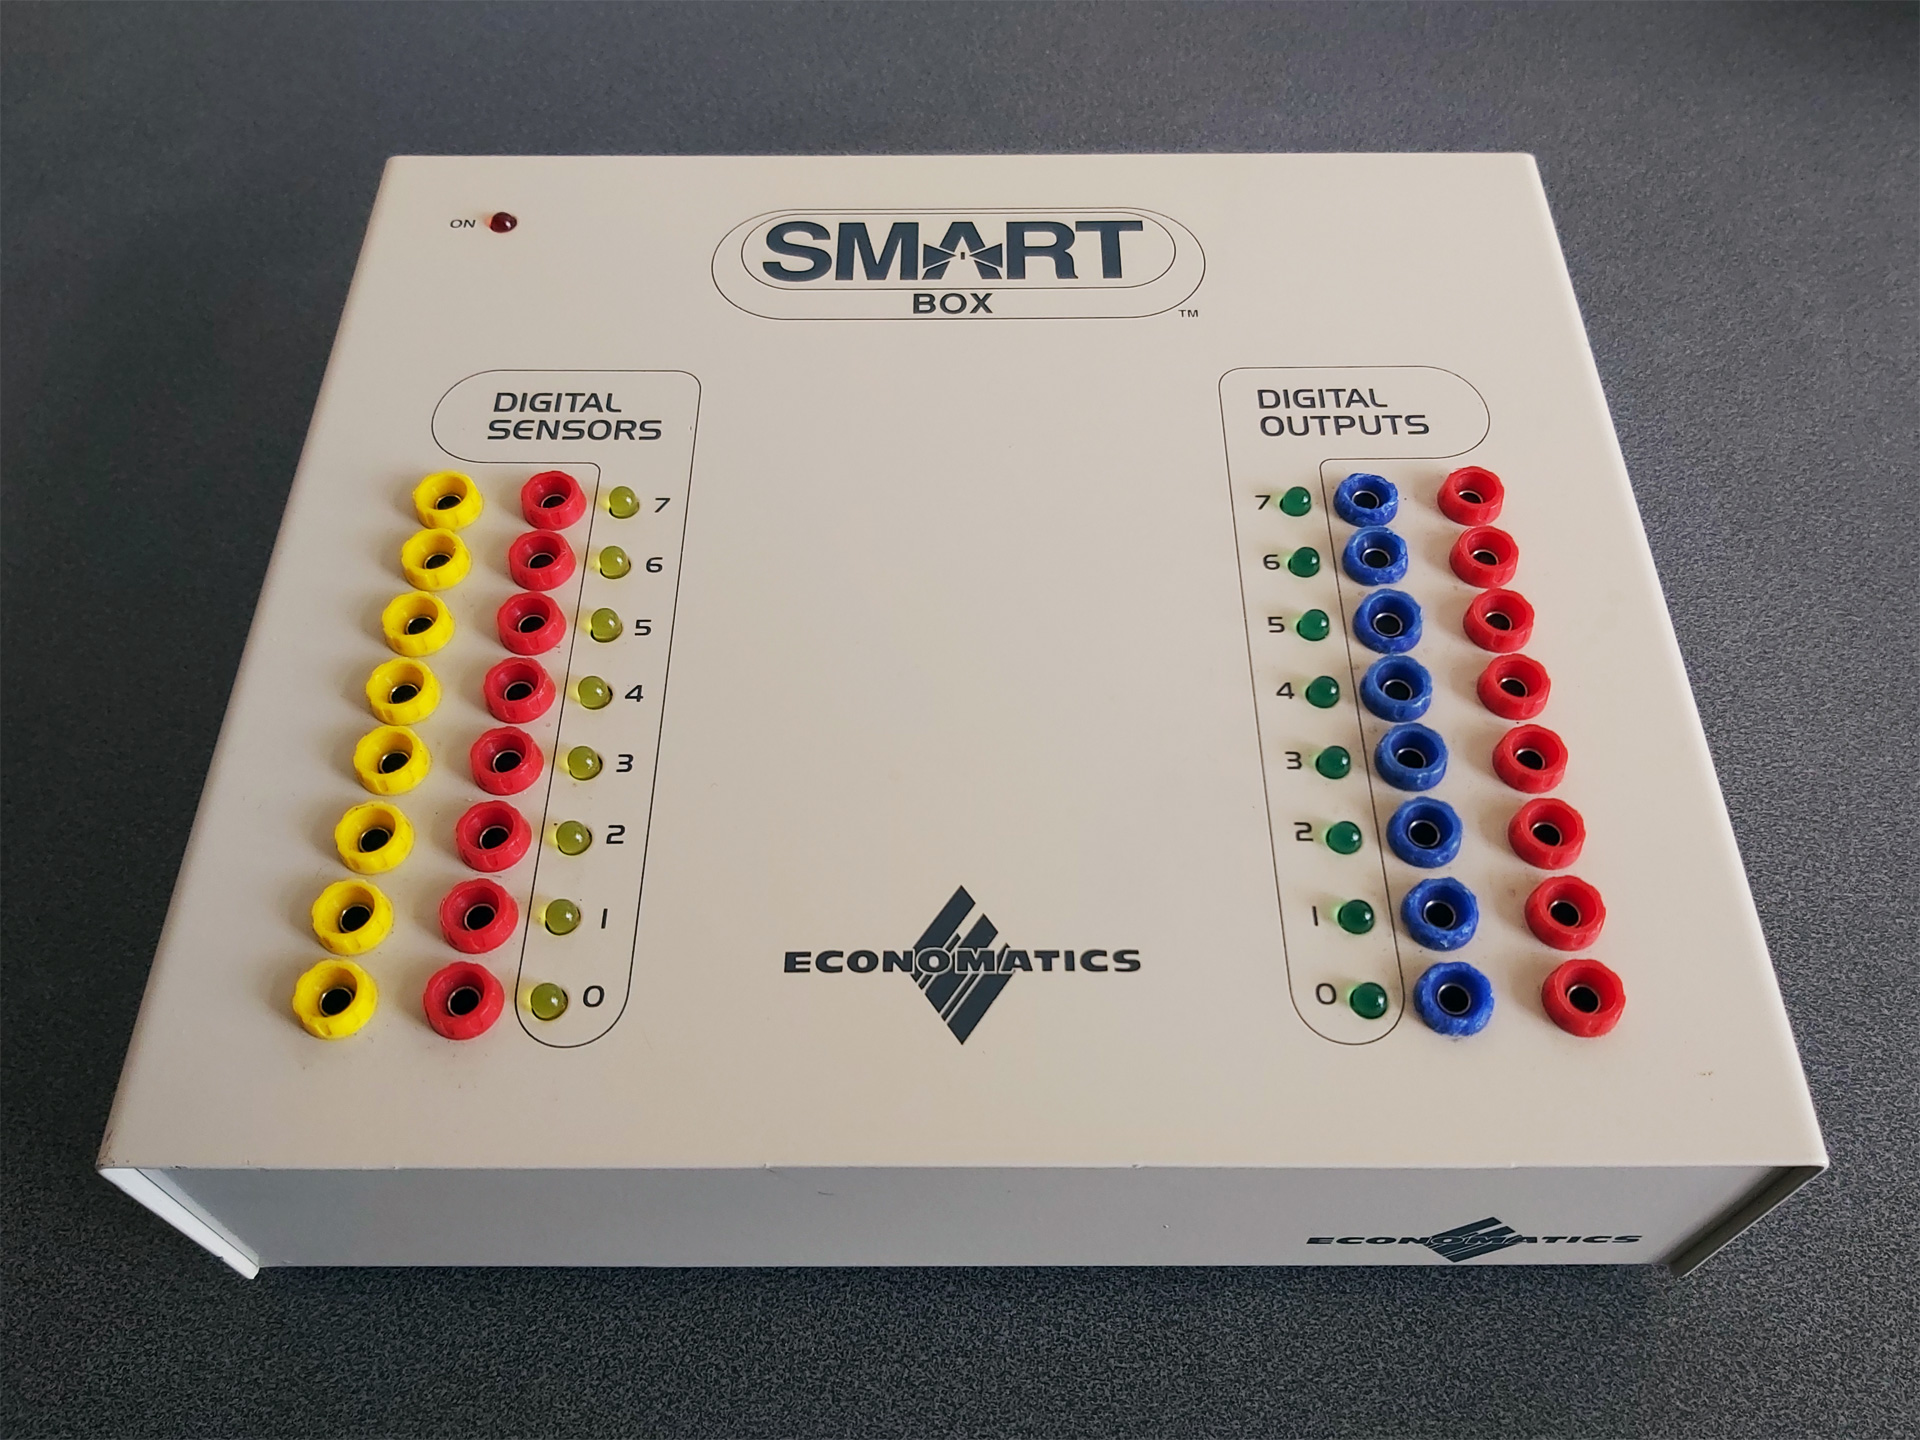
When I was at school in the 1990s one of the devices that got me into microcontrollers in the first place was a computer control system based around the Economatics SmartBox. This plugs into a computer via a serial connection, has eight simple digital inputs, eight simple digital outputs, four analogue inputs and four motor drivers. Programs could be written in a BASIC-like language or in flowchart form, and once you'd run and tested them on the SmartBox you could program them to a PIC microcontroller to run without the host computer.
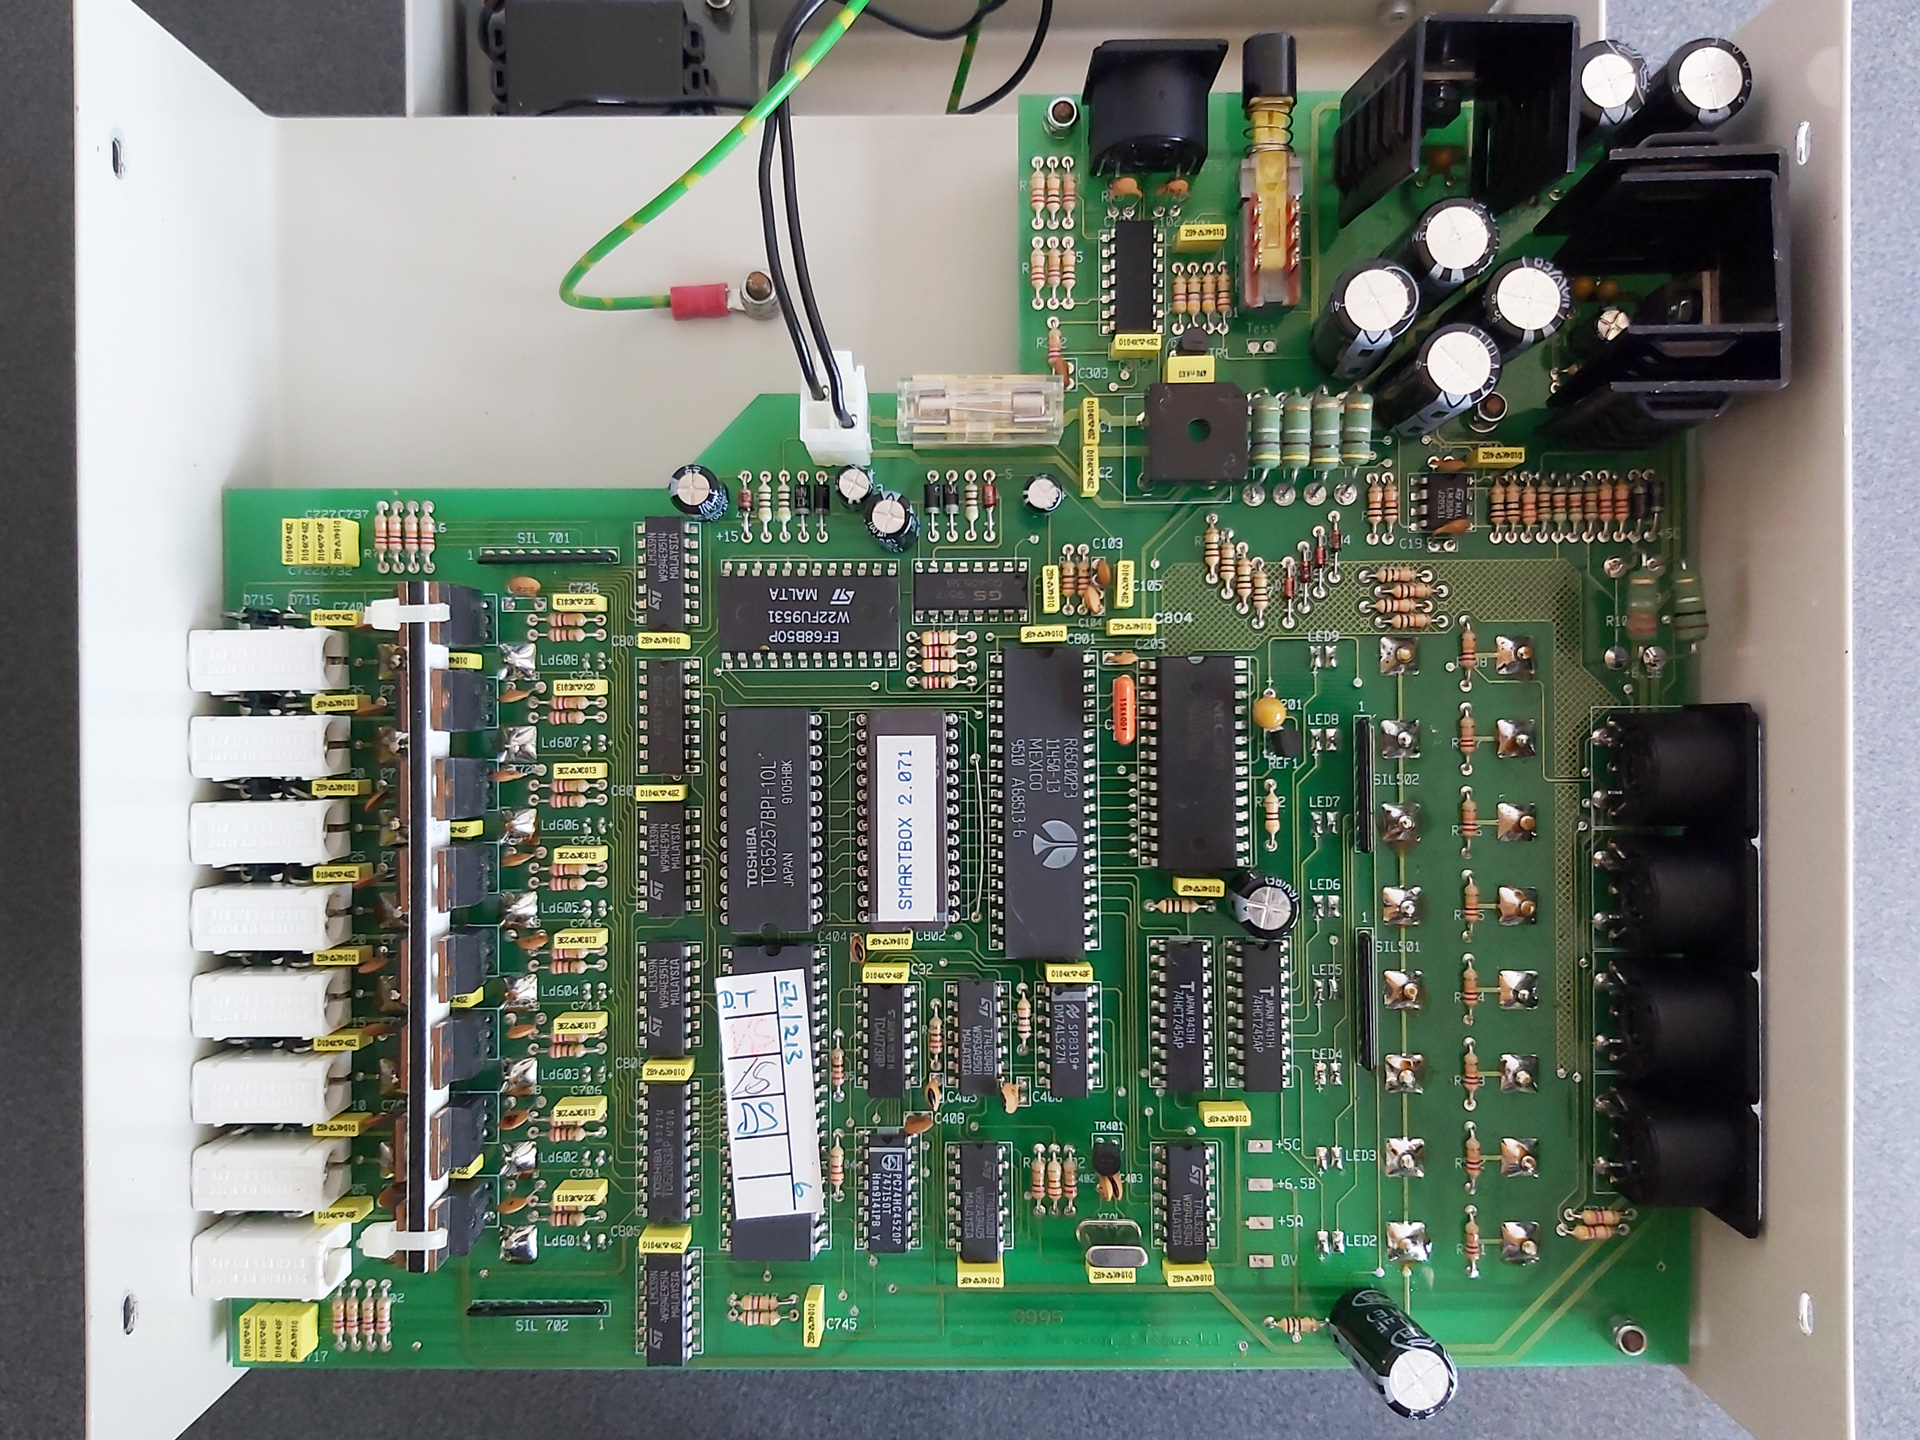
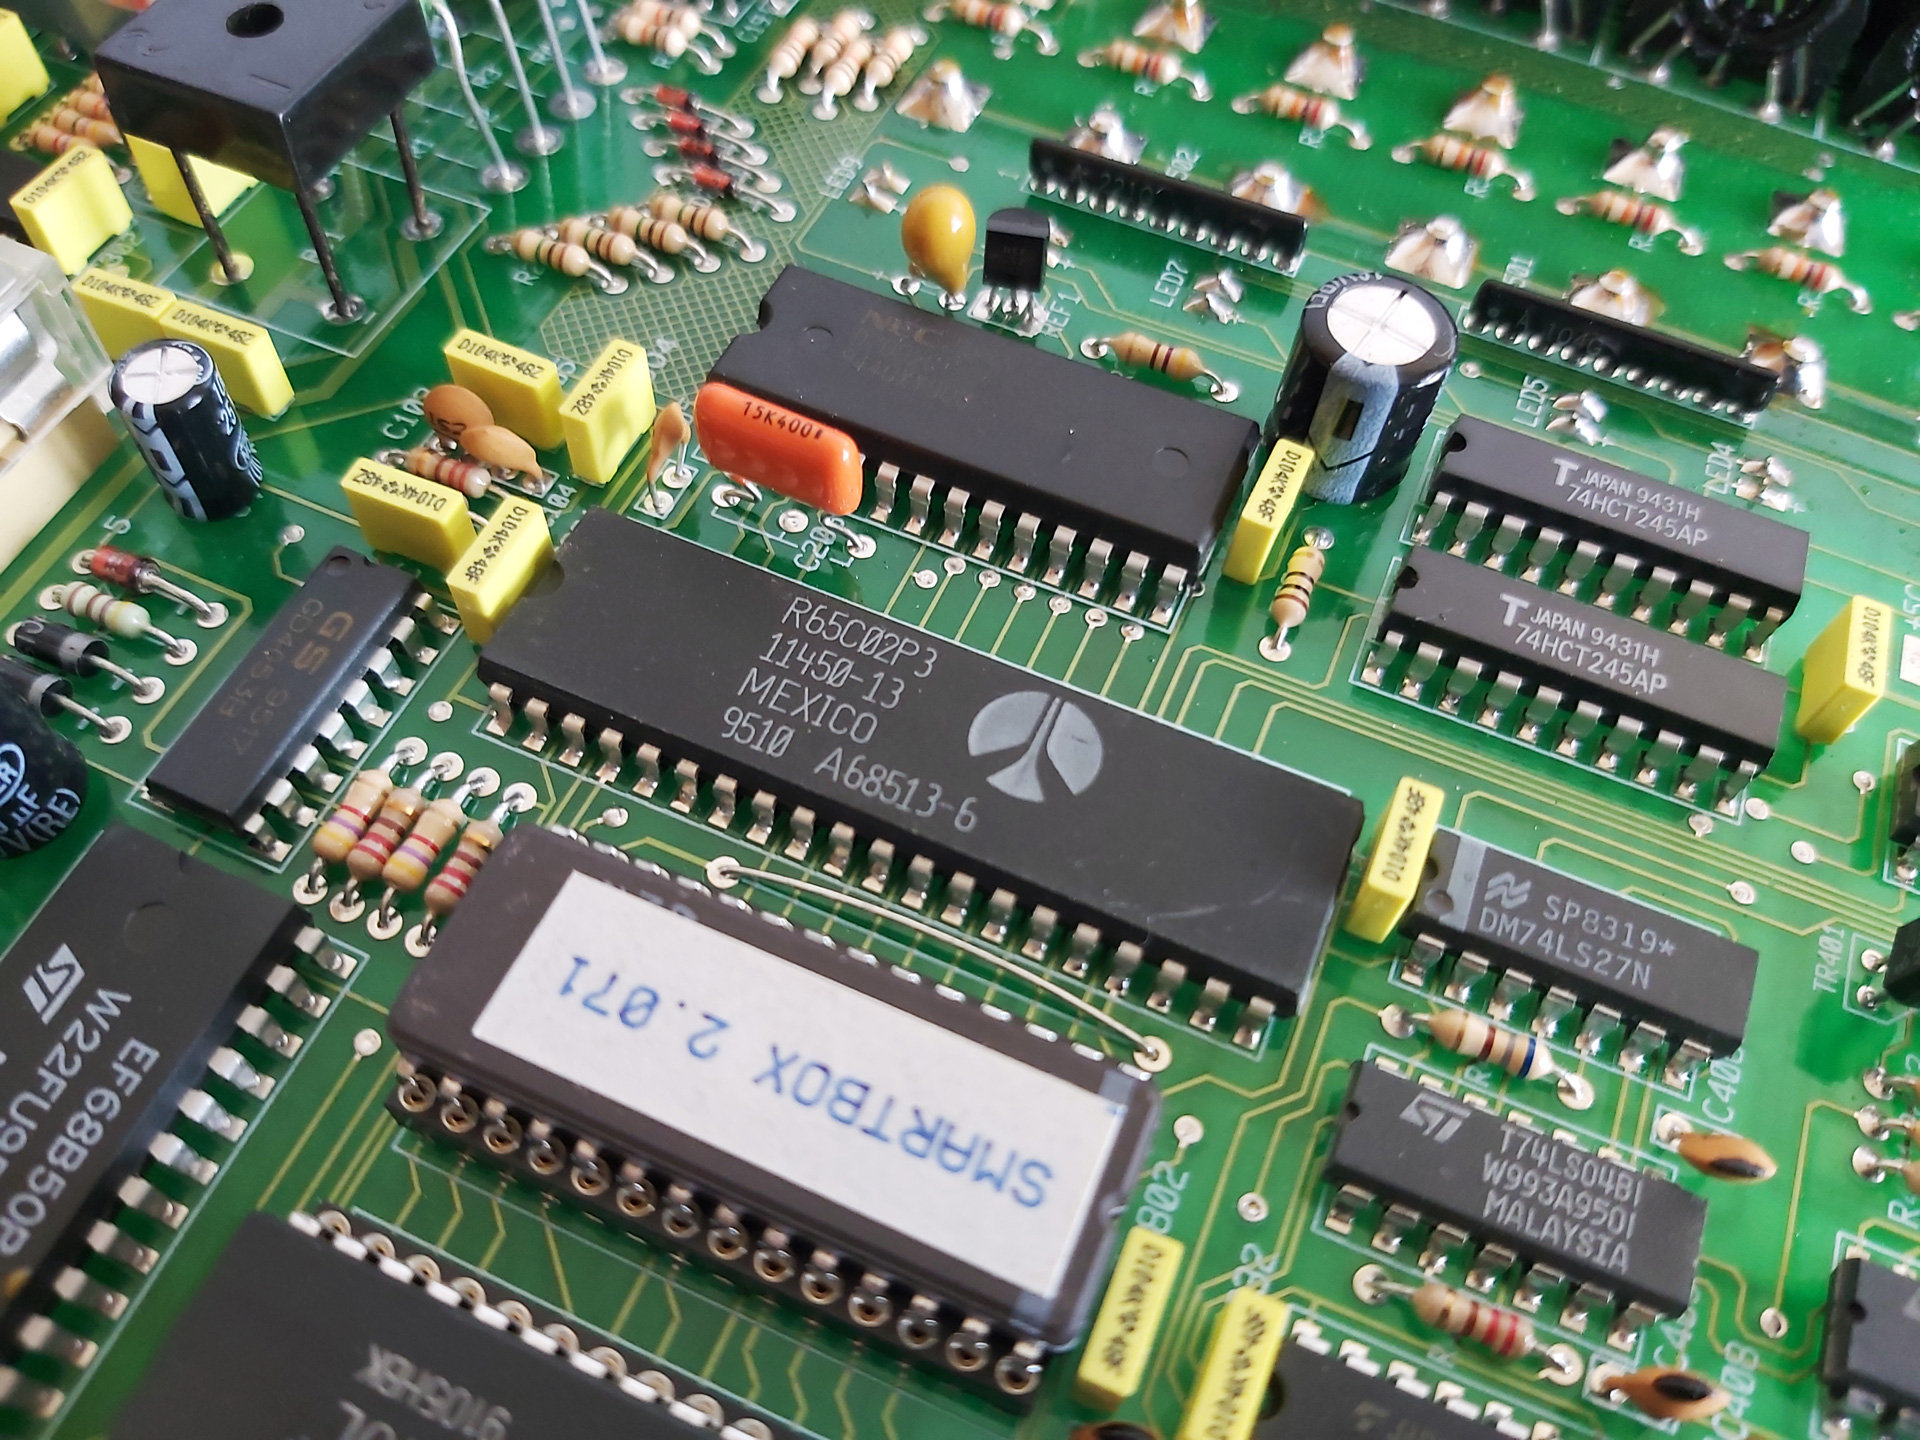
All along I'd assumed that the SmartBox was a simple interface box that relied on the host computer to do all of the processing, but doing some digging I found a thread on StarDot that delved into the heart of the machine and saw that there's a 65C02 CPU inside along with 32KB of RAM and the OS runs from a socketed 8KB ROM. As a long-term Z80 fan I thought it was time I should see how the other side lived – in spite of my fondness for the BBC Micro I don't own one and have not programmed any 6502 assembly, so a SmartBox seemed like it would also provide an affordable 6502 computer for experimentation.
Of course, one challenge was going to be finding the supporting software for the venerable SmartBox. Fortunately in the StarDot thread people had shared archives of the DOS, BBC Master and RISC OS software. One of the many handy features of DOSBox-X is its ability to connect an emulated serial port to a physical one in the host system, and so after building a serial cable for my SmartBox (using a pinout found, once again, via the StarDot thread) I was able to hook it up to my PC and get it working with SmartMove, the BASIC-like programming environment for the SmartBox.
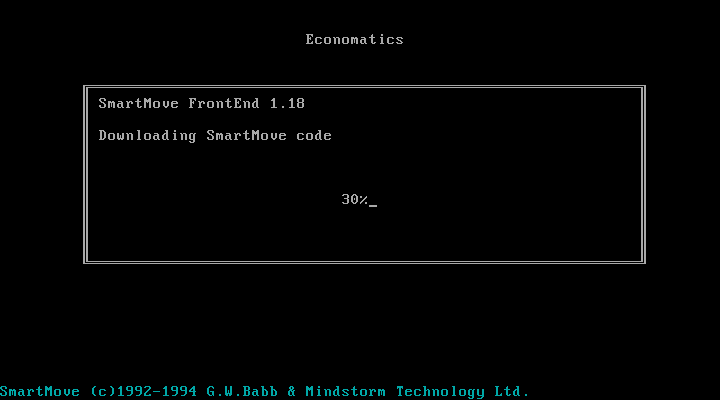
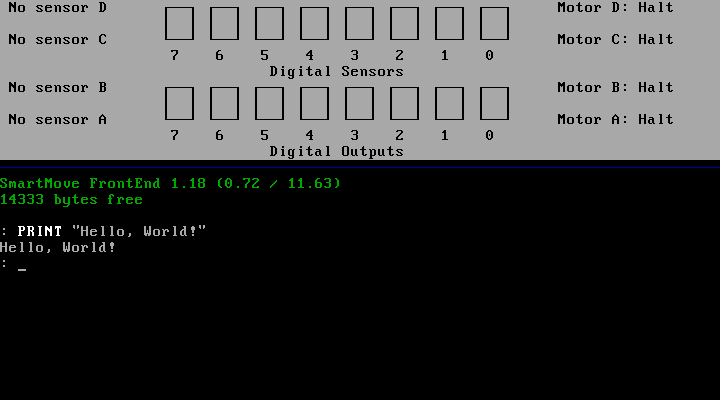
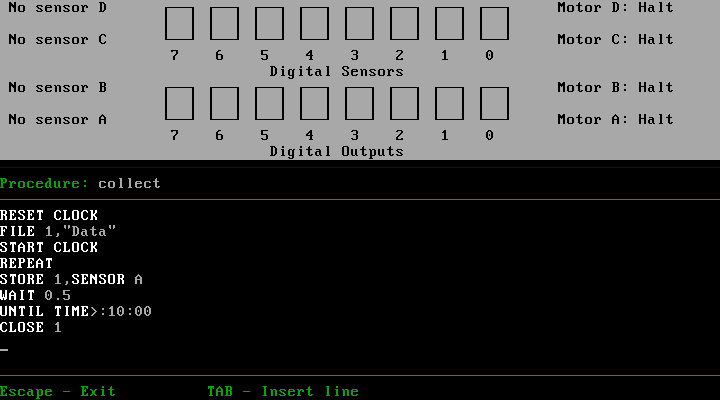
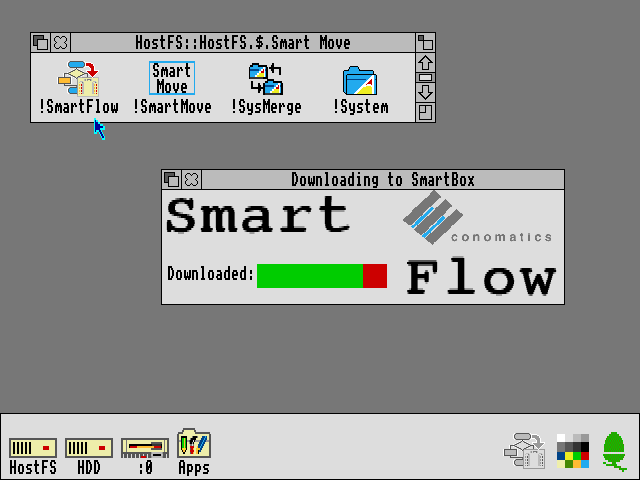
When the software is first run it needs to download SmartMove code into the SmartBox. This is because the programming environment and interpreter is actually running on the SmartBox itself, and the SmartMove software on the host PC is simply loading that interpreter onto the box (found in an accompanying file of 65C02 machine code named AL.COD) and then providing a user interface to that environment as a sort of terminal. This means you can close the SmartMove software (and unplug the serial cable) and your program will continue running on the SmartBox.
This ability to load and execute code directly on the SmartBox is one of the things that intrigued me as a way to get into 65C02 programming, but for the time being I was interested in digging deeper into the how the existing SmartMove software was interfacing with the box with the intention of writing a simple Z80 host interface that I could then adapt to the Cambridge Z88, my CP/M computer and maybe even the TI-83 Plus calculator series. Fortunately the documentation for the serial protocol used by SmartMove application has been documented so I was able to prototype a crude version of the software in C# using WinForms. It needs some serious tidying up before I can release it but as a basic test it does the job:
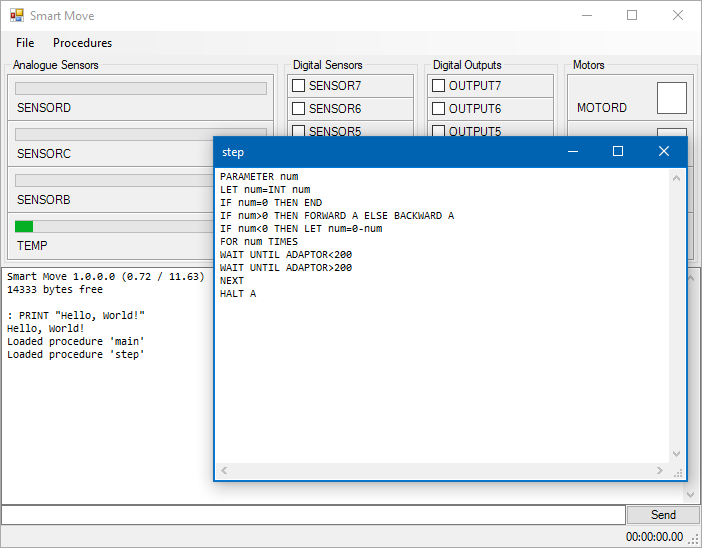
The ability to build new versions of the interface software for different platforms without needing to worry about porting over the BASIC interpreter seems sensible considering there were versions of SmartMove available for DOS, BBC Master, RISC OS and Apple Macintosh. All could use the same AL.COD but would just need to provide the relevant UI, input and output routines specific to their host platforms.
I had been using the DOS version of SmartMove as the initial inspiration of the user interface for my C#/WinForms implementation, however the screenshots of the RISC OS version in the user manual looked rather more visually appealing and an archived copy of this software was available. Unfortunately, I don't own an Acorn Archimedes, I was unable to get the software running properly on modern RISC OS on a Raspberry Pi (even with various compatibility shims in place) and I couldn't find an emulator that handled the serial port in a similar fashion to DOSBox-X. However, the excellent Arculator has source code available and armed with a copy of the 6651 UART datasheet I thought I'd have a go at hacking in the feature myself.
"Hack" is definitely the operative word and though my code is abominable it does work well enough to get the available RISC OS software working on my PC. It's downloadable from here and requires the addition of the host PC's serial port name to arc.cfg (e.g. serial_port = COM1).
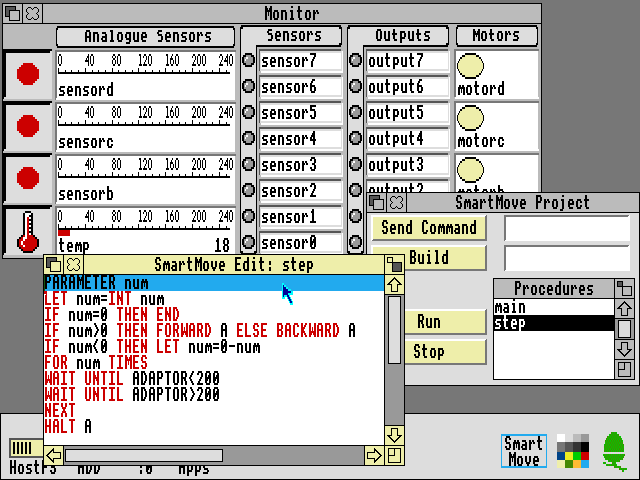
The above screenshot shows the RISC OS version of SmartMove which provided some additional inspiration for how a GUI version of the software should work. As I'd previously loaded some procedures onto the SmartBox via my C# version I could then bring the same procedures up for editing in the RISC OS version of the software. Handy!

The Logicator software can be used to build programs using flowcharts instead of a BASIC-like programming language. As far as I'm aware Logicator directly accesses the inputs and outputs from a number of different host interface boxes and doesn't rely on 65C02 code loaded onto the box like SmartMove, but this does mean that when you close Logicator your program stops aas it's relying on the host PC to run the show. However, included with the archive of RISC OS software is an application called SmartFlow which first loads a flow chart "interpreter" into the SmartBox:
Once loaded you can then load a Logicator-format flowchart onto the SmartBox where it can be run without being connected to a host PC:

All in all it's been quite interesting to dig into the SmartBox and get a feel for how it works and what can be done with it. To this end I recorded a video demonstration of the SmartBox and its usage within RISC OS, though so far I feel I'm only really scratching the surface!

360 degree photos from Lego, a PICAXE, C# and JavaScript
Friday, 9th July 2010
As you may have guessed from the ratio of photos to actual content in my entries I do quite enjoy taking photos of things. One of the reasons I enjoy working with electronics over writing software for computers is that a finished product results in something physical, which I find much more rewarding than a purely virtual hobby.
One type of photograph I particularly enjoy on other websites is the interactive 360° view of a product. The ability to click and drag to rotate an object on the screen makes it seem more real.
What do you need to take this sort of photograph and show it on a web page? There are four components I could think of:
- A rotating platform that could be controlled to rotate to a specific angle.
- A fixed camera that can be triggered once the platform has advanced to the correct angle.
- A way to combine all of the photos taken at different angles into a single file.
- An piece of code that would allow the user to rotate the object on-screen and display the correct single view of the object.
My final solution is a bit of a Heath Robinson affair but it seems to work quite well!
The rotating platform
The most obvious way to build such a platform is to use a stepper motor, as that is specifically designed to be positioned to a particular angle. The problem is that I don't have any stepper motors, and even if I did it would be quite tricky to connect one to a platform. A more practical alternative is to use something I do have — Lego Technic.
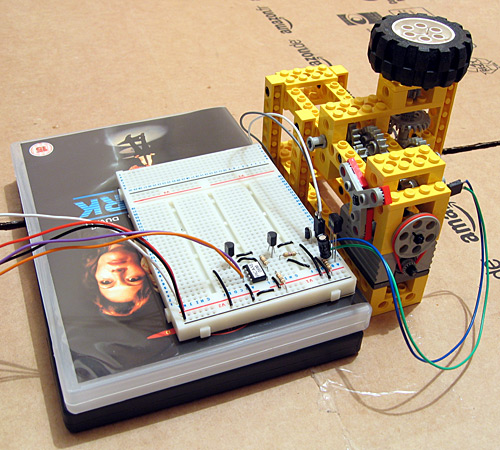
A Lego motor cannot be set to rotate to a particular position, so some additional electronics are required. The motor drives a worm gear which in turn rotates a three-bladed propeller relatively slowly (shown with red pieces attached to it in the photo). This propeller cuts the path of a beam of infra-red light between an LED and an infra-red receiver module. A microcontroller (in this case, a PICAXE-08M) is used to advance the platform in steps by switching the motor on, waiting for the beam to be unblocked, waiting for the beam to be blocked again then switching the motor off. The gears I am using have twenty-four or eight teeth, so each pair of gears divides the rotational speed by 24/8=3. I am using four pairs of gears which results in a division of 34=81. The propeller has three blades which further divides the rotational speed by three resulting in the ability to set the platform to 81×3=243 distinct angles.
' This code is for a PICAXE-08M
#PICAXE 08M

' This pin is used to generate the 38kHz IR carrier. It should be connected to the IR LED's cathode (-).
Symbol IRPwmPin = 2
' This pin is connected to the IR demodulator's output.
Symbol IRReceiverPin = Pin3

' This pin is connected to the motor enable output.
Symbol MotorPin = 4

Symbol SerialControlIn = 1

' The desired position of the "stepper" motor.
Symbol StepDesired = B8
' The current position of the "stepper" motor.
Symbol StepCurrent = B9

Symbol StepDesiredConfirm = B10
Symbol StepDesiredPotential = B11

' Returned from the CheckBeam routine.
Symbol BeamBlocked = B12

' Rather than spin once at a time (slow) spin up to this many times between exchanging position information with the computer.
Symbol SpinLoopCount = 3

' Stores the spin loop time.
Symbol SpinLoop = B13

' The number of steps in a complete revolution.
Symbol TotalSteps = 243


Main:

    ' Reset the current and desired steps.
    StepDesired = 0
    StepCurrent = 0

    ' Switch the motor off.
    Low MotorPin

    'StepDesiredConfirmCount = 0

    Do
        ' Fetch the desired position.
        SetFreq M8
        SerIn SerialControlIn, N4800_8, (CR, LF), #StepDesiredPotential, #StepDesiredConfirm
        SetFreq M4

        ' Check the received data - the second value should be the logical inversion of the first.
        StepDesiredConfirm = Not StepDesiredConfirm
        If StepDesiredPotential = StepDesiredConfirm Then
            StepDesired = StepDesiredPotential
        End If


        ' Adjust the position if required.
        For SpinLoop = 1 To SpinLoopCount

            ' Broadcast the current step position.
            SerTxd(#StepCurrent, ",", #StepDesired, CR, LF)

            ' Do we need to run the motor?
            If StepCurrent <> StepDesired Then

                ' Switch the motor on.
                High MotorPin
                Pause 20

                ' Wait for the beam to be unblocked.
                Do GoSub CheckBeam
                Loop Until BeamBlocked = 0


                Pause 20

                ' Wait for the beam to become blocked again.
                Do GoSub CheckBeam
                Loop Until BeamBlocked = 1

                ' Switch the motor off.
                Low MotorPin

                ' Increment step current to indicate a change of step.
                Inc StepCurrent
                If StepCurrent = TotalSteps Then
                    StepCurrent = 0
                End If
            End If


        Next SpinLoop

    Loop

' Checks whether the beam is blocked or not.
' Returns BeamBlocked = 0 for an unblocked beam, BeamBlocked for a blocked beam.
CheckBeam:
    PwmOut IRPwmPin, 25, 53 ' 38kHz, calculated via PICAXE->Wizards->pwmout
    Pause 1
    BeamBlocked = IRReceiverPin
    PwmOut IRPwmPin, Off
    Return
The BASIC program on the PICAXE constantly outputs the current position and desired position via the serial programming cable as ASCII in the format <current>,<desired><CR><LF>. It also checks for the desired position every loop on via a serial input pin (sadly not the one used for programming the PICAXE as that is not permitted on the 08M) in the format <CR><LF><desired>,<~desired>. (again in ASCII). The desired position is transmitted twice, once normally and the second time inverted (all zero bits set to one and all one bits set to zero) as a simple form of error detection; should the second value received not be a logical inversion of the first then the value is discarded.
A copy of the schematic can be downloaded by clicking the above thumbnail. It is pretty simple; serial data is input on pin IN1 (move the serial input from the programming cable from SERIAL_IN to IN1), an IR LED is driven from pin PWM2 via a current-limiting resistor, an IR receiver sends its input to pin IN3, a Darlington pair drives the motor via pin OUT4 and information is sent out via the SERIAL_OUT pin (no need to move the programming cable for that one).
Triggering the camera
My camera does not have a standard remote control, but does has some software that allows you to capture shots when it's connected to your USB port. Unfortunately the Canon PowerShot SDK is rather old and is no longer maintained, which means that any software that uses it is bound to its bugs and limitations. One of its bigger problems is that it doesn't work on Vista; by setting the Remote Capture utility into XP compatibility mode I could set up a shot and see a live viewfinder but attempting to release the shutter caused the app to hang for about a minute before claiming the camera had been disconnected.
Fortunately VirtualBox emulates USB and serial ports so I set up Windows XP in a virtual machine and installed the Remote Capture utility. It still doesn't work very well (taking about thirty seconds between releasing the shutter and transferring the image) but it's better than nothing.
To control platform I use the following C# code. It's very poorly written (you need to make sure that you quickly set the Remote Capture application as the foreground window when you start it, for example, and it has a hard-coded 10 second delay after taking the photo to transfer the photo from the camera to the PC — when my camera's batteries started going flat it started to drop frames).
using System;
using System.Globalization;
using System.IO.Ports;
using System.Text;
using System.Text.RegularExpressions;
using System.Threading;
using System.Windows.Forms;
using System.Diagnostics;
using System.Linq;

class Program {

    const int StepsInRevolution = 243;

    enum ApplicationState {
        AligningStepper,
        WaitingStepperAligned,
        WaitingStartPistol,
        Photographing,
        Exiting,
    }

    static void Main(string[] args) {
        StringBuilder receivedData = new StringBuilder();
        using (var serialPort = new SerialPort("COM1", 4800, Parity.None, 8, StopBits.Two)) {
            serialPort.WriteTimeout = 1;

            serialPort.Open();

            var packetFieldsRegex = new Regex(@"^(\d+),(\d+)$");

            int? currentPosition = null;
            int desiredPosition = 0;
            int? confirmedDesiredPosition = null;
            int startPosition = 0;

            int angleCount = 64;
            int currentAngle = 0;

            serialPort.DataReceived += new SerialDataReceivedEventHandler((sender, e) => {
                if (e.EventType == SerialData.Chars) {
                    receivedData.Append(serialPort.ReadExisting());
                    string receivedDataString;
                    int newLinePosition;
                    while ((newLinePosition = (receivedDataString = receivedData.ToString()).IndexOf("\r\n")) != -1) {
                        var packet = receivedDataString.Substring(0, newLinePosition);
                        receivedData = receivedData.Remove(0, packet.Length + 2);
                        var packetFields = packetFieldsRegex.Matches(packet);
                        if (packetFields.Count == 1) {
                            currentPosition = int.Parse(packetFields[0].Groups[1].Value, CultureInfo.InvariantCulture);
                            confirmedDesiredPosition = int.Parse(packetFields[0].Groups[2].Value, CultureInfo.InvariantCulture);
                        }
                    }
                }
            });

            ApplicationState appState = ApplicationState.AligningStepper;

            // Main loop.
            while (appState != ApplicationState.Exiting) {
                // Update the stepper position.
                try {
                    serialPort.Write(string.Format(CultureInfo.InvariantCulture, "\r\n{0},{1}.", desiredPosition, (byte)~desiredPosition));
                } catch (TimeoutException) {
                    serialPort.DiscardOutBuffer();
                }
                Thread.Sleep(10);
                // What are we doing?
                switch (appState) {
                    case ApplicationState.AligningStepper:
                        if (currentPosition.HasValue) {
                            desiredPosition = (currentPosition.Value + 5) % StepsInRevolution;
                            appState = ApplicationState.WaitingStepperAligned;
                        }
                        break;
                    case ApplicationState.WaitingStepperAligned:
                        if (currentPosition.Value == desiredPosition) {
                            startPosition = desiredPosition;
                            appState = ApplicationState.WaitingStartPistol;
                            //while (Console.KeyAvailable) Console.ReadKey(true);
                            //Console.WriteLine("Press any key to start rotating...");
                        }
                        break;
                    case ApplicationState.WaitingStartPistol:
                        //while (Console.KeyAvailable) {
                        //  Console.ReadKey(true);
                            appState = ApplicationState.Photographing;
                        //}
                        break;
                    case ApplicationState.Photographing:
                        if (currentPosition == desiredPosition) {
                            Console.Write("Taking photo {0} of {1}...", currentAngle + 1, angleCount);
                            SendKeys.SendWait(" ");
                            Thread.Sleep(10000);
                            Console.WriteLine("Done!");
                            if (currentAngle++ == angleCount) {
                                appState = ApplicationState.Exiting;
                            } else {
                                desiredPosition = (startPosition + (currentAngle * StepsInRevolution) / angleCount) % StepsInRevolution;
                            }
                        }
                        break;
                }
            }

            Console.WriteLine("Done.");
            Console.ReadKey(true);
        }
    }
}
It was meant to prompt to press a key before starting to allow you to re-align the object to the starting position (if required) but this would switch focus away from the Remote Capture utility. I'll probably fix this to switch the focus explicitly to the Remote Capture utility before sending the key to trigger a capture, and will also add code that polls the photo destination directory to spot when the file has been downloaded from the camera instead of the hard-coded 10 second delay. Working in the virtual machine and with the buggy Remote Capture utility is a frustrating endeavour so I left it as it is for the time being!
Stitching the photos together
Once the photos had been taken they needed to be stitched together into a single file. I decided to use 64 angles for a complete revolution as this seemed a good trade-off between fine control over rotation and a decent file size. It also allowed the images to be arranged into a neat 8×8 grid.
I first used VirtualDub to crop each image. VirtualDub allows you to open an image sequence and export to an image sequence so it seemed ideal for the task. Once I had the object neatly cropped I stitched all of them together into a large single PNG file using the following C# program:
using System;
using System.Drawing;
using System.IO;
using System.Text.RegularExpressions;

class Program {
    static void Main(string[] args) {
        var middleImage = 14; // Index of the "middle" (default angle) image.
        var nameRegex = new Regex(@"Processed(\d{2})");
        var images = new Bitmap[64];
        try {
            foreach (var file in Directory.GetFiles(@"D:\Documents\Pictures\Digital Photos\Projects\Line Blanker\Insides 360\Processed", "*.png")) {
                var matches = nameRegex.Matches(file);
                if (matches.Count == 1) {
                    images[int.Parse(matches[0].Groups[1].Value)] = new Bitmap(file);
                }
            }
            var maxSize = new Size(0, 0);
            for (int i = 0; i < images.Length; i++) {
                if (images[i] == null) {
                    Console.WriteLine("Image {0} missing!", i);
                } else {
                    maxSize = new Size(Math.Max(images[i].Width, maxSize.Width), Math.Max(images[i].Height, maxSize.Height));
                }
            }
            using (var finalImage = new Bitmap(maxSize.Width * 8, maxSize.Height * 8)) {
                using (var g = Graphics.FromImage(finalImage)) {
                    g.PixelOffsetMode = System.Drawing.Drawing2D.PixelOffsetMode.Half;
                    for (int x = 0; x < 8; ++x) {
                        for (int y = 0; y < 8; ++y) {
                            var image = images[(x + y * 8 + middleImage) % images.Length];
                            if (image != null) {
                                g.DrawImage(image, new Point(x * maxSize.Width + (maxSize.Width - image.Width) / 2, y * maxSize.Height + (maxSize.Height - image.Height) / 2));
                            }
                        }
                    }
                }
                finalImage.Save("out.png");
            }
        } finally {
            for (int i = 0; i < images.Length; i++) {
                if (images[i] != null) {
                    images[i].Dispose();
                    images[i] = null;
                }
            }
        }
    }
}
The program requires that the input images are named Processed00.png to Processed63.png, which is easily arranged when exporting an image sequence from VirtualDub. The resulting image can be tidied up in a conventional image editor.
Embedding the result on a web page
The final bit of code required is to allow the 360° image to be embedded and manipulated on a web page. I opted to use JavaScript for this task as it seemed the lightest and simplest way to work.
if (typeof(Rotate360) == 'undefined') {
    var Rotate360 = new Class({
        Implements : [Options, Events],
        options : {
            width : 320,
            height : 240,
            container : null,
            element : null
        },
        sign : function(v) {
            return (v > 0) ? +1 : (v < 0 ? -1 : 0);
        },
        initialize : function(source, options) {
            this.setOptions(options);
            this.source = source;
            var rotate360 = this;
            this.element = new Element('div', {
                'class' : 'rotate360',
                styles : {
                    width : this.options.width + 'px',
                    height : this.options.height + 'px',
                    background : 'transparent no-repeat url("' + this.source + '") scroll 0 0'
                },
                events : {
                    mouseenter : function(e) {
                        if (typeof(rotate360.mouseHandlerDiv) != 'undefined') {
                            var myPosition = rotate360.element.getCoordinates();
                            rotate360.mouseHandlerDiv.setStyles({
                                left : myPosition.left + 'px',
                                top : myPosition.top + 'px',
                                width : myPosition.width + 'px',
                                height : myPosition.height + 'px'
                            });
                        }
                    }
                }
            });
            this.mouseHandlerDiv = new Element('div', {
                styles : {
                    position : 'absolute',
                    cursor : 'e-resize'
                },
                events : {
                    mousemove : function(e) {
                        if (typeof(rotate360.mouseHeld) != 'undefined' && rotate360.mouseHeld && typeof(rotate360.previousPageX) != 'undefined' && typeof(rotate360.previousPageY) != 'undefined') {
                            var currentBackgroundPosition = rotate360.element.getStyle('background-position').split(' ');
                            currentBackgroundPosition[0] = parseInt(currentBackgroundPosition[0]);
                            currentBackgroundPosition[1] = parseInt(currentBackgroundPosition[1]);
                            if (typeof(rotate360.rotateX) == 'undefined') rotate360.rotateX = 0;
                            rotate360.rotateX += (e.page.x - rotate360.previousPageX) / (360 * (rotate360.options.width / 270) / ((rotate360.image.width * rotate360.image.height) / (rotate360.options.width * rotate360.options.height)));
                            var workingAngle = parseInt(rotate360.rotateX);
                            currentBackgroundPosition[0] = -rotate360.options.width * (workingAngle % (rotate360.image.width / rotate360.options.width));
                            currentBackgroundPosition[1] = -rotate360.options.height * Math.floor(workingAngle / (rotate360.image.height / rotate360.options.height));
                            while (currentBackgroundPosition[0] > 0) currentBackgroundPosition[0] -= rotate360.image.width;
                            while (currentBackgroundPosition[0] <= -rotate360.image.width) currentBackgroundPosition[0] += rotate360.image.width;
                            while (currentBackgroundPosition[1] > 0) currentBackgroundPosition[1] -= rotate360.image.height;
                            while (currentBackgroundPosition[1] <= -rotate360.image.height) currentBackgroundPosition[1] += rotate360.image.height;
                            rotate360.element.setStyle('background-position', currentBackgroundPosition[0] + 'px ' + currentBackgroundPosition[1] + 'px');
                            rotate360.previousPageX = e.page.x;
                            rotate360.previousPageY = e.page.y;
                        } else {
                            rotate360.previousPageX = e.page.x;
                            rotate360.previousPageY = e.page.y;
                        }
                    },
                    mousedown : function(e) {
                        e.stop();
                        rotate360.mouseHeld = true;
                        rotate360.mouseHandlerDiv.setStyles({
                            left : 0,
                            width : '100%'
                        });
                    },
                    mouseup : function(e) {
                        e.stop();
                        rotate360.mouseHeld = false;
                        rotate360.element.fireEvent('mouseenter');
                    }
                }
            }).inject(document.body, 'top');
            this.image = new Asset.image(this.source, {
                onload : function() {
                    if (rotate360.options.element) {
                        rotate360.element.replaces(rotate360.options.element);
                    } else if (rotate360.options.container) {
                        rotate360.options.container.adopt(rotate360.element);
                    }
                }
            });
        }
    });
    window.addEvent('domready', function() {
        $$('img.rotate360').each(function(rotate360) {
            var src = rotate360.src.replace(/\.([a-zA-Z]+)$/, '_360.$1');
            var img = new Asset.image(src, {
                onload : function() {
                    new Rotate360(img.src, {
                        width : rotate360.width,
                        height : rotate360.height,
                        element : rotate360
                    });
                }
            });
        });
    });
}
The above code requires MooTools (both "core" and "more" for its Asset classes). It can be invoked manually or (preferably) will replace any image with a class of rotate360 with the 360° version — if the file was example.jpg the 360° version would be example_360.jpg.
Examples
I've taken photos of a few of my previous projects using this technique — USB remote control, AVR TV game and VGA line blanker. The process could use some refinement but it certainly seems to work!
IM-me wireless terminal
Thursday, 14th January 2010
A recent post on Hack a Day alerted me the to the IM-me, a device designed to be used with a web-based IM service that communicated with the PC via a USB wireless adaptor.
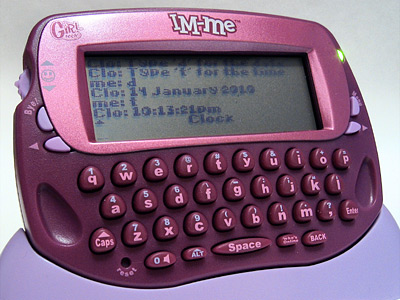
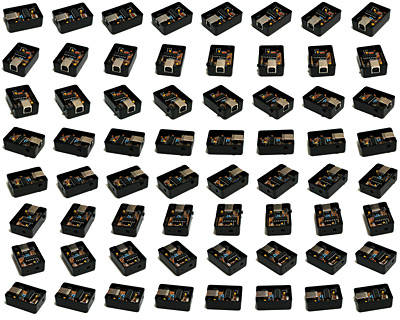
According to Hunter Davis, the body of the messages were sent between the PC and the IM-me are in plain text. This sounded like a good start to me, so I picked one up from Amazon UK for £7.49 (they're now available for even less than that). You get a lot of electronics for that price; there's a CC1110F32 microcontroller inside (the chips inside the device and its wireless adaptor are clearly marked – no nameless blob of epoxy that you might have expected from the price) and Dave has poked around the insides of his and has mapped the contact pads exposed via the battery compartment to the debug port on the microcontroller. You could use this debug port to overwrite the stock firmware with your own if the fancy took you. However, I'm more interested in seeing what I can do with the device without writing my own firmware for it.
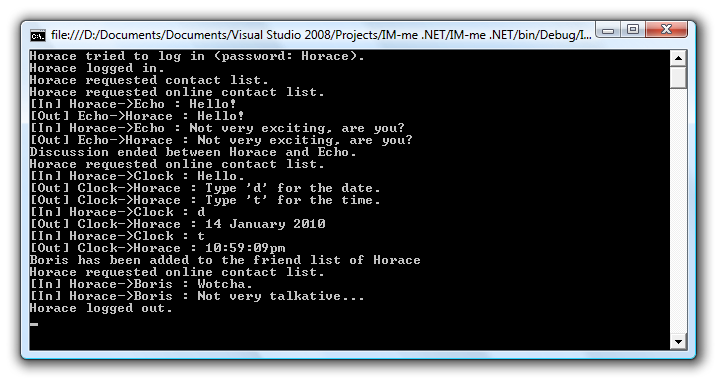
The wireless adaptor shows up in Windows a simple USB HID, so I installed SnoopyPro and logged a chat session with myself. Fortunately, there is indeed no obfuscation or encryption to the structure of messages. I have worked on a C# library that handles most of the different message types (no group chat yet, only direct contact-to-contact) and written up what I've found here. The C# code can be found here, though it is not especially robust yet.
I think that my main problem is a poor grasp of asynchronous I/O. I read data asynchronously, but write synchronously, and don't currently do anything to protect against my code "speaking over" the incoming data. If you output data when the device is half way through sending a packet, it seems to ignore the data you're sending it. In the case of long messages, which are made up of multiple packets sent in rapid succession, they don't appear to ever reach the device. The USB device responds with a single 0 byte after a packet is written to it, which I don't currently wait for. I'm not sure how you can, when mixing asynchronous reading and synchronous writing, so if anyone has any suggestions or links to reading material I'd greatly appreciate it!
I have no intention of going near the existing IM-me web service – being able to use the IM-me as a general-purpose wireless terminal to talk to your own software opens up a wealth of possibilities. You could set it up to notify you of new emails, read RSS feeds, post updates to social networking sites, use it as a home automation console, remote control a media PC... You may wish to paint it black first, though!
Addendum: Whoops, after refactoring some code I broke the checksum generation. It appears that the IM-me ignores the checksum when receiving messages. I have stuck a brief pause between each byte written to the device and a slightly longer one between each packet sent to the device, and I can now send long messages to it.
RC-5, NEC, JVC and Panasonic infrared codes
Wednesday, 3rd June 2009
I've rewritten the remote control signal decoding software to handle multiple protocols. As well as SIRCS, it now supports RC-5, NEC, JVC and two Panasonic codes (one "old" 11-bit code and one "new" 48-bit code). There's not much in the way of screenshots at the moment, other than a debug window that gets filled when keys are pressed:
NecCommand Address=24, Command=87, Extended=False, Repeat=1
RC5Command Address=20, Command=53, Repeat=True, Repeat=1
NewPanasonicCommand OEM Device 1=2, OEM Device 2=32, Device=144, Sub-Device=0, Command=10, Repeat=1
RC5Command Address=8, Command=35, Repeat=True, Repeat=1
OldPanasonicCommand Address=0, Command=20, Repeat=1
SircsCommand Address=2362, Command=121, Length=20, Repeat=1
SircsCommand Address=7002, Command=84, Length=20, Repeat=1
NecCommand Address=64, Command=146, Extended=False, Repeat=1
NecCommand Address=81, Command=8, Extended=False, Repeat=1
JvcCommand Address=3, Command=23, Repeat=1
Gripping stuff, I'm sure you'll agree.
The C# source code for this can be downloaded here.
A keyring remote control (courtesy of Poundland) has highlighted one possible issue in handling repeating buttons. Rather than target any particular device, it will try and brute-force a response. For example, here's the result of pressing the power button once in one particular mode:
SircsCommand Address=1, Command=21, Length=12, Repeat=2
OldPanasonicCommand Address=0, Command=32, Repeat=1
NecCommand Address=32, Command=11, Extended=False, Repeat=1
NewPanasonicCommand OEM Device 1=2, OEM Device 2=32, Device=128, Sub-Device=0, Command=61, Repeat=1
That's four different protocols from one button. I suppose some sort of mapping from protocol-specific code to a string (so those five commands would be translated into five "power" strings) and comparing the time between signals to turn the input into something meaningful may help, but that would require an enormous database of known codes.
C# emu2413
Thursday, 8th January 2009
This is fairly embarrassing; somebody sent me an email that was flagged as spam which I accidentally deleted. So if you sent me an email and I haven't replied, I'm not deliberately being rude; could you send it again? 
After encountering strange crashes (not .NET exceptions, full out crashes) with emu2413 I decided to port it to straight C# instead from its existing C incarnation (emu2413.h.cs and emu2413.c.cs). Even though the original was macro-heavy it was relatively simple to port, and so there's no dependency on an unmanaged DLL to generate FM sound any more. However, the C# version is significantly slower (Cogwheel now takes about 50% extra CPU time when FM sound is enabled), possibly due to many extraneous method calls that were macros in the original.
However, the emulator still crashes when FM sound is enabled. And I have no idea why, as it only happens in Release mode and outside the IDE. The Debug build works fine inside and outside the IDE, and Release mode works fine when run within the IDE. 
Controller input updates to Cogwheel
Monday, 5th January 2009
I hope you all had a good Christmas and New Year period!
I received an Xbox 360 controller for Christmas, so have done a bit of work on Cogwheel to add support for it. (You can download a copy of the latest version 1.0.2.0 with SlimDX here).
The first issue to deal with was the D-pad on the Xbox 360 controller. When treated as a conventional joystick or DirectInput device the D-pad state is returned via the point-of-view (POV) hat. The joystick input source class couldn't raise events generated by the POV hat so support for that had to be added. This now allows other controllers that used the POV hat for slightly bizarre reasons (eg the faceplate buttons on the PlayStation controller when using PPJoy) to work too.
The second issue was the slightly odd way that the Xbox 360's DirectInput driver returns the state of the triggers - as a single axis, with one trigger moving the axis in one direction, the other trigger moving it in the other. You cannot differentiate between both triggers being held and both being released, as both states return 0. To get around this, I've added support for XInput devices, where all buttons and triggers operate independently.
The Xbox 360 controller now shows up twice in the UI - once as an XInput device and again as a conventional joystick. Fortunately, you can check if a device is an XInput device by the presence of IG_ in its device ID. Here's some C# code that can be used to check with a joystick is an XInput device or not.
using System.Globalization;
using System.Management;
using System.Text.RegularExpressions;

namespace CogwheelSlimDX.JoystickInput {

    /// <summary>
    /// Provides methods for retrieving the state from a joystick.
    /// </summary>
    public class Joystick {

        /* ... */

        /// <summary>
        /// Gets the vendor identifier of the <see cref="Joystick"/>.
        /// </summary>
        public ushort VendorId { get; private set; }

        /// <summary>
        /// Gets the product identifier of the <see cref="Joystick"/>.
        /// </summary>
        public ushort ProductId { get; private set; }

        /* ... */

        /// <summary>
        /// Determines whether the device is an XInput device or not. Returns true if it is, false if it isn't.
        /// </summary>
        public bool IsXInputDevice {
            get {
                var ParseIds = new Regex(@"([VP])ID_([\da-fA-F]{4})"); // Used to grab the VID/PID components from the device ID string.

                // Iterate over all PNP devices.
                using (var QueryPnp = new ManagementObjectSearcher(@"\\.\root\cimv2", string.Format("Select * FROM Win32_PNPEntity"), new EnumerationOptions() { BlockSize = 20 })) {
                    foreach (var PnpDevice in QueryPnp.Get()) {

                        // Check if the DeviceId contains the tell-tale "IG_".
                        var DeviceId = (string)PnpDevice.Properties["DeviceID"].Value;
                        if (DeviceId.Contains("IG_")) {

                            // Check the VID/PID components against the joystick's.
                            var Ids = ParseIds.Matches(DeviceId);
                            if (Ids.Count == 2) {
                                ushort? VId = null, PId = null;
                                foreach (Match M in Ids) {
                                    ushort Value = ushort.Parse(M.Groups[2].Value, NumberStyles.HexNumber);
                                    switch (M.Groups[1].Value) {
                                        case "V": VId = Value; break;
                                        case "P": PId = Value; break;
                                    }
                                }
                                if (VId.HasValue && this.VendorId == VId && PId.HasValue && this.ProductId == PId) return true;
                            }
                        }
                    }
                }
                return false;
            }
        }

        /* ... */
    }
}
When the joysticks are enumerated they are only added to the input manager if they are not XInput devices.
To round up the entry, here's a screenshot of a minesweeper clone I've been working on in BBC BASIC.

You can view/download the code here and it will run in the shareware version of BBC BASIC for Windows. The code has been deliberately uglified (cramming multiple statements onto a single line, few comments, trimmed whitespace) to try and keep it within the shareware version's 8KB limit as this is a good limit to keep in mind for the TI-83+ version too.
Sega Master System emulation in Silverlight
Monday, 15th December 2008
I've had to quickly learn Silverlight for work recently, which has been an interesting experience. I've had to write new code, which is fine but doesn't really excite me as far as Silverlight is concerned - it doesn't really matter which language new code is developed in, as long as it gets the job done.
What does interest me more is that Silverlight is ".NET in your browser", and I'm a big fan of .NET technology with a handful of .NET-based projects under my belt. Silverlight therefore gives me the opportunity to run these projects within the browser, which is a fun idea. 
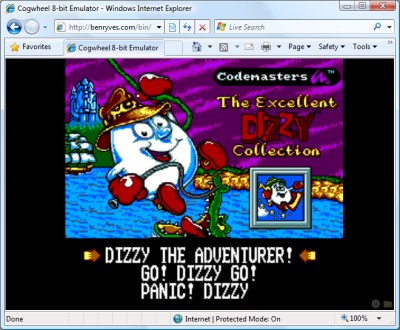
To this end, I've turned Cogwheel, a Sega 8-bit system emulator, into a Silverlight application. It took about an hour and a half, which was not as bad as I'd expected! (Skip to the bottom for instructions for the demo).
Raster graphics
Silverlight's raster graphics support is somewhat lacking. You can display raster graphics in Image elements, but - as far as I can see - that's about it. If you wish to generate and display images dynamically via primitive pixel-pushing, you're out of luck as far as Silverlight's class library is concerned.
Thankfully, Ian Griffiths has developed a class named PngGenerator that can speedily encode a PNG from an array of Colors that can then be displayed in an Image. Cogwheel's rasteriser returns pixel data as an array of integers so there's a small amount of overhead to convert these but other than that it's easy to push pixels, albeit in a fairly roundabout manner.
Render loop
The render loop is based around an empty Storyboard that invokes an Action every time it completes then restarts itself.
using System;
using System.Windows;
using System.Windows.Media.Animation;

namespace Cogwheel.Silverlight {

    public static class RenderLoop {

        public static void AttachRenderLoop(this FrameworkElement c, Action update) {
            var Board = new Storyboard();
            c.Resources.Add("RenderLoop", Board);
            Board.Completed += (sender, e) => {
                if (update != null) update();
                Board.Begin();
            };
            Board.Begin();
        }

        public static void DetachRenderLoop(this FrameworkElement c) {
            var Board = (Storyboard)c.Resources["RenderLoop"];
            Board.Stop();
            c.Resources.Remove("RenderLoop");
        }

    }
}
I'm not sure if this is the best way to do it, but it works well enough and is easy to use - just grab any FrameworkElement (in my case the Page UserControl) and call AttachRenderLoop:
private void UserControl_Loaded(object sender, RoutedEventArgs e) {
    this.UserControlRoot.AttachRenderLoop(() => {
        /* Update/render loop in here. */
    });
}
Missing .NET framework class library features
This is the big one; Silverlight does not cover the entire .NET framework class library, and so bits of it are missing. Fortunately this can be resolved, the difficulty depending on how you want the functionality of the original app to be affected.
Missing types you're not interested in.
These are the easiest to deal with, and this includes attributes and interfaces that the existing code uses that you're not especially interested in. For example, Cogwheel uses some of .NET's serialisation features for save states - a feature I wasn't intending on implementing in the Silverlight version. The [Serializable] and [NonSerialized] attributes are not available in Silverlight, nor is the IDeserializationCallback interface. To get the project to compile some dummy types were created.
namespace System {

    class SerializableAttribute : Attribute { }
    class NonSerializedAttribute : Attribute { }

    interface IDeserializationCallback {
        void OnDeserialization(object sender);
    }

}
Missing types or methods that you don't mind partially losing.
Cogwheel features some zip file handling code that uses System.IO.Compression.DeflateStream, a class not available in Silverlight. Rather than remove the zip classes entirely (which would require modifications to other files that relied on them) it was easier to use conditional compilation to skip over the DeflateStream where required.
switch (this.Method) {
    case CompressionMethod.Store:
        CompressingStream = CompressedStream;
        break;

    #if !SILVERLIGHT
    case CompressionMethod.Deflate:
        CompressingStream = new DeflateStream(CompressedStream, CompressionMode.Compress, true);
        break;
    #endif

    default:
        throw new NotSupportedException();
}
Missing instance methods.
C# 3.0 adds support for extension methods - user-defined methods that can be used to extend the functionality of existing classes that you cannot modify directly. Silverlight is missing a number of instance methods on certain classes, such as string.ToLowerInvariant();. By using extension methods the missing methods can be restored.
namespace System {

    public static class Extensions {
        public static string ToLowerInvariant(this string s) { return s.ToLower(CultureInfo.InvariantCulture); }
        public static string ToUpperInvariant(this string s) { return s.ToUpper(CultureInfo.InvariantCulture); }
    }

}
Missing static methods.
These are the most work to fix as extension methods only work on instance methods, not static methods. This requires a change at the place the method is called as well as the code for the method itself.
I've got around this by creating new static classes with Ex appended to the name then using using to alias the types. For example, Silverlight lacks the Array.ConvertAll method.
namespace System {

    static class ArrayEx {
        public static TOut[] ConvertAll<TIn, TOut>(TIn[] input, Func<TIn, TOut> fn) {
            TOut[] result = new TOut[input.Length];
            for (int i = 0; i < input.Length; i++) {
                result[i] = fn(input[i]);
            }
            return result;
        }
    }

}
First, a replacement method is written with Ex appended to the class name. Secondly, any file that contains a reference to the method has this added to the top:
#if SILVERLIGHT
using ArrayEx = System.ArrayEx;
#else
using System.IO.Compression;
using ArrayEx = System.Array;
#endif
Finally, anywhere in the code that calls Array.ConvertAll is modified to call ArrayEx.ConvertAll instead. When compiling for Silverlight it calls the new routine, otherwise it calls the regular Array.Convert.
Demo
The links below launch the emulator with the selected ROM image.
To run your own ROM image, click on the folder image in the bottom-right corner of the browser window to bring up a standard open file dialog.
Zip files are not handled correctly, but if you type *.* into the filename box, right-click a zip file, pick Open, then select the ROM from inside that it should work (it does on Vista at any rate).
The cursor keys act as you'd expect; Ctrl or Z is button 1/Start; Alt, Shift or X is 2 (Alt brings up the menu in IE). Space is Pause if you use an SMS ROM and Start if you use a Game Gear ROM. Keys don't work at all in Opera for some reason, but they should work fine in IE 8 and Firefox 3. You may need to click on the application first!
Issues
There are a number of issues I have yet to address. Performance is an obvious one; it's a little choppy even with 100% usage of one the cores on a Core 2 Duo. Sound is missing, and I'm not sure what Opera's doing with keys. Other than that, I thought it was a fun experiment.
Once I've tidied it up a bit I'll merge the source code with the existing source repository.
CSG, fisheye and spotlights.
Monday, 5th May 2008
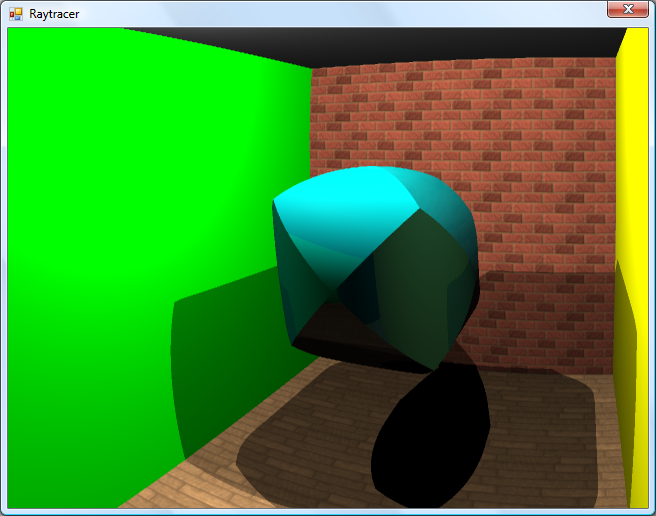
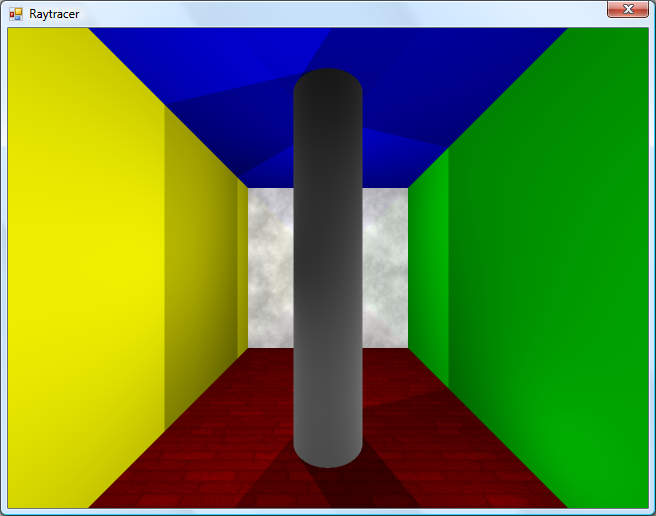
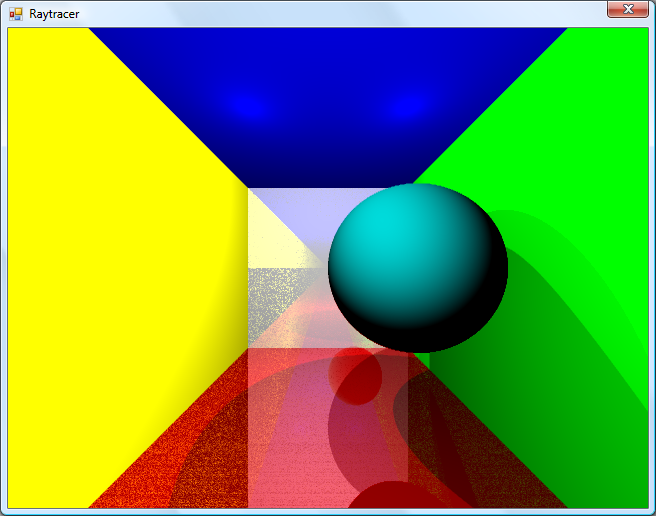
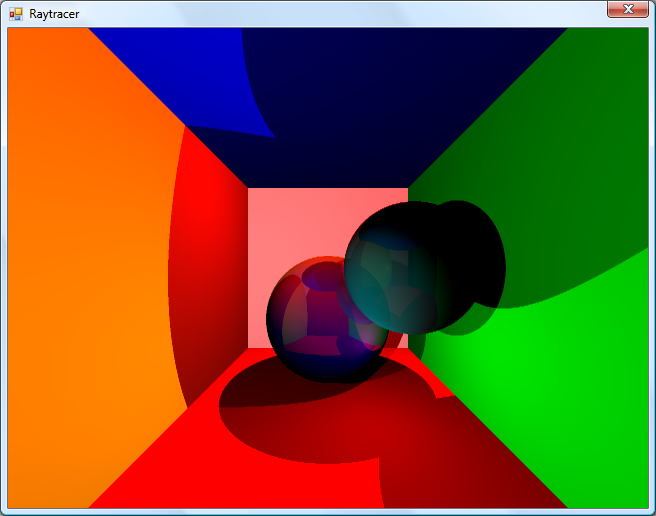
One way of constructing solids is to use a method named constructive solid geometry (or CSG for short). I added two simple CSG operators - intersection and subtraction - that both take two surfaces and return the result.

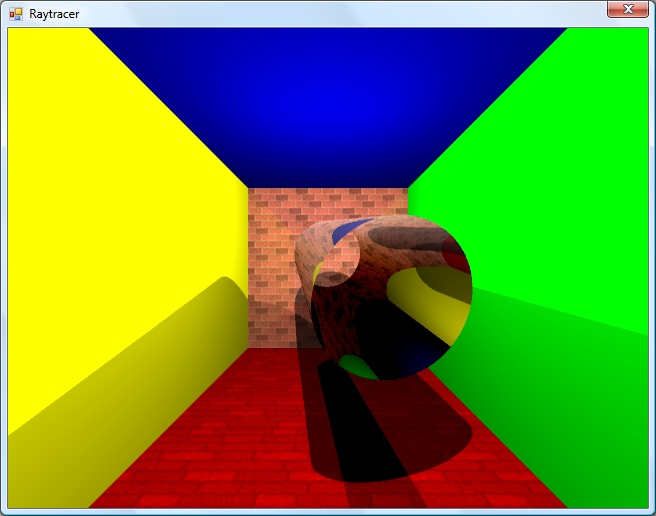
In the above image, the surface that makes up the ceiling is created by subtracting a sphere from a plane. Of course, much more interesting examples can be created. For example, here is the surface created by taking a sphere and subtracting three cylinders from it (each cylinder points directly along an axis).

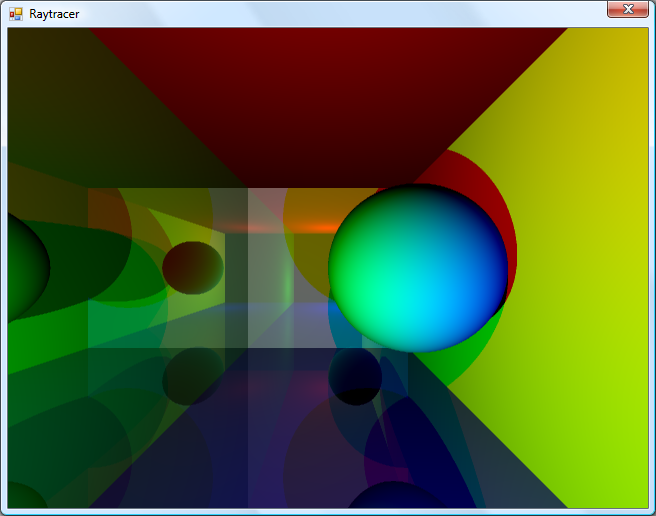
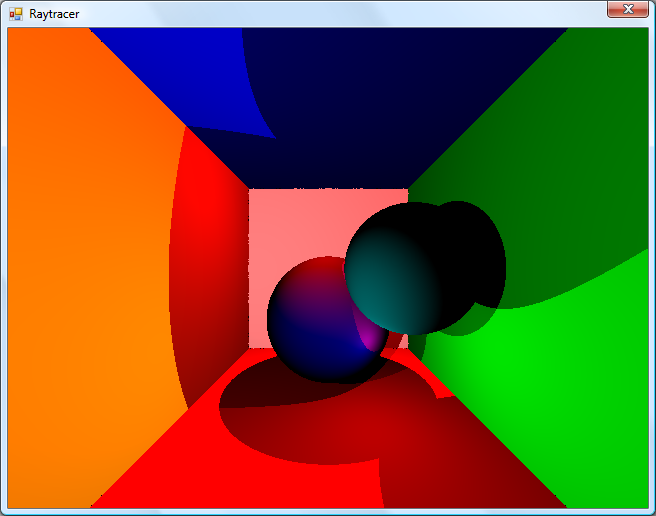
One problem with the camera implementation was that it couldn't be rotated. To try and aid this, I used a spherical to cartesian conversion to generate the rays - which has the side-effect of images with "fisheye" distortion.
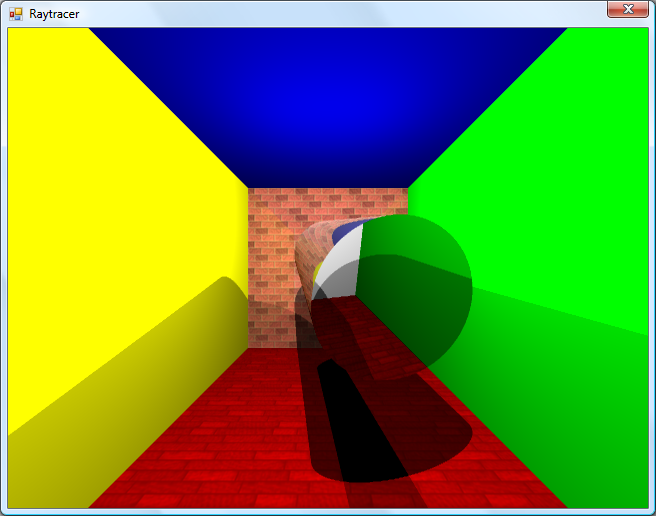
The above left image also demonstrates a small amount of refraction - something that I've not got working properly - through the surface. The above right image is the result of the intersection of three cylinders aligned along the x,y and z axes.
To try and combat the fisheye distortion, I hacked together a simple matrix structure that could be used to rotate the vectors generated by the earlier linear projection. The result looks a little less distorted!
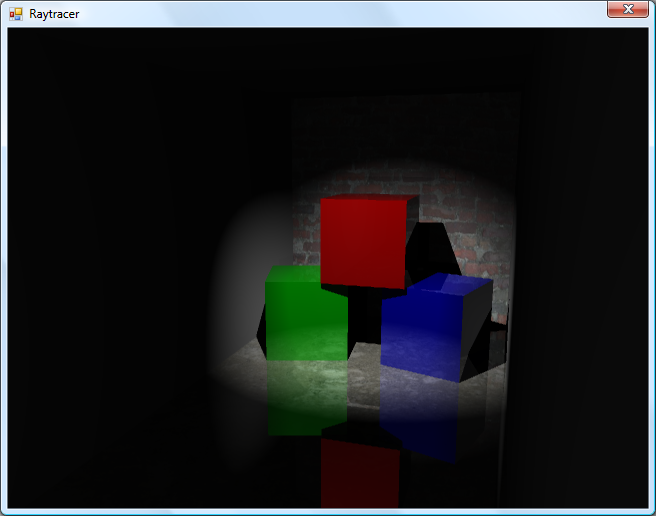
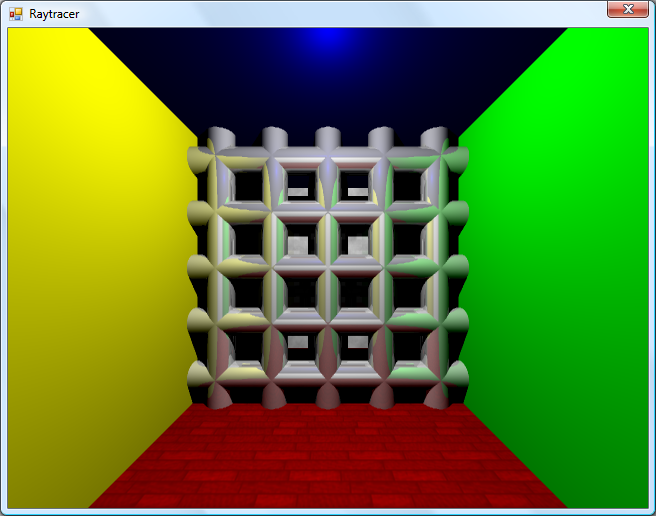
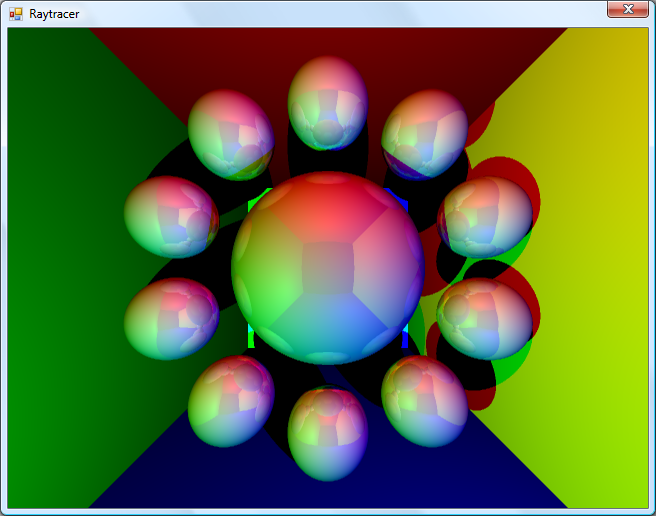
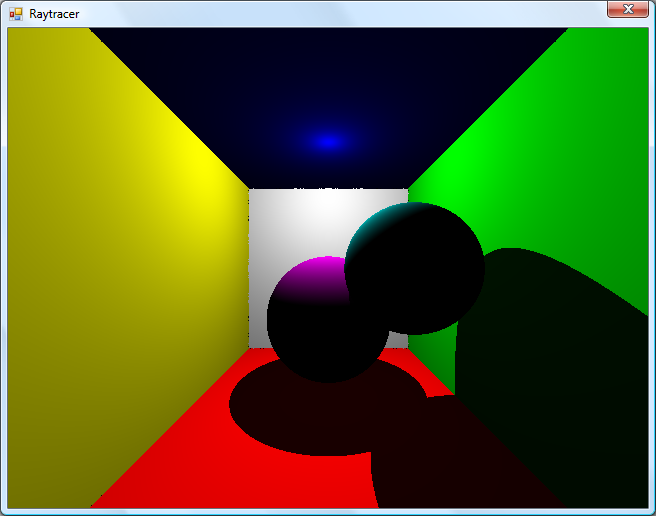
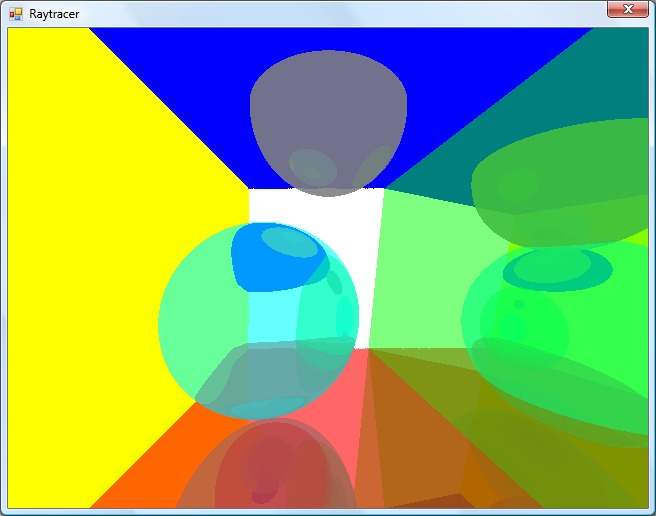
The final addition to the raytracer before calling it a day was a spotlight. The spotlight has an origin, like the existing point light - but it adds a direction (in which it points) and an angle to specify how wide the beam is. In fact, there are two angles - if you're inside the inner one, you're fully lit; if you're outside the outer one, you're completely in the dark; if you're between the two then the light's intensity is blended accordingly.

In the above screenshot, a spotlight is shining down and backwards away from the camera towards a grid of spheres.
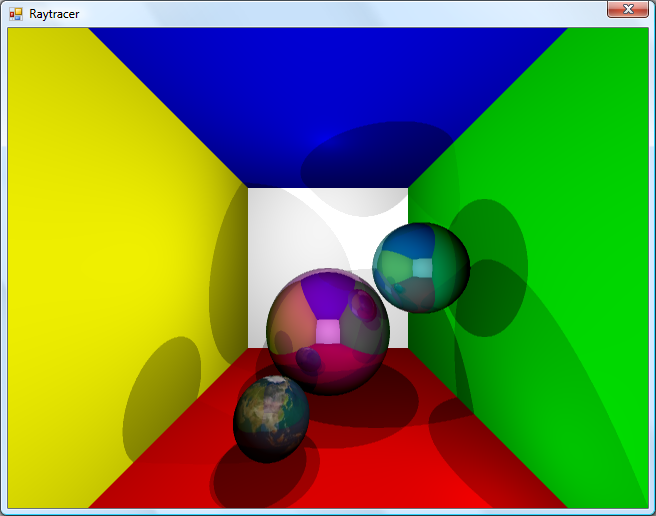
If you're interested in an extremely slow, buggy, and generally badly written raytracer, I've uploaded the C# 3 source and project file. The majority of the maths code has been pinched and hacked about from various sites on the internet, and there are no performance optimisations in place. I do not plan on taking this project any further.
Building and running the project will result in the above image, though you may well wish to put the kettle on and make yourself a cup of tea whilst it's working.
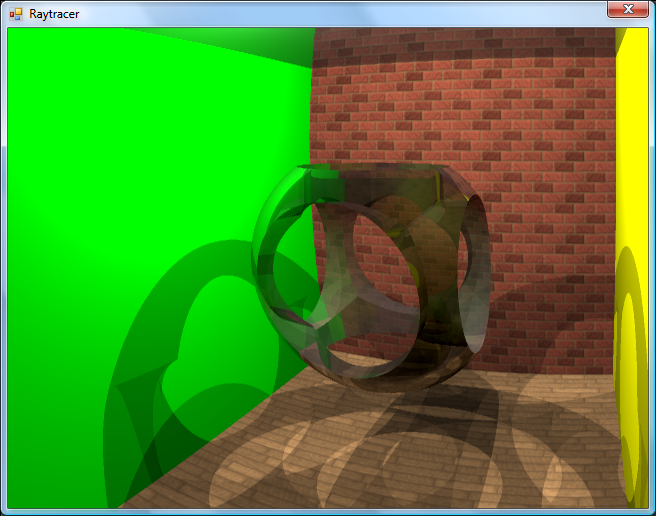
Cylinders and translucent surfaces
Tuesday, 29th April 2008
The first addition to the raytracer was a cylindrical surface, represented by two end points and a radius. In the two screenshots above, the cylinder is infinitely long - not very useful. However, by calculating the point on the cylinder's axis that is closest to the struck point on its surface you can work out how far along its axis you are, and from that whether you are between either of the cylinder's ends.
The cylinder can have its ends optionally capped. To add the caps, you can create plane that has a normal that points in the the direction of the cylinder's axis. If you collide with the plane, you can then calculate the distance between the point you struck on it and the end coordinate of the cylinder. If this distance is smaller than the radius of the cylinder, you've hit one of the end caps.
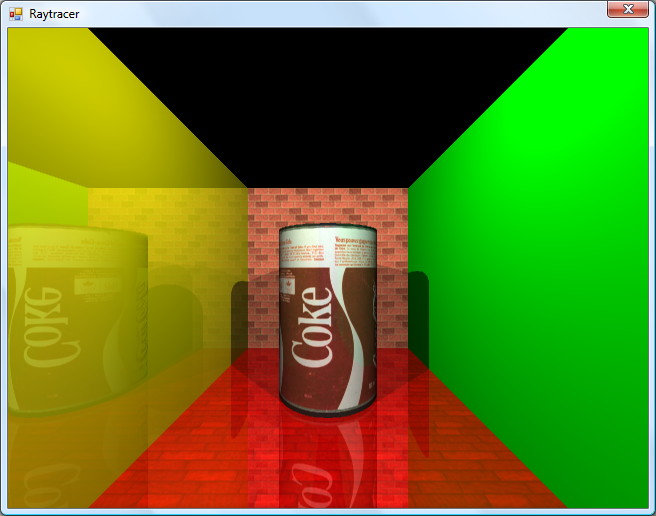
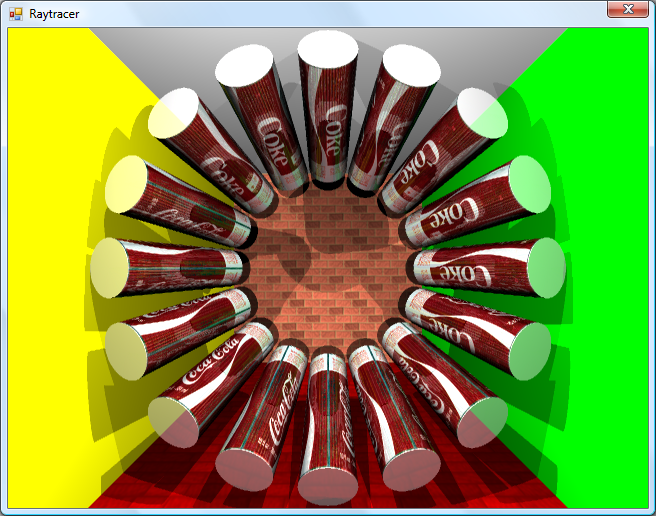
Texturing the cylinders proved rather difficult. The v component of the texture component can be calculated by working how far along the cylinder's axis you are - easy. However, to wrap a texture around the rotational axis of the cylinder is a bit more complicated. In the first screenshot, I simply used Math.Atan2(z,x) to get the angle, and hence texture coordinate - but this only works if the cylinder points along the y axis. If I had another vector that lay perpendicular to the cylinder's axis I could use the dot product to work out its angle, but I don't. The cross product could generate one, but I'd need another vector to cross the axis with... In the end, this post came to my rescue, and I managed to get it working for cylinders pointing along any axis - producing the second screenshot.
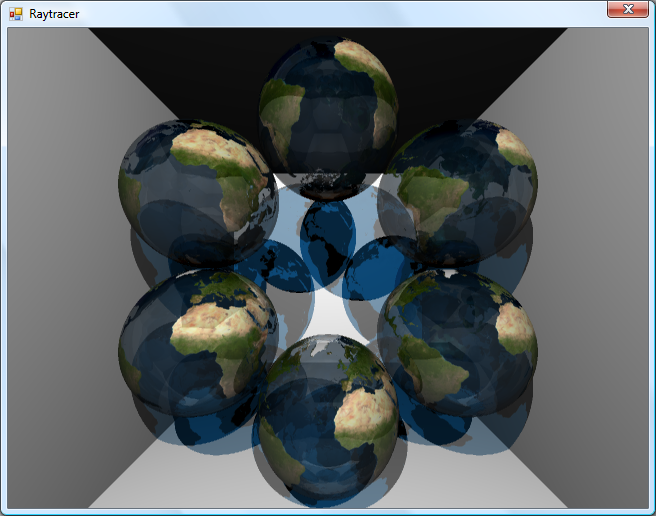
An addition I've wanted to make for a while was support for translucent surfaces.
This required a few changes to the structure of the raytracer. Previously, all methods for calculating ray intersections had to return a single Collision object, which contained a boolean flag specifying whether the collision was succesful. A translucent sphere would need to return two collision points - one as the ray enters the front and one as it leaves the back of its surface. To this end, all collision detection methods now return an array (empty or null if no collisions were made), and each collision has a flag indicating whether the collision was made by the ray entering the solid or leaving the solid (this is required, for example, to invert surface normals for correct shading).
Once the nearest struck point to the camera has been handled (including recursive reflection-handling code) it is checked to see if it's on a translucent surface. If so, the raytracer continues raytracing away from the camera, and blends the new result with the existing result based on its opacity. By stopping and starting again, one can adjust the direction of the ray - for example, to add a refraction effect (which I have not yet got working ).
One trick the above image misses is that it's still simply scaling down the intensity of the light by the opacity of the surface it passes through. It would look nicer if the light was coloured by the surface it passes through; so, in the above example, the white light shining through the blue water on the sphere should cast blue-tinted shadows.
Whilst it's far from being real-time, I can still make it dump out a sequence of frames to create a basic animation.

Fixed reflections and proper textures
Sunday, 27th April 2008
How long does that scene take to render?
Just over a minute, so not very good performance at all. I've made some changes since then (including multithreading) that drop it down to about 30 seconds.
There is definitely something wrong with the reflections.
I decided to rewrite the main raycasting code from scratch, after seeing results such as the above. I'm not sure where the speckles were coming from, nor why the reflections were being calculated incorrectly. The new code writes to regions of an array of integers (for 32-bit ARGB output), and is designed much more simply. By splitting the output buffer into two halves I can perform the raytracing in two threads, which makes much better use of modern dual-core CPUs.

Before and after rewrite.
A scene with lots of reflective spheres would seem like a good test. If you look at the reflections in the outer ring of spheres, they're quite different (and now appear to be correct) now, so whatever was wrong now seems to have been fixed.
A similar scene to the one at the top of this entry.
A scene with multiple reflective planes no longer appears to have the noise and reflection bugs that were clearly visible in the first screenshot in this entry.
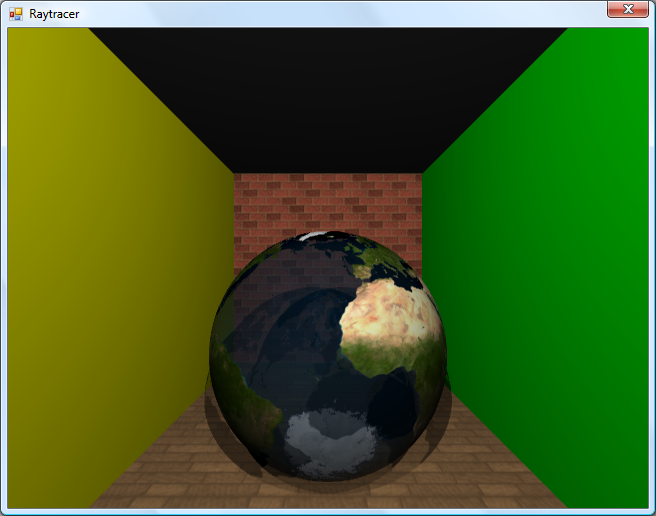
Textures would certainly make the objects look a bit more interesting, but I couldn't think of a simple way of aligning a texture to a surface. I decided that textures should be treated as simple 2D rectangles, and each material can now have a diffuse texture applied to it (which provides a method Colour GetColour(Vector2 coordinate) to read it). To attach the texture to the surface of an object the surface needs to implement ITexturable, which exposes the method Vector2 GetTextureCoordinate(Vector3 surfacePoint).
In short; it's the job of the surface class (such as the Sphere or Plane classes) to map the struck point to a texture coordinate. This is most easily handled with the sphere, which simply converts the cartesian coordinates of the stuck point to polar coordinates.
The small foreground sphere has an Earth texture.
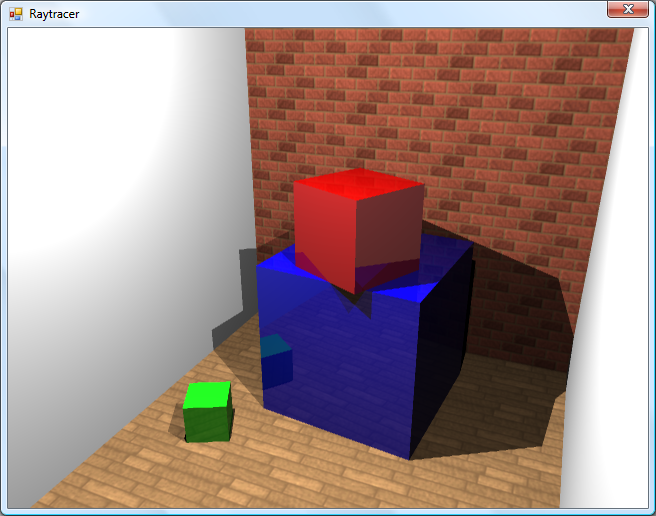
For planes, I thought that the easiest way of aligning the texture would be to declare two vectors - one that represents the texture's X axis and one that represents the texture's Y axis.
For example, take the white wall at the back of the room in the above screenshot. To align a texture parallel to its surface, one could set the texture's X axis vector to point right and its Y axis vector to point down. By changing the magnitude of these vectors the texture can be scaled.
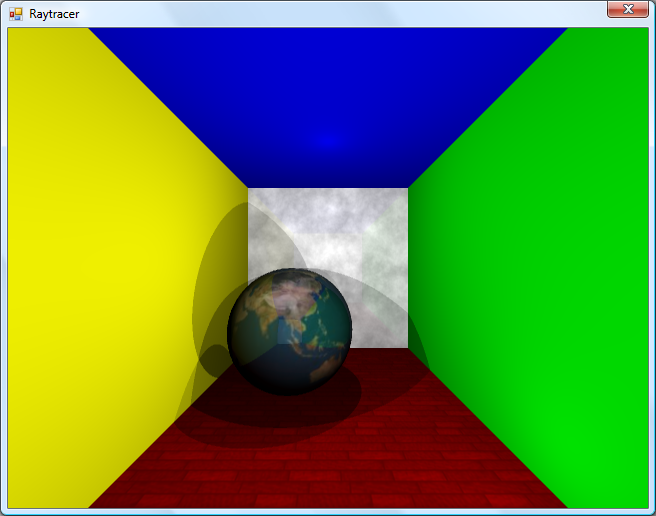
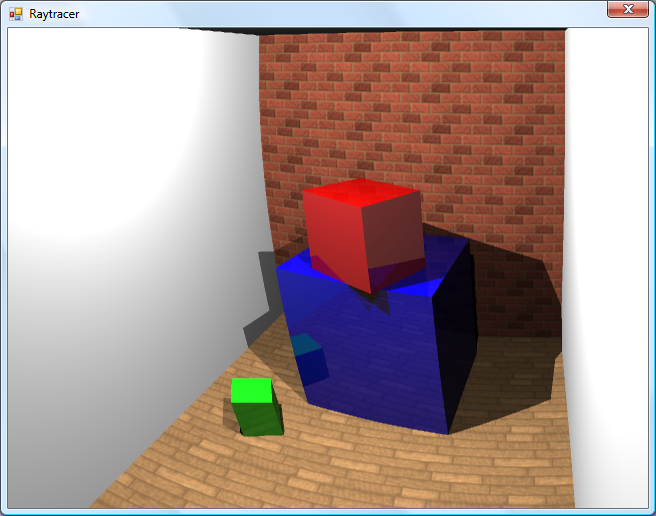
The back wall and floor are textured planes.
For the floor in the above image, the texture's X axis points right, and its Y axis points into the screen.
As the texture merely has to provide a method that takes in a texture coordinate and outputs a colour, this lets us declare simple procedural textures.
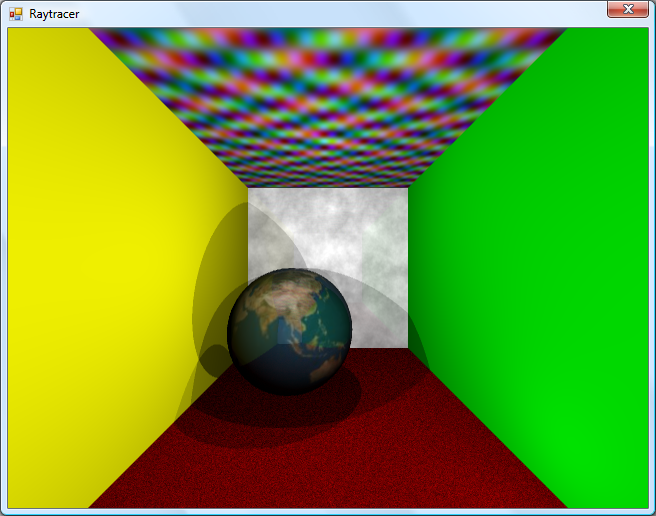
The floor and ceiling textures are procedurally generated.
The rather garish ceiling is declared like this in code:
this.Tracer.Objects.Add(new WorldObject() {
	Surface = new Plane(Vector3.Down, 10.0d) {
		TextureXAxis = Vector3.Right,
		TextureYAxis = Vector3.Forward,
	},
	Material = new Material() {
		Colour = Colour.White,
		Texture = new ProceduralTexture(
			p => new Colour(
				1.0d,
				(Math.Sin(p.X) * Math.Cos(p.Y * 2)) / 2.0d + 0.5d,
				(Math.Cos(p.X) * Math.Sin(p.Y * 3)) / 2.0d + 0.5d,
				(Math.Sin(p.X * 5) * Math.Sin(p.Y / 0.3d)) / 2.0d + 0.5d
			)
		),
	},
});
I think before I go any further I'm going to need to support a wider variety of surfaces than spheres and planes. Another limitation with the existing implementation is that only a single collision between a ray and a surface is reported, which limits what can be done with the renderer - for example, a glass sphere that refracts a ray that passes through it would need to report two collisions, one for the front of the sphere as the ray passes through and again one for the back as the ray leaves.
Raytraced shadows, reflections and chessboards
Saturday, 26th April 2008
I thought that better lighting might help the scene look a bit nicer, so decided removed all the existing lighting code (and reflection code, to make life easier) and tried to add some basic shadowing.

Simple shadowing test.
When a ray's intersection with the world is found, a ray is cast back from that point towards the light source. If this ray collides with another object on its return trip to the light, it's assumed that it's in the shade. In the above test, points in shade simply had their diffuse colour divided by two. This still looks rather flat, though.
As we know the surface normal of the surface that has been struck and the direction of the ray that's going between the struck point and the light source, we can work out how much the surface point is facing the light by taking the dot product of the two vectors. When multiplied by the surface's diffuse colour, this results in much smoother lighting.
Each colour value is multiplied by the dot product of the light beam and the surface normal.
That's better, but would look better with multiple lights. I start with a running total colour (initially black), then iterate over a list of lights. If the struck point is in line with the light, I add the surface diffuse colour multiplied by the light colour to this running total. This results in a much more interesting-looking scene.
Multiple lighting test - two white and one red light, all in different positions.
The edges of the surfaces are rather ugly and noisy, probably due to rounding errors. They are helped if I offset the pixel coordinates by 0.5 (so the rays are shot through the centre of pixels, rather than the top-left corner), but proper supersampling would probably look better.

Rendering with 4x supersampling.
It does, thankfully, at the expense of making the rendering time four times longer!
Reintroduction of reflective surface support.
I reintroduced the reflective surfaces - those reflections don't look quite right to me, but I can't really tell. More detail in the world might make it easier, so I'd like to add some sort of texturing.
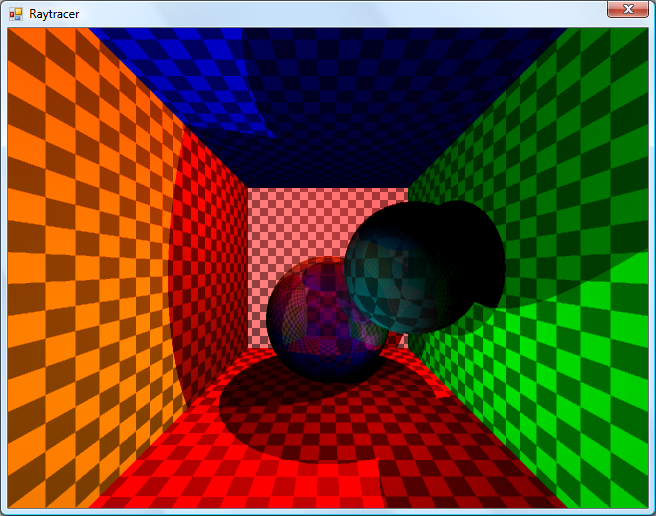
The obligatory chessboard texture.
I'm undecided how to handle mapping struck points to texture coordinates. For the moment I'm just XORing together the x, y and z components together - if the least significant bit of the result is zero, return half of the diffuse colour, otherwise return the full diffuse colour.
Raytracing - Beware of the coder colours
Friday, 25th April 2008
As much as I claim to be interested in software rendering (be it as part of a game engine or as an effect in a demo), I've never actually written a raytracer. Having written some basic vector and plane arithmetic code for physics in the XNA Quake project, I thought I'd give it a stab.
No apologies made for the coder colours.
Currently, the world is just a simple List<WorldObject>, where each WorldObject has a Surface and Material property. The Surface has to implement IRayCollidable, which lets me call GetCollision(Ray) on it to find out where a ray strikes it (if at all), returning the point of collision and the normal of the surface that was hit. Currently, there are only two types that implement this interface - Plane and Sphere - but they'll do for testing.
For each ray, I iterate over the list of items in the world and grab the collision point. If a collision is made, I add the details to another list (including the total length of the ray at this point) and, if the surface's material is marked as reflective (ie, has a Reflectivity property greater than zero) I reflect the ray against the surface normal and cast again (recursively, so it's very easy to cause a StackOverflowException when two shiny surfaces are parallel to eachother).
Once I have a record of all the collisions, I sort them in back-to-front order based on the length of the ray, then iterate over them, blending the colours as I go (so a reflection in a green surface ends up being green tinted).

Marginally less garish.
To try and get a better sense of the 3D scene, I added a simple directional light. This simply takes the dot product of the hit surface normal and the light's direction, then multiplies it by the material's diffuse colour. The above screenshot has a light pointing directly away from the camera, hence the upper and left walls are completely black (however, the bottom and right walls, being reflective, are partially visible).
I've trying to do this without looking up the correct way of doing it, experimenting as I go - mainly in an attempt to try and patch up my rather poor handle on 3D maths and collision detection.
SaveStates and Key Names
Monday, 31st March 2008
It's a good feeling when issue 1 is finally marked as Fixed - in this case it was another interrupt-related bug. The IFF1 flag was being used to mask non-maskable interrupts; I don't think it should and it hasn't seem to have broken anything just yet by making non-maskable interrupts truly non-maskable.
I have also changed the savestate format to something that will be a little more backwards compatible rather than a plain BinaryFormatter dump of the entire emulator state. The data is now saved in what is basically an INI file with C#-style attributes and CSS-style url() syntax for binary data.
[Type(BeeDevelopment.Sega8Bit.Hardware.VideoDisplayProcessor)]
VideoRam=Dump(Video\VideoRam.bin)
Address=49165
WaitingForSecond=False
AccessMode=ColourRamWrite
ReadBuffer=32
Registers=Dump(Video\Registers.bin)
System=Ntsc
SupportsMode4=True
; ... snip ...
Other changes include a faked fullscreen mode (ie, a maximised borderless window) and an option to retain the aspect ratio of the game, so games no longer appear stretched on widescreen monitors. The sound emulation is a bit better, but still a little noisy in certain games with spurious beeps or buzzes.
One minor problem was on the key configuration control panel. Converting members of the Keys enumeration into displayable strings can be done via .ToString(), but this results in names that do not match the user's keyboard layout (such as OemQuestion for /, OemTilde for # and even Oemcomma for , - note the lowercase c, all on a UK keyboard).
With a prod in the right direction from jpetrie, here's a snippet that can be used to convert Keys into friendly key name strings:
#region Converting Keys into human-readable strings.

/// <summary>
/// Converts a <see cref="Keys"/> value into a human-readable string describing the key.
/// </summary>
/// <param name="key">The <see cref="Keys"/> to convert.</param>
/// <returns>A human-readable string describing the key.</returns>
public static string GetKeyName(Keys key) {

	// Convert the virtual key code into a scancode (as required by GetKeyNameText).
	int Scancode = MapVirtualKey((int)key, MapVirtualKeyMode.MAPVK_VK_TO_VSC);

	// If that returned 0 (failure) just use the value returned by Keys.ToString().
	if (Scancode == 0) return key.ToString();

	// Certain keys end up being mapped to the number pad by the above function,
	// as their virtual key can be generated by the number pad too.
	// If it's one of the known number-pad duplicates, set the extended bit:
	switch (key) {
		case Keys.Insert:
		case Keys.Delete:
		case Keys.Home:
		case Keys.End:
		case Keys.PageUp:
		case Keys.PageDown:
		case Keys.Left:
		case Keys.Right:
		case Keys.Up:
		case Keys.Down:
		case Keys.NumLock:
			Scancode |= 0x100;
			break;
	}

	// Perform the conversion:
	StringBuilder KeyName = new StringBuilder("".PadRight(32));
	if (GetKeyNameText((Scancode << 16), KeyName, KeyName.Length) != 0) {
		return KeyName.ToString();
	} else {
		return key.ToString();
	}
}

/// <summary>
/// Retrieves a string that represents the name of a key.
/// </summary>
/// <param name="lParam">Specifies the second parameter of the keyboard message (such as <c>WM_KEYDOWN</c>) to be processed.</param>
/// <param name="lpString">Pointer to a buffer that will receive the key name.</param>
/// <param name="size">Specifies the maximum length, in TCHAR, of the key name, including the terminating null character. (This parameter should be equal to the size of the buffer pointed to by the lpString parameter).</param>
/// <returns>The length of the returned string.</returns>
[DllImport("user32.dll")]
static extern int GetKeyNameText(int lParam, StringBuilder lpString, int size);

/// <summary>
/// Translates (maps) a virtual-key code into a scan code or character value, or translates a scan code into a virtual-key code.
/// </summary>
/// <param name="uCode">Specifies the virtual-key code or scan code for a key. How this value is interpreted depends on the value of the <paramref name="uMapType"/> parameter.</param>
/// <param name="uMapType">Specifies the translation to perform. The value of this parameter depends on the value of the <paramref name="uCode"/> parameter.</param>
/// <returns>Either a scan code, a virtual-key code, or a character value, depending on the value of <paramref="uCode"/> and <paramref="uMapType"/>. If there is no translation, the return value is zero.</returns>
[DllImport("user32.dll")]
static extern int MapVirtualKey(int uCode, MapVirtualKeyMode uMapType);

enum MapVirtualKeyMode {
	/// <summary>uCode is a virtual-key code and is translated into a scan code. If it is a virtual-key code that does not distinguish between left- and right-hand keys, the left-hand scan code is returned. If there is no translation, the function returns 0.</summary>
	MAPVK_VK_TO_VSC = 0,
	/// <summary>uCode is a scan code and is translated into a virtual-key code that does not distinguish between left- and right-hand keys. If there is no translation, the function returns 0.</summary>
	MAPVK_VSC_TO_VK = 1,
	/// <summary>uCode is a virtual-key code and is translated into an unshifted character value in the low-order word of the return value. Dead keys (diacritics) are indicated by setting the top bit of the return value. If there is no translation, the function returns 0.</summary>
	MAPVK_VK_TO_CHAR = 2,
	/// <summary>uCode is a scan code and is translated into a virtual-key code that distinguishes between left- and right-hand keys. If there is no translation, the function returns 0.</summary>
	MAPVK_VSC_TO_VK_EX = 3,
	MAPVK_VK_TO_VSC_EX = 4,
}

#endregion
It uses P/Invoke and the Win32 API so is only suitable for use on Windows.

Fun with IThumbnailProvider
Friday, 28th March 2008
Note: I have been informed that the code below no longer works in Windows 7 due to changes in the way IThumbnailProvider operates. It is recommended that you use unmanaged code instead of the managed solution presented below.
I have started releasing Cogwheel binaries on its project page, so if you'd like a look at the project but can't be bothered to check out and build the source yourself you can now give it a whirl.
One of the newer additions is a savestate mechanism; this is a very lazy bit of code on my behalf as all it does currently is serialise the entire emulator to a file using the BinaryFormatter. This resulted in savestates weighing in at about 6MB; by marking certain private fields (such as look-up tables in the Z80 emulator) as [NonSerialized] it was down to 2MB. To squash it down to the current ~250KB size the savestate is compressed using the zip file classes I've written to handle loading ROMs from zips.
Whilst this is going to change soon (I'm currently working this on an simple INI file serialiser, so the savestate files will be compatible with later releases of the software) I decided to experiment with the idea of dumping extra data into the savestate - namely, a screenshot.
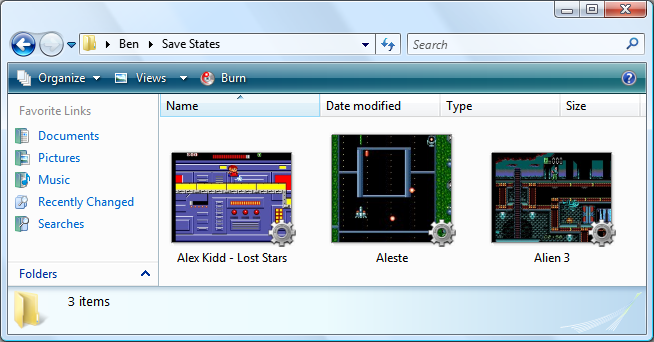
The screenshot is simply saved as Screenshot.png in the root of the savestate's zip archive. Creating a thumbnailer is extremely easy under Vista, and as the thumbnailer runs out-of-process you can use .NET code! Here's a quick and dirty run-down of how to make them if you decide to write one yourself.
Setting up the project
Create a new class library project in Visual Studio, then go switch to its project properties editor. On the Application tab, set Target Framework to something sensible (I currently try and keep everything at .NET 2.0 level), then click on the Assembly Information button and tick the Make assembly COM-Visible box.
Finally, move to the Signing tab, and tick the box marked Sign the assembly. From the drop-down box, pick New, which will create a new key file and add it to the project (this is required later for COM registration).
Add the COM interface wrappers
This is a simple copy and paste job! Just bung this in a source file somewhere:
using System;
using System.Runtime.InteropServices;
using System.Runtime.InteropServices.ComTypes;

namespace Thumbnailer {

	/// <summary>
	/// Defines the format of a bitmap returned by an <see cref="IThumbnailProvider"/>.
	/// </summary>
	public enum WTS_ALPHATYPE {
		/// <summary>
		/// The bitmap is an unknown format. The Shell tries nonetheless to detect whether the image has an alpha channel.
		/// </summary>
		WTSAT_UNKNOWN = 0,
		/// <summary>
		/// The bitmap is an RGB image without alpha. The alpha channel is invalid and the Shell ignores it.
		/// </summary>
		WTSAT_RGB = 1,
		/// <summary>
		/// The bitmap is an ARGB image with a valid alpha channel.
		/// </summary>
		WTSAT_ARGB = 2,
	}

	/// <summary>
	/// Exposes a method for getting a thumbnail image.
	/// </summary>
	[ComVisible(true), Guid("e357fccd-a995-4576-b01f-234630154e96"), InterfaceType(ComInterfaceType.InterfaceIsIUnknown)]
	public interface IThumbnailProvider {
		/// <summary>
		/// Retrieves a thumbnail image and alpha type.
		/// </summary>
		/// <param name="cx">The maximum thumbnail size, in pixels. The Shell draws the returned bitmap at this size or smaller. The returned bitmap should fit into a square of width and height <paramref name="cx"/>, though it does not need to be a square image. The Shell scales the bitmap to render at lower sizes. For example, if the image has a 6:4 aspect ratio, then the returned bitmap should also have a 6:4 aspect ratio.</param>
		/// <param name="hBitmap">When this method returns, contains a pointer to the thumbnail image handle. The image must be a device-independent bitmap (DIB) section and 32 bits per pixel. The Shell scales down the bitmap if its width or height is larger than the size specified by cx. The Shell always respects the aspect ratio and never scales a bitmap larger than its original size.</param>
		/// <param name="bitmapType">Specifies the format of the output bitmap.</param>
		void GetThumbnail(int cx, out IntPtr hBitmap, out WTS_ALPHATYPE bitmapType);
	}

	/// <summary>
	/// Provides a method used to initialize a handler, such as a property handler, thumbnail provider, or preview handler, with a file stream.
	/// </summary>
	[ComVisible(true), Guid("b824b49d-22ac-4161-ac8a-9916e8fa3f7f"), InterfaceType(ComInterfaceType.InterfaceIsIUnknown)]
	public interface IInitializeWithStream {
		/// <summary>
		/// Initializes a handler with a file stream.
		/// </summary>
		/// <param name="stream">Pointer to an <see cref="IStream"/> interface that represents the file stream source.</param>
		/// <param name="grfMode">Indicates the access mode for <paramref name="stream"/>.</param>
		void Initialize(IStream stream, int grfMode);
	}

}
(You may wish to set the namespace to something more appropriate). As you can see, most of that source file is documentation.
Create your thumbnailer class
First thing you'll need to do here is to generate a GUID for your thumbnailer; this is so that when you register your thumbnailer Windows will know which COM object to create an instance of which it can then call to generate a thumbnail (the GUID of your thumbnailer is attached to the extension of the file via standard file associations - more on that later).
Your thumbnailer class should implement two interfaces; IThumbnailProvider (obviously!) and IInitializeWithStream. Here's a skeleton class for the thumbnailer:
using System;
using System.Drawing;
using System.Drawing.Drawing2D;
using System.IO;
using System.Runtime.InteropServices;
using System.Runtime.InteropServices.ComTypes;

namespace Thumbnailer {

	[ComVisible(true), ClassInterface(ClassInterfaceType.None)]
	[ProgId("YourApp.ThumbnailProvider"), Guid("YOUR-GUID-IN-HERE")]
	public class ThumbnailProvider : IThumbnailProvider, IInitializeWithStream {

		#region IInitializeWithStream

		private IStream BaseStream { get; set; }

		public void Initialize(IStream stream, int grfMode) {
			this.BaseStream = stream;
		}

		#endregion

		#region IThumbnailProvider

		public void GetThumbnail(int cx, out IntPtr hBitmap, out WTS_ALPHATYPE bitmapType) {

			hBitmap = IntPtr.Zero;
			bitmapType = WTS_ALPHATYPE.WTSAT_UNKNOWN;

			try {

				// Thumbnailer code in here...

			} catch { } // A dirty cop-out.

		}

		#endregion
	}
}
You will probably want to set the ProgId to something meaningful, and make sure you set the GUID to the one you just generated.
What will happen is that Windows will first initialise your object by calling IInitializeWithStream.Initialize(), passing in an IStream. The above implementation stores the IStream in a member property for future reference.
Windows will then call IThumbnailProvider.GetThumbnail(). cx is the maximum size of the thumbnail (width and height) you should return; Windows will scale your thumbnail down if you return one that is too large. Do not scale your thumbnail up to match this value; it is perfectly valid to return one that is smaller than the requested value. Also; do not scale your thumbnail up to a square: you should return it at the same aspect ratio of the source image.
For the moment, and for the sake of testing, here's a snippet that will create a bright red thumbnail using GDI+:
using (var Thumbnail = new Bitmap(cx, cx)) {
	using (var G = Graphics.FromImage(Thumbnail)) {
		G.Clear(Color.Red);
	}
	hBitmap = Thumbnail.GetHbitmap();
}
Registration
If you compile your class library at this point you should end up with a single DLL. You need to register this DLL using the command-line tool RegAsm.exe that comes with the .NET framework.
Open an elevated command prompt (you need admin rights for this bit) and set the working directory to the output directory of your DLL. Now, invoke the following command:
%windir%\Microsoft.NET\Framework\v2.0.50727\RegAsm /codebase YourThumbnailer.dllThat's half of the battle; the last bit boils down to conventional file associations.
Run the registry editor, and open the HKEY_CLASSES_ROOT key. You will see a list of keys representing file extensions; find one (or create a new one) to match the extension that you wish to attach your thumbnailer to. Under that create a new key named shellex, and under that create another key named {e357fccd-a995-4576-b01f-234630154e96}. Set its (Default) value to {YOUR-GUID-IN-HERE} - yes, the GUID you created earlier. That should look something like this:
- HKEY_CLASSES_ROOT
- .yourextension
- shellex
- {e357fccd-a995-4576-b01f-234630154e96} = {YOUR-GUID-IN-HERE}
- shellex
- .yourextension
That's it! You may need to log out then in again (and/or reboot and/or just kill all Explorer instances and restart them) for Explorer to catch on if nothing seems to be working.
A final note: IStream to Stream
The only final hitch is that IStream is not the same as our beloved .NET Stream. I use the following snippet to dump all of the contents of an IStream into an array of bytes (which can then be converted to a stream using new MemoryStream(byte[]) if need be).
private byte[] GetStreamContents() {

	if (this.BaseStream == null) return null;

	System.Runtime.InteropServices.ComTypes.STATSTG statData;
	this.BaseStream.Stat(out statData, 1);

	byte[] Result = new byte[statData.cbSize];

	IntPtr P = Marshal.AllocCoTaskMem(Marshal.SizeOf(typeof(UInt64)));
	try {
		this.BaseStream.Read(Result, Result.Length, P);
	} finally {
		Marshal.FreeCoTaskMem(P);
	}
	return Result;
}
This, naturally, is not a good idea if you're thumbnailing very large files, as it dumps the entire thing into memory!
For more information, take a look at MSDN: Thumbnail Providers, which includes useful information (including how to change the overlay icon in the bottom-right of your thumbnails or the adornments).
The COM wrappers and GetStreamContents() snippet are based on this uberdemo article.
Finally, another screenshot; you can now load IPS patch files directly into Cogwheel using the advanced ROM load dialog - which can be useful for translations.
Sound, at long last.
Friday, 7th March 2008
I have finally got around to adding sound to Cogwheel using Ianier Munoz's waveOut API wrapper.

The technique used is fairly simple. I start with a sound buffer that is a multiple a number of video frames in length (1/60th of a second is one frame) - four seems a good number. This buffer needs to be periodically topped up with sound samples (every four frames in the above example).
I run the emulator for one frame, then generate a frame's worth of audio. I add these samples to a queue. The sound callback then periodically dequeues these samples and appends them to its buffer.
// This is called once every video frame.
// 735 samples at 44100Hz = 1/60th second.
// (Multiplied by two for stereo).
this.Emulator.RunFrame();
short[] Buffer = new short[735 * 2];
this.Emulator.Sound.CreateSamples(Buffer);
this.GeneratedSoundSamples.Enqueue(Buffer);
The important thing is that the sound is always generated after the video frame (and thus after any hardware writes). I log writes to the sound hardware over the period of a frame (along with the number of CPU cycles that have elapsed), then space them out when generating the sound samples so that they play in synch. My previous problems were caused by the sound emulation trying to "look ahead" past what had already been generated.
However, there is a potential problem with this - as the video and sound emulation are not locked in synch with eachother, there are two cases that could crop up:
- The emulator runs faster than 60Hz, generating too many sound samples.
- The emulator runs slower than 60Hz, not generating enough sound samples.
The first is the easiest to deal with. In most instances you'd want a couple of extra frames of sound data left in the queue after topping up the sound buffer, in case in the next period not enough are generated. However, if I notice that the queue is longer than entire sound buffer after topping it up, I clear it completely. This would make the sound a little choppy, but so far this hasn't happened in my tests.
The latter is a little more complex. If I just left it the sound buffer would have gaps in it, causing noticable pops (this I have noticed in some of the more processor-intensive games). To cover up the gaps, I generate enough extra frames of sound data to fill the gap. As no sound hardware writes are made, this has the effect of extending any tones that were currently playing, so the sound will play back slightly out of time. However, slightly out of time by a few 60ths of a second is a better solution than a pop.
// This is called when the sound buffer needs topping up.
// That's about once every four frames.
private void SoundBufferFiller(IntPtr data, int size) {

	// Temporary buffer to store the generated samples.
	short[] Generated = new short[size / 2];

	for (int i = 0; i < Generated.Length; i += 735 * 2) {
		if (this.GeneratedSoundSamples.Count > 0) {
			// We've already queued up some sound samples.
			Array.Copy(this.GeneratedSoundSamples.Dequeue(), 0, Generated, i, 735 * 2);
		} else {
			// Erk, we're out of samples... force generate some more and use those instead.
			// (This avoids popping).
			short[] Temp = new short[735 * 2];
			this.Emulator.Sound.CreateSamples(Temp);
			Array.Copy(Temp, 0, Generated, i, 735 * 2);
		}
	}

	// Copy to the sound buffer.
	Marshal.Copy(Generated, 0, data, size / 2);

	// If too many samples are being generated (FPS > 60Hz) then make sure it doesn't go out of control.
	while (this.GeneratedSoundSamples.Count > this.SoundBufferSizeInFrames) this.GeneratedSoundSamples.Dequeue();

}
PlayStation Controllers
Monday, 4th February 2008
PlayStation controllers are relatively comfortable, and I have a number of them knocking about.
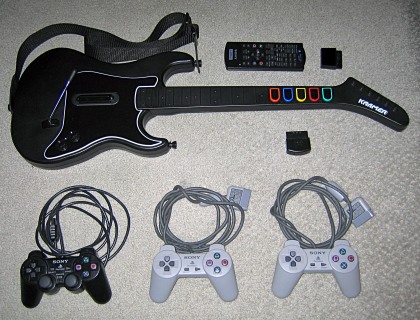
From top to bottom - PS2 IR remote control and receiver; Guitar Hero wireless Kramer and receiver; black PS2 DualShock 2 analogue joypad; a pair of grey standard PS1 digital joypads.
As I've learned in the past, a decent gamepad can help with certain games. Of course, what's much more fun than playing the games is trying to work out how these controllers work.
The byte-level protocol is very simple; the PlayStation pulls a select line low (used to grab the attention of the controller) then pulses the clock eight times, writing a bit at a time onto one line and reading another bit at a time from another. This means that the controller and PlayStation end up sending and receiving a byte simultaneously. Finally, the PlayStation checks to see if controller pulls the acknowledge line low to indicate that it received the data; if no acknowledgement is received it assumes that there is no controller on the port it is currently accessing.
All electrical connections are unidirectional, and so a controller can be easily connected to a standard PC's parallel port. There are a number of diagrams floating around the internet using similar pin connections, so I followed one of those.
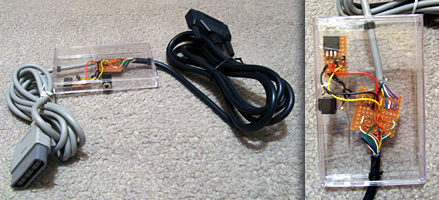
I cut up a pound-shop parallel cable for the PC end and a controller extension cable for the PlayStation end. PlayStation controllers require power; a lot of diagrams I've seen refer to a 9V and 5V supply, some 7.6V and 3.3V. A voltmeter informs me that it's the latter option. Rather than try and draw power from the parallel port, I'm using a generic power supply set to 7.5V. To derive the 3.3V I'm using a 5V regulator followed by two 1A rectifier diodes in series - the diodes provide a voltage drop of 0.7V across each, resulting 3.6V.
I wrote an application in C# that attempted to swap bytes back and forth between the PC and the controller, and was getting good results. I was not, however, having any luck polling the acknowledgement line. It didn't appear to ever go low - my guess was that the program simply couldn't poll the parallel port rapidly enough. Not that this is a slur on C#, of course, but to access the parallel port in the first place I need to use an unmanaged library.
The solution was therefore to write an unmanaged library myself that would handle the PlayStation protocol side of things, which I could then wrap up and add nice functionality to via a C# managed library.
#include "Windows.h"

// inpout32.dll function declarations.
short Inp32(short portAddress);
void Out32(short portAddress, short data);

/// <summary>Gets the state of the data line.</summary>
/// <param name="portAddress">Base address of the parallel port.</param>
/// <returns>The state of the data line.</returns>
extern "C" __declspec(dllexport) bool GetData(short portAddress) {
	return (Inp32(portAddress + 1) & (1 << 6)) != 0;
}

/// <summary>Gets the state of the acknowledge line.</summary>
/// <param name="portAddress">Base address of the parallel port.</param>
/// <returns>The state of the data line.</returns>
extern "C" __declspec(dllexport) bool GetAcknowledge(short portAddress) {
	return (Inp32(portAddress + 1) & (1 << 5)) != 0;
}

/// <summary>Sets the state of the command line.</summary>
/// <param name="portAddress">Base address of the parallel port.</param>
/// <param name="state">The state to set the command line to.</param>
extern "C" __declspec(dllexport) void SetCommand(short portAddress, bool state) {
	Out32(portAddress, (Inp32(portAddress) & ~0x01) | (state ? 0x01 : 0x00));
}

/// <summary>Sets the state of the select line.</summary>
/// <param name="portAddress">Base address of the parallel port.</param>
/// <param name="state">The state to set the select line to.</param>
extern "C" __declspec(dllexport) void SetSelect(short portAddress, bool state) {
	Out32(portAddress, (Inp32(portAddress) & ~0x02) | (state ? 0x02 : 0x00));
}

/// <summary>Sets the state of the clock line.</summary>
/// <param name="portAddress">Base address of the parallel port.</param>
/// <param name="state">The state to set the clock line to.</param>
extern "C" __declspec(dllexport) void SetClock(short portAddress, bool state) {
	Out32(portAddress, (Inp32(portAddress) & ~0x04) | (state ? 0x04 : 0x00));
}

/// <summary>Begins a data transfer by pulling select low.</summary>
/// <param name="portAddress">Base address of the parallel port.</param>
extern "C" __declspec(dllexport) void BeginTransfer(short portAddress) {
	SetSelect(portAddress, false);
}

/// <summary>Ends a data transfer by releasing select high.</summary>
/// <param name="portAddress">Base address of the parallel port.</param>
extern "C" __declspec(dllexport) void EndTransfer(short portAddress) {
	SetSelect(portAddress, true);
}


/// <summary>Exchanges a byte between the PlayStation controller and the PC.</summary>
/// <param name="portAddress">Base address of the parallel port.</param>
/// <param name="data">The data to exchange.</param>
/// <returns>True if the transmission was acknowledged, false if it timed out.</returns>
extern "C" __declspec(dllexport) bool ExchangeByte(short portAddress, unsigned char* data) {

	DWORD TimeoutStart = GetTickCount();

	for (int i = 0; i < 8; ++i) {
		SetClock(portAddress, false);
		SetCommand(portAddress, (*data & (1 << i)) != 0);
		SetClock(portAddress, true);
		if (GetData(portAddress)) {
			*data |= (1 << i);
		} else {
			*data &= ~(1 << i);
		}
	}

	while (GetAcknowledge(portAddress)) {
		if ((GetTickCount() - TimeoutStart) > 10) return false;
	}

	while (!GetAcknowledge(portAddress)) {
		if ((GetTickCount() - TimeoutStart) > 10) return false;
	}

	return true;

}

/// <summary>Exchanges a block of data between the PlayStation controller and the PC.</summary>
/// <param name="portAddress">Base address of the parallel port.</param>
/// <param name="command">The command byte to send.</param>
/// <param name="data">The data to exchange (input and output).</param>
/// <param name="numberOfElements">The size of data in bytes.</param>
/// <returns>The size of the received packet.</returns>
extern "C" __declspec(dllexport) int SendPacket(short portAddress, unsigned char* command, unsigned char* data, int numberOfElements) {

	// Start by sending 0x01.
	unsigned char ToExchange = 0x01;
	if (!ExchangeByte(portAddress, &ToExchange)) return 0;

	// Next send the command byte.
	// Controller will respond with packet size and mode.
	if (!ExchangeByte(portAddress, command)) return 0;

	// Check for end-of-header.
	ToExchange = 0x00;
	if (!ExchangeByte(portAddress, &ToExchange) || ToExchange != 0x5A) return 0;

	// Fix the "numberOfElements" to only try and fetch the number of bytes that are in the packet.
	numberOfElements = min(numberOfElements, (*command & 0xF) * 2);

	for (int i = 0; i < numberOfElements; ++i) {
		if (!ExchangeByte(portAddress, &data[i])) return i + 1;
	}

	return numberOfElements;
}
I'm not much of a C++ programmer, so I hope the above isn't too offensive.
Polling a standard digital joypad or a dual analogue is pretty straightforwards - send 0x42 to the device, and it'll return the status of each button as a bitfield 2 bytes in length. If the controller is in analogue mode, it'll then go on to return a further four bytes; one byte per axis, two axes per joystick.
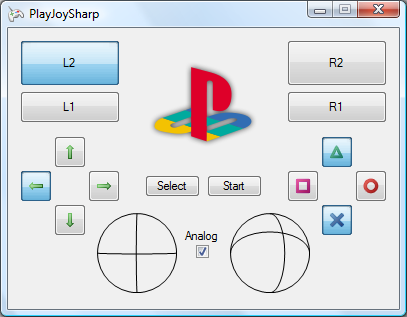
Standard disclaimer applies; if you're going to hook anything up to your PC, I cannot be held responsible for any damages incurred. Be careful!
I'm still having some problems with data transfer. The controller doesn't always send back enough data (least reliable with a DualShock 2); this could be because I'm running its clock too fast. Introducing delays doesn't seem to help. This is most noticable in the demo program when a DualShock 2 is used in analogue mode; the analogue light flickers on and off.
I also haven't successfully managed to get the DualShock 2 to enter escape mode - this mode is used to access some of the more exotic commands, including commands to control the force feedback motors or to append extra data to the packet sent back when the controller is polled, such as the status of the analogue buttons.
Scripting
Wednesday, 21st November 2007
Scripting with .NET is unbelievably easy. 
I wanted to add scripting support to Brass, and have added it using .NET's excellent powers of reflection and its System.CodeDom.Compiler namespace.
The first thing I need to do is find out which language the source script is written in. I use the extension to check for this.
string ScriptFile = ...; // Name of main script file to compile.

CodeDomProvider Provider = null;

// Get the extension (eg "cs")
string Extension = Path.GetExtension(ScriptFile).ToLowerInvariant();
if (Extension.Length > 0 && Extension[0] == '.') Extension = Extension.Substring(1);

// Hunt through all available compilers and dig out one with a matching extension.
foreach (CompilerInfo Info in CodeDomProvider.GetAllCompilerInfo()) {
	if (Info.IsCodeDomProviderTypeValid) {
		CodeDomProvider TestProvider = Info.CreateProvider();
		if (TestProvider.FileExtension.ToLowerInvariant() == Extension) {
			Provider = TestProvider;
			break;
		}
	}
}

if (Provider == null) throw new CompilerExpection(source, "Script language not supported.");
Now that we have a compiler, we just set some settings, add some references, then compile the source files:
string[] ScriptFiles = ...; // Array of source file name(s) to compile.

// Compiler settings:
CompilerParameters Parameters = new CompilerParameters();
Parameters.GenerateExecutable = false; // Class lib, not .exe
Parameters.GenerateInMemory = true;

// Add references:
Parameters.ReferencedAssemblies.Add("System.dll");
Parameters.ReferencedAssemblies.Add("Brass.exe");

// Compile!
CompilerResults Results = Provider.CompileAssemblyFromFile(Parameters, ScriptFiles);
And that's it! In my case I now pass any errors back up to the assembler, and exit if there were any errors:
// Errors?
foreach (CompilerError Error in Results.Errors) {
	Compiler.NotificationEventArgs Notification = new Compiler.NotificationEventArgs(compiler, Error.ErrorText, Error.FileName, Error.Line);
	if (Error.IsWarning) {
		compiler.OnWarningRaised(Notification);
	} else {
		compiler.OnErrorRaised(Notification);
	}
}

// Do nothing if there were errors.
if (Results.Errors.HasErrors) return;
Now the task is passed on to reflection; I go through the compiled assembly, hunt down methods and wrap them up for use as native Brass functions and/or directives.
// Grab the public classes from the script.
foreach (Type T in Results.CompiledAssembly.GetExportedTypes()) {
    // ...
}
I've used this technique in the release of my PAL demo; a C# script file is used to encode an image to the 18×304 resolution and format required by the routine.
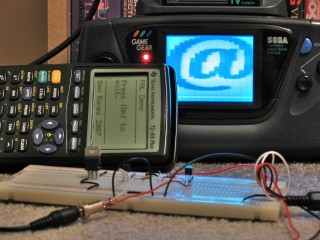
Brass 3
Tuesday, 2nd October 2007
Quake isn't dead, but I've shifted my concentration to trying to get Brass 3 (the assembler project) out.
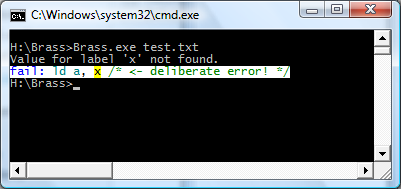
Brass 2 didn't really work, but I've taken a lot of its ideas - namely the plugin system - and kept some of the simplicity from Brass 1. The result works, and is easy to extend and maintain. Last night I got it to compile all of the programs I used for testing Brass 1 against TASM successfully.
I'm taking advantage of .NET's excellent reflection capabilities; one such example is marking plugin functions with attributes for documentation purposes, meaning that all you need to get Brass documentation is to drop your plugin collection assemblies (DLLs) into the Brass directory then open the help viewer app.
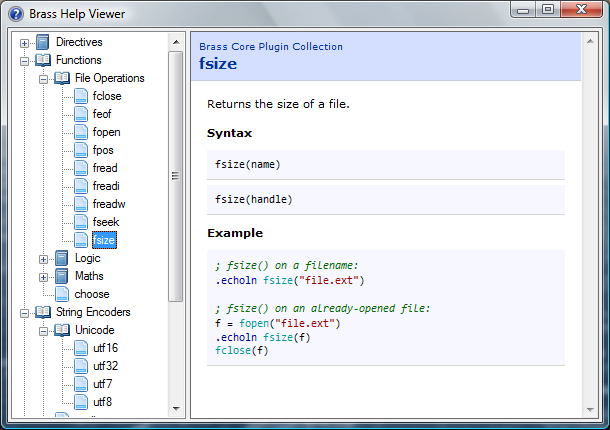
The source code examples are embedded as text, but compiled by the viewer (and thus syntax-highlighted) so you can click on directives or functions and it'll jump to their definitions automatically.
Native function support and a much-improved parser means that complex control structures can be built up, like:
file = fopen("somefile.txt")

#while !feof(file)
    .db fread(file)
#loop

fclose(file)
The compiler invokes the plugins, and the plugins talk back to the compiler ("remember your current position", "OK, we need to loop, so go back to this position", "this loop fails, so switch yourself off until you hit the #loop directive again").
The compiler natively works with project files (rather than some horrible command-line syntax) which specify which plugins to load, which include directories to search and so on and so forth. There are a number of different plugin classes:
- IAssembler - CPU-specific assembler.
- IDirective - assembler directive.
- IFunction - functions like abs() or fopen().
- IOutputWriter - writes the object file to disk (eg raw, intel hex, TI-83+ .8xp).
- IOutputModifier - modifies each output byte (eg "unsquishing" bytes to two ASCII charcters for the TI-83).
- IStringEncoder - handles the conversion of strings to byte[] arrays (ascii, utf8, arcane mappings for strange OS).
Unlike Brass 2, though, I actually have working output from this, so hopefully it'll get released!
As a bonus, to compare outputs between this and TASM (to check it was assembling properly) I hacked together a binary diff tool from the algorithm on Wikipedia (with the recursion removed) - it's not great, but it's been useful to me.
using System;
using System.Collections.Generic;
using System.Text;
using System.IO;

namespace Differ {
	class Program {
		static void Main(string[] args) {

			// Prompt syntax:
			if (args.Length != 2) {
				Console.WriteLine("Usage: Differ <file1> <file2>");
				return;
			}

			// Load both files into byte arrays (sloppy, but whatever).
			byte[][] Data = new byte[2][];

			for (int i = 0; i < Data.Length; ++i) {
				try {
					byte[] Source = File.ReadAllBytes(args[i]);
					Data[i] = new byte[Source.Length + 1];
					Array.Copy(Source, 0, Data[i], 1, Source.Length);
				} catch (Exception ex) {
					Console.WriteLine("File load error: " + args[i] + " (" + ex.Message + ")");
					return;
				}
			}

			// Quick-and-dirty equality test:
			if (Data[0].Length == Data[1].Length) {
				bool IsIdentical = true;
				for (int i = 0; i < Data[0].Length; ++i) {
					if (Data[0][i] != Data[1][i]) {
						IsIdentical = false;
						break;
					}
				}
				if (IsIdentical) {
					Console.WriteLine("Files are identical.");
					return;
				}
			}

			if (Data[0].Length != Data[1].Length) {
				Console.WriteLine("Files are different sizes.");
			}

			// Analysis:
			int[,] C = new int[Data[0].Length, Data[1].Length];
			for (int i = 1; i < Data[0].Length; ++i) {
				if ((i - 1) % 1000 == 0) Console.Write("\rAnalysing: {0:P}...", (float)i / (float)Data[0].Length);
				for (int j = 1; j < Data[1].Length; ++j) {
					if (Data[0][i] == Data[1][j]) {
						C[i, j] = C[i - 1, j - 1] + 1;
					} else {
						C[i, j] = Math.Max(C[i, j - 1], C[i - 1, j]);
					}
				}
			}
			Console.WriteLine("\rResults:".PadRight(Console.BufferWidth - 1));

			List<DiffData> CollectedDiffData = new List<DiffData>(Math.Max(Data[0].Length, Data[1].Length));

			for (int i = Data[0].Length - 1, j = Data[1].Length - 1; ; ) {
				if (i > 0 && j > 0 && Data[0][i] == Data[1][j]) {
					CollectedDiffData.Add(new DiffData(DiffData.DiffType.NoChange, Data[0][i], i, j));
					--i; --j;
				} else {
					if (j > 0 && (i == 0 || C[i, j - 1] >= C[i - 1, j])) {
						CollectedDiffData.Add(new DiffData(DiffData.DiffType.Addition, Data[1][j], i, j));
						--j;
					} else if (i > 0 && (j == 0 || C[i, j - 1] < C[i - 1, j])) {
						CollectedDiffData.Add(new DiffData(DiffData.DiffType.Removal, Data[0][i], i, j));
						--i;
					} else {
						CollectedDiffData.Reverse();
						break; // Done!
					}
				}
			}


			DiffData.DiffType LastType = (DiffData.DiffType)(-1);

			int PrintedData = 0;
			foreach (DiffData D in CollectedDiffData) {
				if (LastType != D.Type) {
					Console.WriteLine();
					Console.Write("{0:X4}:{1:X4}", D.AddressA - 1, D.AddressB - 1);
					LastType = D.Type;
					PrintedData = 0;
				} else if (PrintedData >= 16) {
					Console.WriteLine();
					Console.Write("         ");
					PrintedData = 0;
				}
				ConsoleColor OldColour = Console.ForegroundColor;

				switch (D.Type) {
					case DiffData.DiffType.NoChange:
						Console.ForegroundColor = ConsoleColor.White;
						break;
					case DiffData.DiffType.Addition:
						Console.ForegroundColor = ConsoleColor.Green;
						break;
					case DiffData.DiffType.Removal:
						Console.ForegroundColor = ConsoleColor.Red;
						break;
				}
				Console.Write(" " + D.Data.ToString("X2"));
				++PrintedData;
				Console.ForegroundColor = OldColour;
			}
			Console.WriteLine();

		}

		private struct DiffData {

			public enum DiffType {
				NoChange,
				Addition,
				Removal,
			}

			public DiffType Type;

			public byte Data;

			public int AddressA;
			public int AddressB;

			public DiffData(DiffType type, byte data, int addressA, int addressB) {
				this.Type = type;
				this.Data = data;
				this.AddressA = addressA;
				this.AddressB = addressB;
			}


		}
	}
}
Removals are shown in red, additions are shown in green, data that's the same is in white.
Entities Spawned by QuakeC Code
Thursday, 6th September 2007
After all that time spent trying to work out how the QuakeC VM works I finally have some real-world results.
Apart from the obvious boring stuff going on in the background parsing and loading entities go, two functions in particular are of note. The first is a native function, precache_model(string) which loads and caches a model of some description (sprites, Alias models or BSP models). The QuakeC VM I've written raises an event (passing an event containing the name of the model to load), which the XNA project can interpret and use to load a model into a format it's happy with.
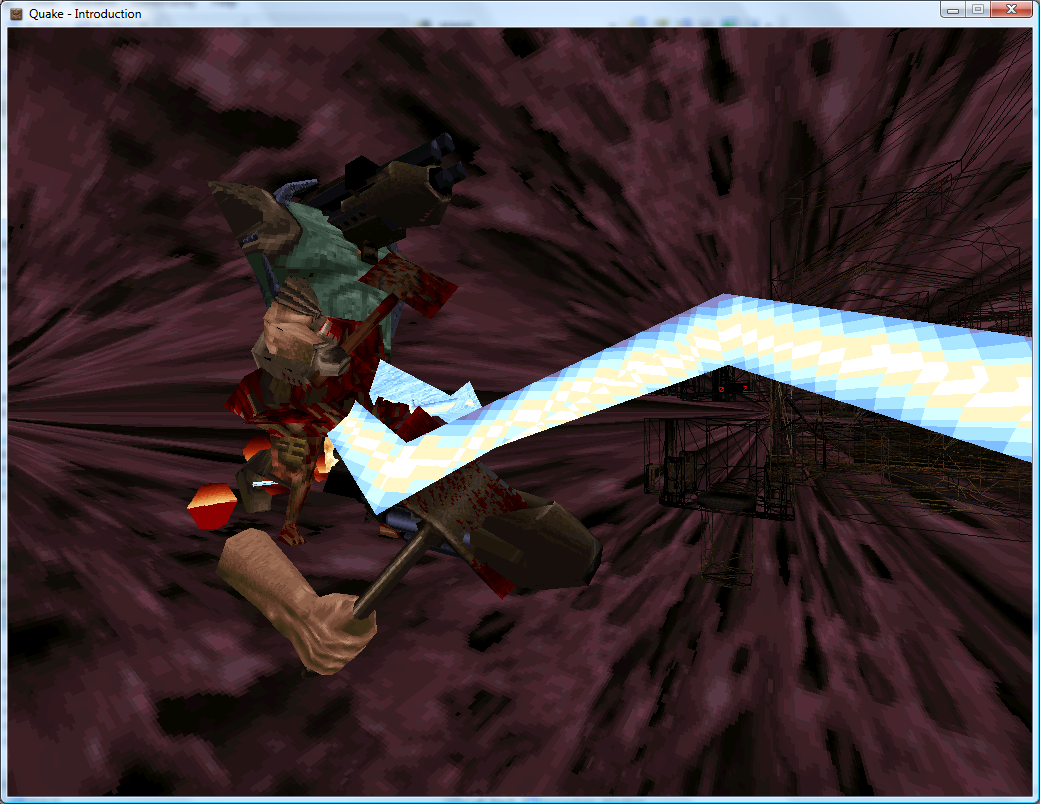
Inspiration for the Strogg in Quake 2?
With a suitable event handler and quick-and-dirty model renderer in place, the above models are precached (though they probably shouldn't be drawn at {0, 0, 0}).
The second function of interest is another native one, makestatic(entity). Quake supports three basic types of entity - dynamic entities (referenced by an index, move around and can be interacted with - ammo boxes, monsters and so on), temporary entities (removes itself from the game world automatically - point sprites) and static entities. Static entities are the easiest to handle - once spawned they stay fixed in one position, and can't be accessed (and hence can't be removed). Level decorations such as flaming torches are static. Here's the QuakeC code used to spawn a static small yellow flame:
void() light_flame_small_yellow =
{
	precache_model ("progs/flame2.mdl");
	setmodel (self, "progs/flame2.mdl");
	FireAmbient ();
	makestatic (self);
};
// Handle precache models:
void Progs_PrecacheModelRequested(object sender, Quake.Files.QuakeC.PrecacheFileRequestedEventArgs e) {
	switch (Path.GetExtension(e.Filename)) {
		case ".mdl":
			if (CachedModels.ContainsKey(e.Filename)) return; // Already cached.
			CachedModels.Add(e.Filename, new Renderer.ModelRenderer(this.Resources.LoadObject<Quake.Files.Model>(e.Filename)));
			break;
		case ".bsp":
			if (CachedLevels.ContainsKey(e.Filename)) return; // Already cached.
			CachedLevels.Add(e.Filename, new Renderer.BspRenderer(this.Resources.LoadObject<Quake.Files.Level>(e.Filename)));
			break;
	}
}

// Spawn static entities:
void Progs_SpawnStaticEntity(object sender, Quake.Files.QuakeC.SpawnStaticEntityEventArgs e) {
	// Grab the model name from the entity.
	string Model = e.Entity.Properties["model"].String;

	// Get the requisite renderer:
	Renderer.ModelRenderer Renderer;
	if (!CachedModels.TryGetValue(Model, out Renderer)) throw new InvalidOperationException("Model " + Model + " not cached.");

	// Add the entity's position to the renderer:
	Renderer.EntityPositions.Add(new Renderer.EntityPosition(e.Entity.Properties["origin"].Vector, e.Entity.Properties["angles"].Vector));
}
The result is a light sprinkling of static entities throughout the level.
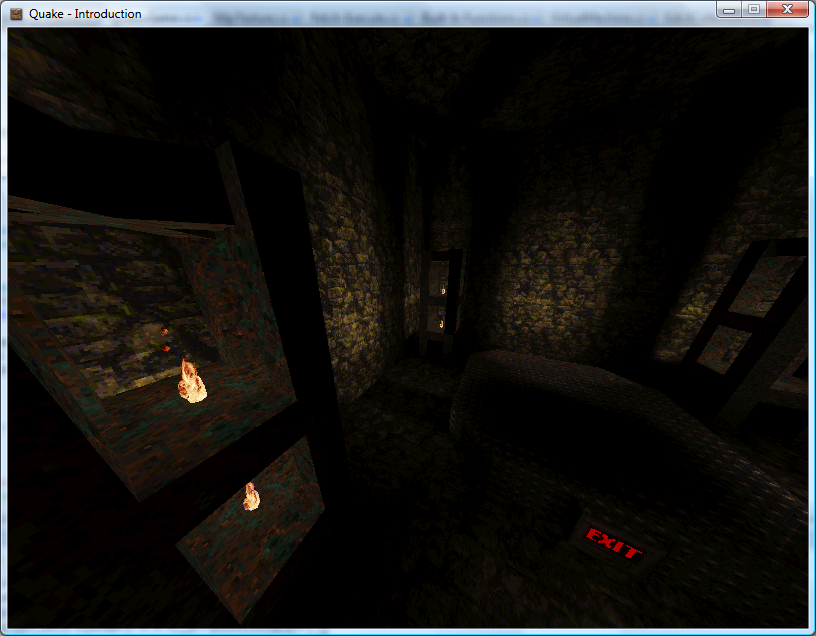
As a temporary hack I just iterate over the entities, checking if each one is still active, and if so lumping them with the static entities.
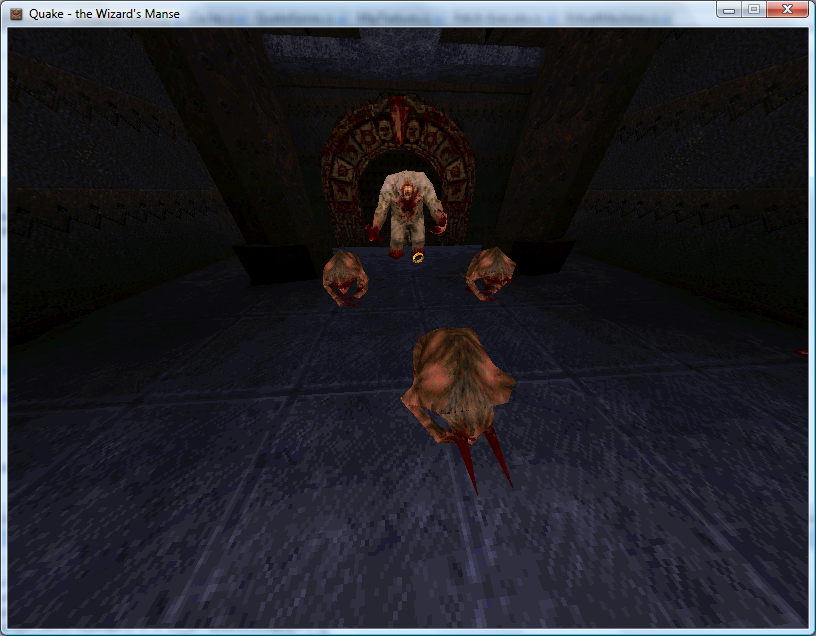
If you look back a few weeks you'd notice that I already had a lot of this done. In the past, however, I was simply using a hard-coded entity name to model table and dumping entities any old how through the level. By parsing and executing progs.dat I don't have to hard-code anything, can animate models correctly, and even have the possibility of running the original game logic.
An example of how useful this is relates to level keys. In some levels you need one or two keys to get to the exit. Rather than use the same keys for each level, or use many different entity classes for keys, the worldspawn entity is assigned a type (Mediaeval, Metal or Base) and the matching key model is set automatically by the key spawning QuakeC function:
/*QUAKED item_key2 (0 .5 .8) (-16 -16 -24) (16 16 32)
GOLD key
In order for keys to work
you MUST set your maps
worldtype to one of the
following:
0: medieval
1: metal
2: base
*/

void() item_key2 =
{
	if (world.worldtype == 0)
	{
		precache_model ("progs/w_g_key.mdl");
		setmodel (self, "progs/w_g_key.mdl");
		self.netname = "gold key";
	}
	if (world.worldtype == 1)
	{
		precache_model ("progs/m_g_key.mdl");
		setmodel (self, "progs/m_g_key.mdl");
		self.netname = "gold runekey";
	}
	if (world.worldtype == 2)
	{
		precache_model2 ("progs/b_g_key.mdl");
		setmodel (self, "progs/b_g_key.mdl");
		self.netname = "gold keycard";
	}
	key_setsounds();
	self.touch = key_touch;
	self.items = IT_KEY2;
	setsize (self, '-16 -16 -24', '16 16 32');
	StartItem ();
};
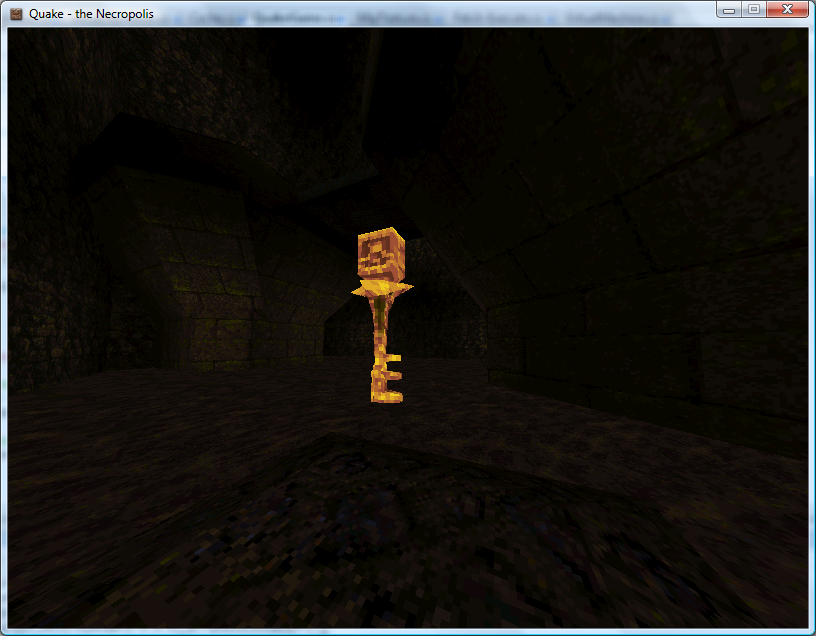
Mediaeval Key
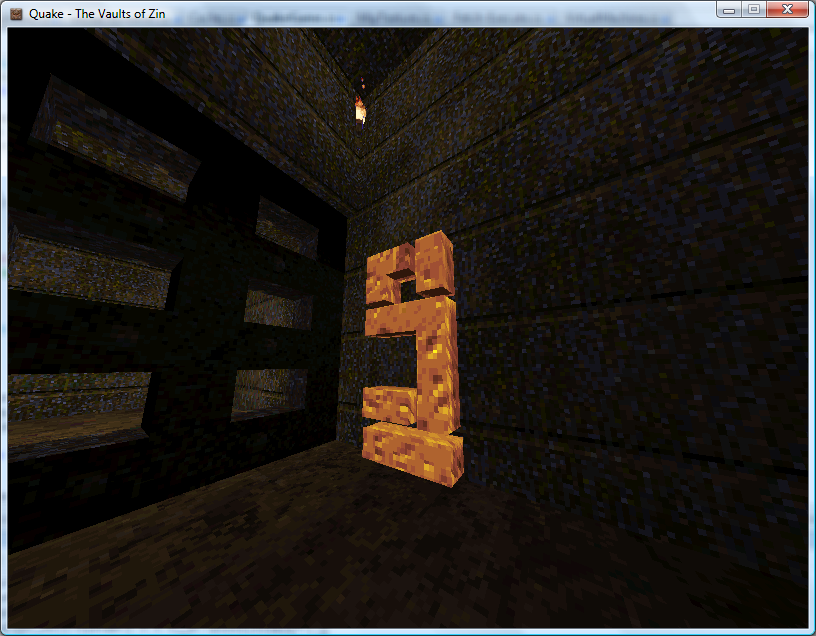
Metal Runekey
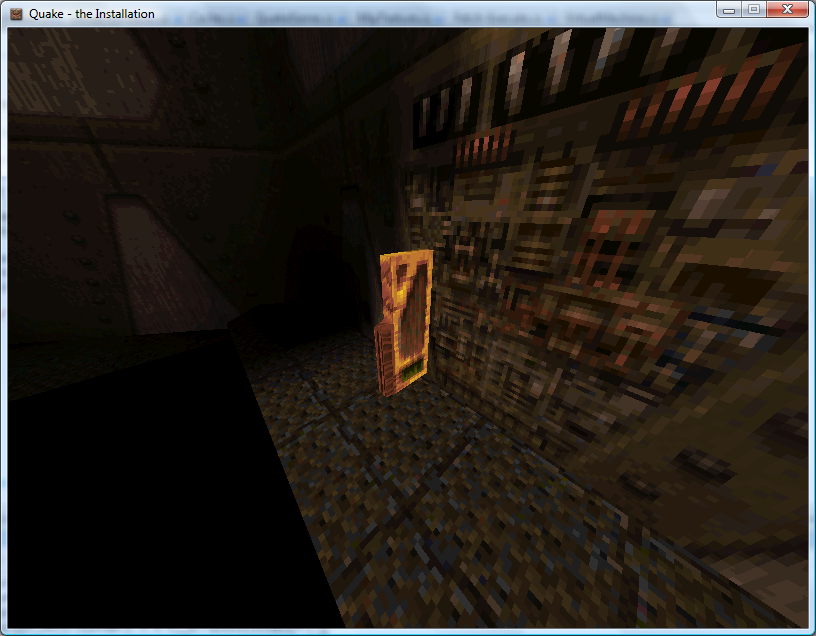
Base Keycard
One problem is entities that appear at different skill levels. Generally higher skill levels have more monsters, but there are other level design concerns such as swapping a strong enemy for a weaker one in the easy skill mode. In deathmatch mode entities are also changed - keys are swapped for weapons, for example. At least monsters are kind - their spawn function checks the deathmatch global and they remove themselves automatically, so adding the (C#) line Progs.Globals["deathmatch"].Value.Boolean = true; flushes them out nicely.
Each entity, however, has a simple field attached - spawnflags - that can have bits set to inhibit the entity from spawning at the three different skill levels.

Easy
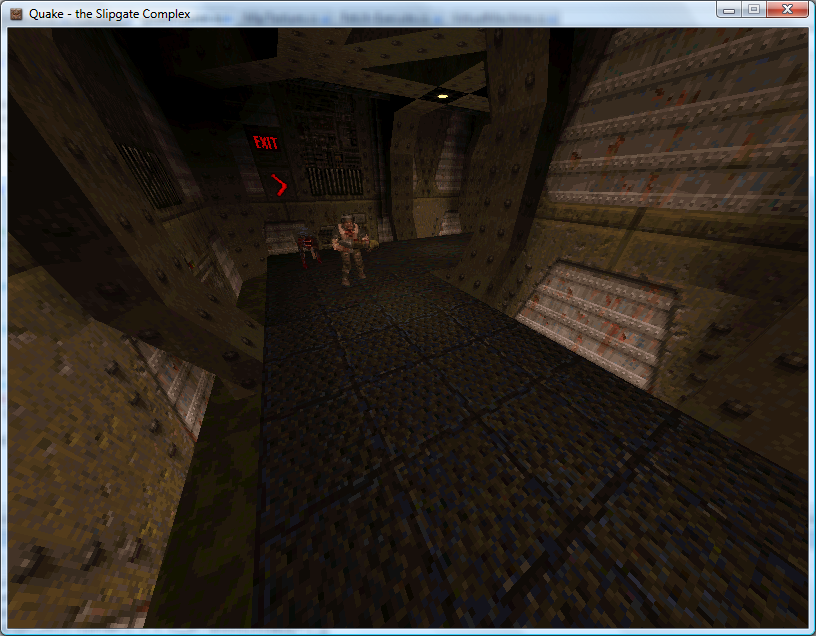
Medium

Hard
Regrettably, whilst the Quake 1 QuakeC interpreter source code is peppered with references to Quake 2 it would appear that Quake 2 used native code rather than QuakeC to provide gameplay logic, so I've dropped development on the Quake 2 side at the moment.
QuakeC VM
Wednesday, 15th August 2007
I've started serious work on the QuakeC virtual machine.
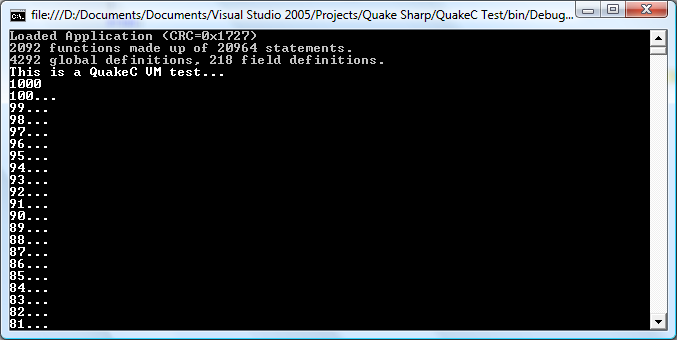
The bytecode is stored in a single file, progs.dat. It is made up of a number of different sections:
- Definitions data - an unformatted block of data containing a mixture of floating point values, integers and vectors.
- Statements - individual instructions, each made up of four short integers. Each statement has an operation code and up to three arguments. These arguments are typically pointers into the definitions data block.
- Functions - these provide a function name, a source file name, storage requirements for local variables and the address of the first statement.
On top of that are two tables that break down the definitions table into global and field variables (as far as I'm aware this is only used to print "nice" names for variables when debugging, as it just attaches a type and name to each definition) and a string table.
The first few values in the definition data table are used for predefined values, such as function parameters and return value storage.
Now, a slight problem is how to handle these variables. My initial solution was to read and write types strictly as particular types using the definitions table, but this idea got scrapped when I realised that the QuakeC bytecode uses the vector store opcode to copy string pointers, and a vector isn't much use when you need to print a string.
I now use a special VariablePointer class that internally stores the pointer inside the definition data block, and provides properties for reading and writing using the different formats.
/// <summary>Defines a variable.</summary>
public class VariablePointer {

	private readonly uint Offset;

	private readonly QuakeC Source;

	private void SetStreamPos() { this.Source.DefinitionsDataReader.BaseStream.Seek(this.Offset, SeekOrigin.Begin); }

	public VariablePointer(QuakeC source, uint offset) {
		this.Source = source;
		this.Offset = offset;
	}

	#region Read/Write Properties

	/// <summary>Gets or sets a floating-point value.</summary>
	public float Float {
		get { this.SetStreamPos(); return this.Source.DefinitionsDataReader.ReadSingle(); }
		set { this.SetStreamPos(); this.Source.DefinitionsDataWriter.Write(value); }
	}

	/// <summary>Gets or sets an integer value.</summary>
	public int Integer {
		get { this.SetStreamPos(); return this.Source.DefinitionsDataReader.ReadInt32(); }
		set { this.SetStreamPos(); this.Source.DefinitionsDataWriter.Write(value); }
	}

	/// <summary>Gets or sets a vector value.</summary>
	public Vector3 Vector {
		get { this.SetStreamPos(); return new Vector3(this.Source.DefinitionsDataReader.BaseStream); }
		set {
			this.SetStreamPos();
			this.Source.DefinitionsDataWriter.Write(value.X);
			this.Source.DefinitionsDataWriter.Write(value.Y);
			this.Source.DefinitionsDataWriter.Write(value.Z);
		}
	}

	#endregion

	#region Extended Properties

	public bool Boolean {
		get { return this.Float != 0f; }
		set { this.Float = value ? 1f : 0f; }
	}

	#endregion

	#region Read-Only Properties

	/// <summary>Gets a string value.</summary>
	public string String {
		get { return this.Source.GetString((uint)this.Integer);  }
	}

	public Function Function {
		get { return this.Source.Functions[this.Integer]; }
	}

	#endregion
}
If the offset for a statement is negative in a function, that means that the function being called is an internally-implemented one. The source code for the test application in the screenshot at the top of this entry is as follows:
float testVal;

void() test = {
	dprint("This is a QuakeC VM test...\n");

	testVal = 100;
	dprint(ftos(testVal * 10));
	dprint("\n");

	while (testVal > 0) {
		dprint(ftos(testVal));
		testVal = testVal - 1;
		dprint("...\n");
	}
	dprint("Lift off!");

};
There's a huge amount of work to be done here, especially when it comes to entities (not something I've looked at at all). All I can say is that I'm very thankful that the .qc source code is available and the DOS compiler runs happily under Windows - they're going to be handy for testing.
Keyboard Handler Fix
Friday, 3rd August 2007
ArchG indicated a bug in the TextInputHandler class I posted a while back - no reference to the delegate instance used for the unmanaged callback is held, so as soon as the garbage collector kicks in things go rather horribly wrong.
/* * * * * * * * * * * * * * * * * * * * * * * * * * * * * * * * * * * * * * * * * * * * * * *
 * XnaTextInput.TextInputHandler - benryves@benryves.com                                     *
 * * * * * * * * * * * * * * * * * * * * * * * * * * * * * * * * * * * * * * * * * * * * * * *
 * This is quick and very, VERY dirty.                                                       *
 * It uses Win32 message hooks to grab messages (as we don't get a nicely wrapped WndProc).  *
 * I couldn't get WH_KEYBOARD to work (accessing the data via its pointer resulted in access *
 * violation exceptions), nor could I get WH_CALLWNDPROC to work.                            *
 * Maybe someone who actually knows what they're  doing can work something out that's not so *
 * kludgy.                                                                                   *
 * * * * * * * * * * * * * * * * * * * * * * * * * * * * * * * * * * * * * * * * * * * * * * *
 * This quite obviously relies on a Win32 nastiness, so this is for Windows XNA games only!  *
 * * * * * * * * * * * * * * * * * * * * * * * * * * * * * * * * * * * * * * * * * * * * * * */

#region Using Statements
using System;
using System.Runtime.InteropServices;
using System.Windows.Forms; // This class exposes WinForms-style key events.
#endregion

namespace XnaTextInput {

	/// <summary>
	/// A class to provide text input capabilities to an XNA application via Win32 hooks.
	/// </summary>
	class TextInputHandler : IDisposable {

		#region Win32

		/// <summary>
		/// Types of hook that can be installed using the SetWindwsHookEx function.
		/// </summary>
		public enum HookId {
			WH_CALLWNDPROC = 4,
			WH_CALLWNDPROCRET = 12,
			WH_CBT = 5,
			WH_DEBUG = 9,
			WH_FOREGROUNDIDLE = 11,
			WH_GETMESSAGE = 3,
			WH_HARDWARE = 8,
			WH_JOURNALPLAYBACK = 1,
			WH_JOURNALRECORD = 0,
			WH_KEYBOARD = 2,
			WH_KEYBOARD_LL = 13,
			WH_MAX = 11,
			WH_MAXHOOK = WH_MAX,
			WH_MIN = -1,
			WH_MINHOOK = WH_MIN,
			WH_MOUSE_LL = 14,
			WH_MSGFILTER = -1,
			WH_SHELL = 10,
			WH_SYSMSGFILTER = 6,
		};

		/// <summary>
		/// Window message types.
		/// </summary>
		/// <remarks>Heavily abridged, naturally.</remarks>
		public enum WindowMessage {
			WM_KEYDOWN = 0x100,
			WM_KEYUP = 0x101,
			WM_CHAR = 0x102,
		};

		/// <summary>
		/// A delegate used to create a hook callback.
		/// </summary>
		public delegate int GetMsgProc(int nCode, int wParam, ref Message msg);

		/// <summary>
		/// Install an application-defined hook procedure into a hook chain.
		/// </summary>
		/// <param name="idHook">Specifies the type of hook procedure to be installed.</param>
		/// <param name="lpfn">Pointer to the hook procedure.</param>
		/// <param name="hmod">Handle to the DLL containing the hook procedure pointed to by the lpfn parameter.</param>
		/// <param name="dwThreadId">Specifies the identifier of the thread with which the hook procedure is to be associated.</param>
		/// <returns>If the function succeeds, the return value is the handle to the hook procedure. Otherwise returns 0.</returns>
		[DllImport("user32.dll", EntryPoint = "SetWindowsHookExA")]
		public static extern IntPtr SetWindowsHookEx(HookId idHook, GetMsgProc lpfn, IntPtr hmod, int dwThreadId);

		/// <summary>
		/// Removes a hook procedure installed in a hook chain by the SetWindowsHookEx function.
		/// </summary>
		/// <param name="hHook">Handle to the hook to be removed. This parameter is a hook handle obtained by a previous call to SetWindowsHookEx.</param>
		/// <returns>If the function fails, the return value is zero. To get extended error information, call GetLastError.</returns>
		[DllImport("user32.dll")]
		public static extern int UnhookWindowsHookEx(IntPtr hHook);

		/// <summary>
		/// Passes the hook information to the next hook procedure in the current hook chain.
		/// </summary>
		/// <param name="hHook">Ignored.</param>
		/// <param name="ncode">Specifies the hook code passed to the current hook procedure.</param>
		/// <param name="wParam">Specifies the wParam value passed to the current hook procedure.</param>
		/// <param name="lParam">Specifies the lParam value passed to the current hook procedure.</param>
		/// <returns>This value is returned by the next hook procedure in the chain.</returns>
		[DllImport("user32.dll")]
		public static extern int CallNextHookEx(int hHook, int ncode, int wParam, ref Message lParam);

		/// <summary>
		/// Translates virtual-key messages into character messages.
		/// </summary>
		/// <param name="lpMsg">Pointer to an Message structure that contains message information retrieved from the calling thread's message queue.</param>
		/// <returns>If the message is translated (that is, a character message is posted to the thread's message queue), the return value is true.</returns>
		[DllImport("user32.dll")]
		public static extern bool TranslateMessage(ref Message lpMsg);


		/// <summary>
		/// Retrieves the thread identifier of the calling thread.
		/// </summary>
		/// <returns>The thread identifier of the calling thread.</returns>
		[DllImport("kernel32.dll")]
		public static extern int GetCurrentThreadId();

		#endregion

		#region Hook management and class construction.

		/// <summary>Handle for the created hook.</summary>
		private readonly IntPtr HookHandle;

		private readonly GetMsgProc ProcessMessagesCallback;

		/// <summary>Create an instance of the TextInputHandler.</summary>
		/// <param name="whnd">Handle of the window you wish to receive messages (and thus keyboard input) from.</param>
		public TextInputHandler(IntPtr whnd) {
			// Create the delegate callback:
			this.ProcessMessagesCallback = new GetMsgProc(ProcessMessages);
			// Create the keyboard hook:
			this.HookHandle = SetWindowsHookEx(HookId.WH_GETMESSAGE, this.ProcessMessagesCallback, IntPtr.Zero, GetCurrentThreadId());
		}

		public void Dispose() {
			// Remove the hook.
			if (this.HookHandle != IntPtr.Zero) UnhookWindowsHookEx(this.HookHandle);
		}

		#endregion

		#region Message processing

		private int ProcessMessages(int nCode, int wParam, ref Message msg) {
			// Check if we must process this message (and whether it has been retrieved via GetMessage):
			if (nCode == 0 && wParam == 1) {

					// We need character input, so use TranslateMessage to generate WM_CHAR messages.
					TranslateMessage(ref msg);

					// If it's one of the keyboard-related messages, raise an event for it:
					switch ((WindowMessage)msg.Msg) {
						case WindowMessage.WM_CHAR:
							this.OnKeyPress(new KeyPressEventArgs((char)msg.WParam));
							break;
						case WindowMessage.WM_KEYDOWN:
							this.OnKeyDown(new KeyEventArgs((Keys)msg.WParam));
							break;
						case WindowMessage.WM_KEYUP:
							this.OnKeyUp(new KeyEventArgs((Keys)msg.WParam));
							break;
					}

			}

			// Call next hook in chain:
			return CallNextHookEx(0, nCode, wParam, ref msg);
		}

		#endregion

		#region Events

		public event KeyEventHandler KeyUp;
		protected virtual void OnKeyUp(KeyEventArgs e) {
			if (this.KeyUp != null) this.KeyUp(this, e);
		}

		public event KeyEventHandler KeyDown;
		protected virtual void OnKeyDown(KeyEventArgs e) {
			if (this.KeyDown != null) this.KeyDown(this, e);
		}

		public event KeyPressEventHandler KeyPress;
		protected virtual void OnKeyPress(KeyPressEventArgs e) {
			if (this.KeyPress != null) this.KeyPress(this, e);
		}

		#endregion
	}
}
I wrote a crude ZSoft PCX loader (only handles 8-bit per plane, single-plane images, which is sufficient for Quake 2).

Using this loader I found colormap.pcx, which appears to perform the job of palette and colour map for Quake II.

.wal files now open with the correct palette. I've also copied over most of the BSP loading code, but it needs a good going-over to make it slightly more sane (especially where the hacks for Quake II support have been added).
Quake 2 and Emulation
Wednesday, 1st August 2007
The current design of the Quake project is that there are a bunch of classes in the Data namespace that are used to decode Quake's structures in a fairly brain-dead manner. To do anything useful with it you need to build up your own structures suitable for the way you intend on rendering the level.
The problem comes in when you try to load resources from different versions of Quake. Quake 1 and Quake 2 have quite a few differences. One major one is that every BSP level in Quake contains its own mip textures. You can call a method in the BSP class which returns sane texture coordinates as it can inspect the texture dimensions inside itself. Quake 2 stores all of the textures externally in .wal resources - the BSP class can no longer calculate texture coordinates as it can't work out how large the textures are as it can't see outside itself.
I guess the only sane way to work this out is to hide the native types from the end user and wrap everything up, but I've never liked this much as you might neglect to wrap up something that someone else would find very important, or you do something that is unsuitable for the way they really wanted to work.
Anyhow. I've hacked around the BSP loader to within an inch of its life and it seems to be (sort of) loading Quake 2 levels for brute-force rendering. Quake 2 boasts truecolour lightmaps, improving the image quality quite significantly!
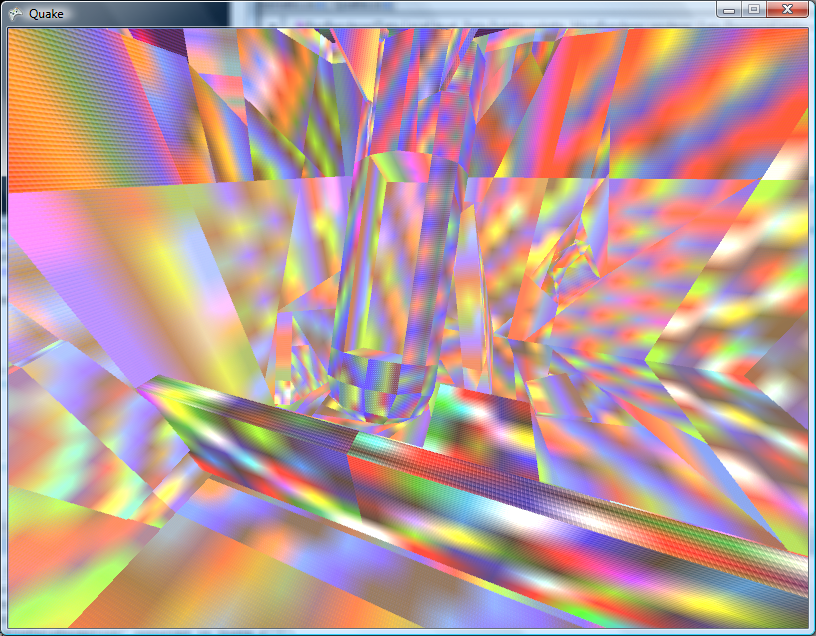
The truecolour lightmaps show off the Strogg disco lighting to its best effect. One of the problems with the Quake II BSP file format is that the indexing of lumps inside the file has changed. Not good.

That's a bit better. Quake II's lightmaps tend to stick to the red/brown/yellow end of the spectrum, but that is a truecolour set of lightmaps in action!
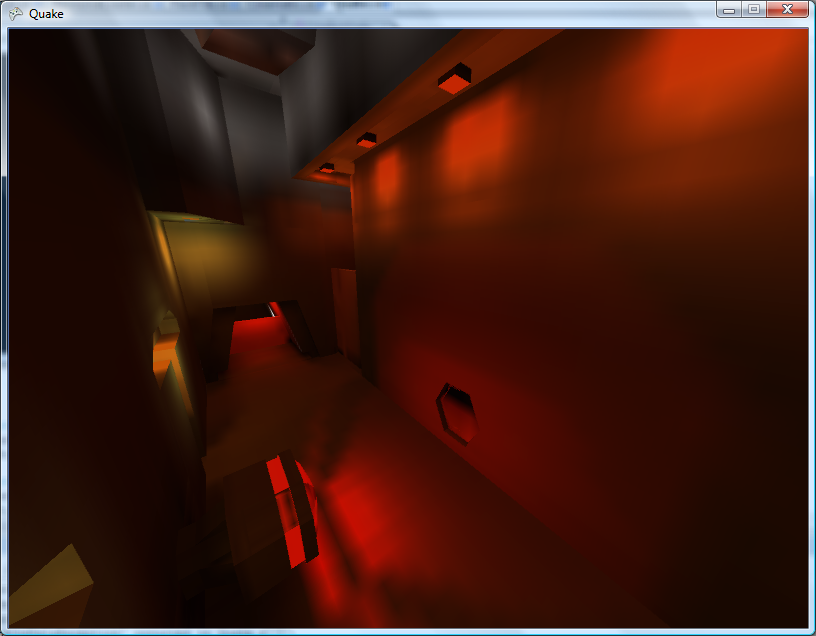
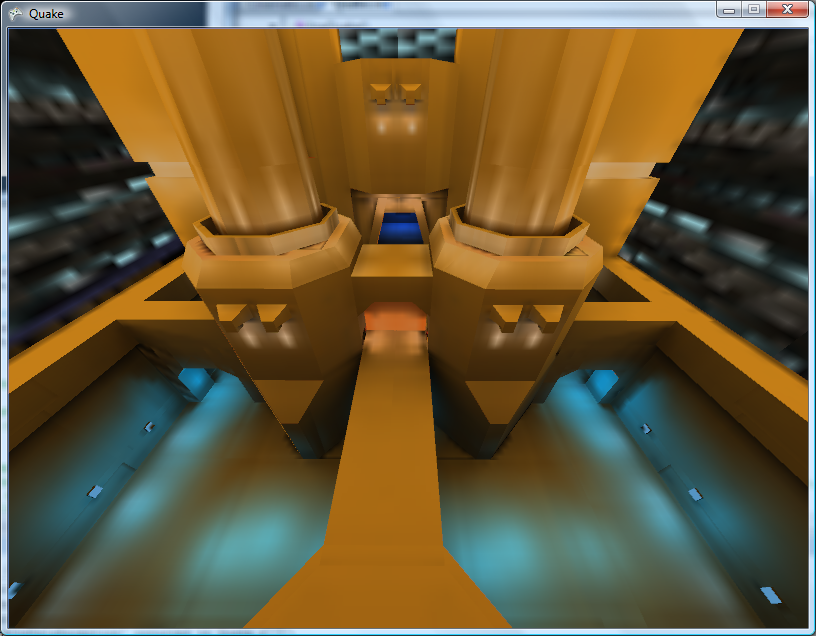
The lightmaps tend to look a bit grubby where they don't line up between faces. Some trick to join all lightmaps for a plane together into a single texture should do the trick, and reduce the overhead of having to load thousands of tiny textures (which I'm guessing have to be scaled up to a power-of-two). I'll have to look into it.
On to .wal (wall texture) loading - and I can't find a palette anywhere inside the Quake II pack files. I did find a .act (Photoshop palette) that claimed to be for Quake II, but it doesn't quite seem to match. It's probably made up of the right colours, but not in the right order.
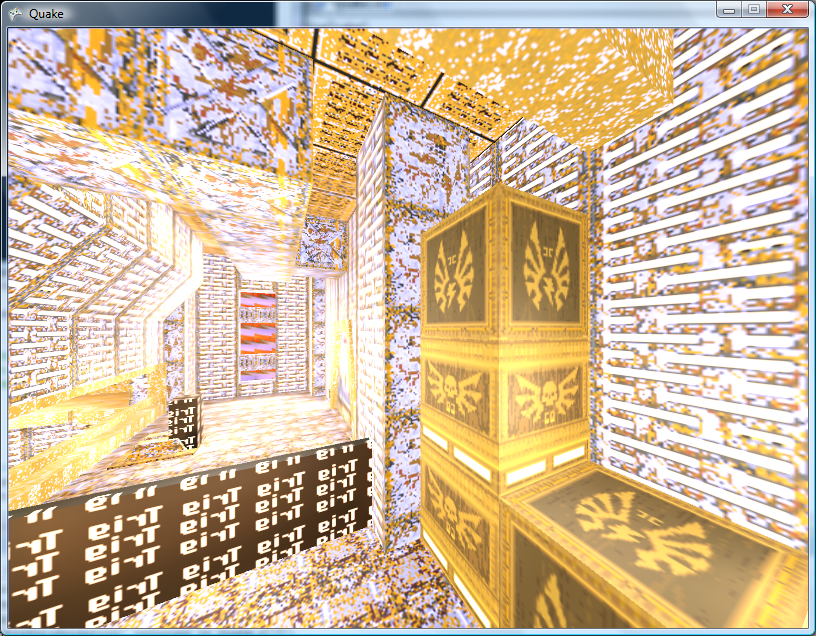
Fortunately I have some PAK files with replacement JPEG textures inside them and can load those instead for the moment.

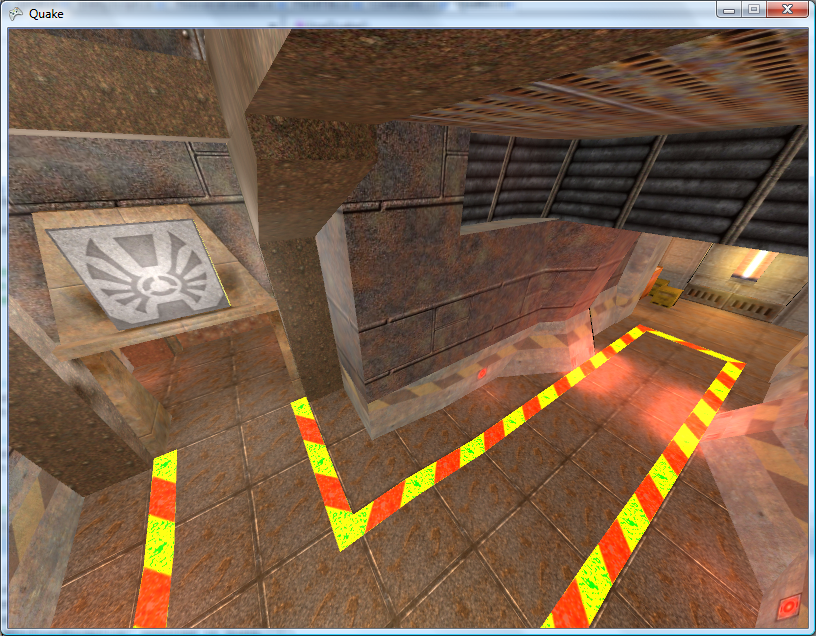
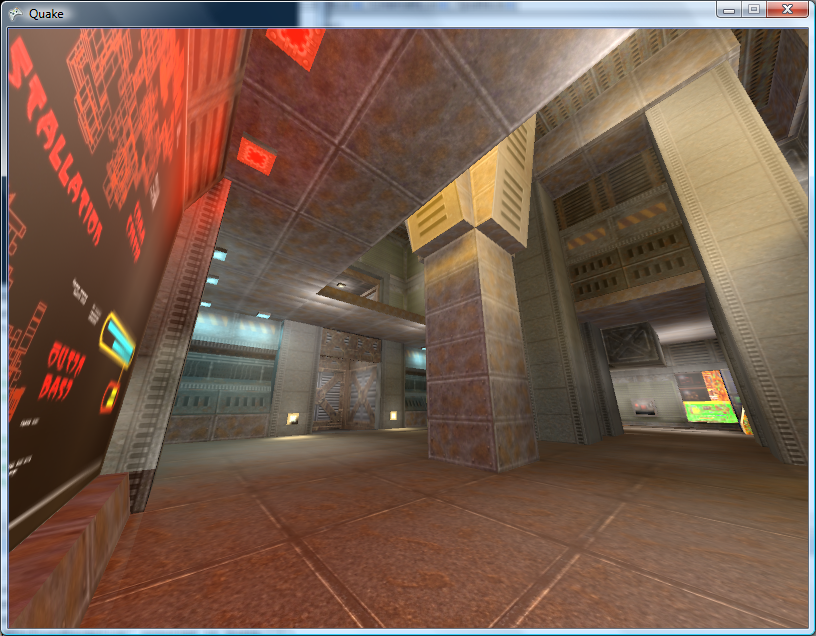
The brightness looks strange due to the bad way I apply the lightmaps - some kludgy forced two-pass affair with alpha blending modes set to something that sort of adds the two textures together in a not-very-convincing manner.
Can anyone recommend a good introduction to shaders for XNA? I'm not really trying to do anything that exciting.
This is a really bad and vague overview of the emulation technique I use in Cogwheel, so I apologise in advance. Emulation itself is very simple when done in the following manner - all you really need is a half-decent knowledge of how the computer you're emulating works at the assembly level. The following is rather Z80-specific.
At the heart of the system is its CPU. This device reads instructions from memory and depending on the value it reads it performs a variety of different actions. It has a small amount of memory inside itself which it uses to store its registers, variables used during execution. For example, the PC register is used as a pointer to the next instruction to fetch and execute from memory, and the SP register points at the top of the stack.
It can interact with the rest of the system in three main ways:
- Read/Write Memory
- Input/Output Hardware
- Interrupt Request
I assume you're familiar with memory. The hardware I refer to are peripheral devices such as video display processors, keypads, sound generators and so on. Data is written to and read from these devices on request. What the hardware device does with that data is up to it. I'll ignore interrupt requests for the moment.
The CPU at an electronic level communicates with memory and hardware using two buses and a handful of control pins. The two buses are the address bus and data bus. The address bus is read-only (when viewed from outside the CPU) and is used to specify a memory address or a hardware port number. It is 16 bits wide, meaning that 64KB memory can be addressed. Due to the design, only the lower 8-bits are normally used for hardware addressing, giving you up to 256 different hardware devices.
The data bus is 8-bits wide (making the Z80 an "8-bit" CPU). It can be read from or written to, depending on the current instruction.
The exact function of these buses - whether you're addressing memory or a hardware device, or whether you're reading or writing - is relayed to the external hardware via some control pins on the CPU itself. The emulator author doesn't really need to emulate these. Rather, we can do something like this:
class CpuEmulator {

	public virtual void WriteMemory(ushort address, byte value) {
		// Write to memory.
	}

	public virtual byte ReadMemory(ushort address) {
		// Read from memory.
		return 0x00;
	}

	public virtual void WriteHardware(ushort address, byte value) {
		// Write to hardware.
	}

	public virtual byte ReadHardware(ushort address) {
		// Read from hardware.
		return 0x00;
	}

}
A computer with a fixed 64KB RAM, keyboard on hardware port 0 and console (for text output) on port 1 might look like this:
class SomeBadComputer : CpuEmulator {

	private byte[] AllMemory = new byte[64 * 1024];

	public override void WriteMemory(ushort address, byte value) {
		AllMemory[address] = value;
	}

	public override byte ReadMemory(ushort address) {
		return AllMemory[address];
	}

	public override void WriteHardware(ushort address, byte value) {
		switch (address & 0xFF) {
			case 1:
				Console.Write((char)value);
				break;
		}
	}

	public override byte ReadHardware(ushort address) {
		switch (address & 0xFF) {
			case 0:
				return (byte)Console.ReadKey();
			default:
				return 0x00;
		}
	}

}
This is all very well, but how does the CPU actually do anything worthwhile?
It needs to read instructions from memory, decode them, and act on them. Suppose our CPU had two registers - 16-bit PC (program counter) and 8-bit A (accumulator) and this instruction set:
00nn   : Load 'nn' into accumulator.
01nn   : Output accumulator to port N.
02nn   : Input to accumulator from port N.
03nnnn : Read from memory address nnnn to accumulator.
04nnnn : Write accumulator to memory address nnnn.
05nnnn : Jump to address nnnn.
Extending the above CpuEmulator class, we could get something like this:
partial class CpuEmulator {

	public ushort RegPC = 0;
	public byte RegA = 0;

	private int CyclesPending = 0;

	public void FetchExecute() {
		switch (ReadMemory(RegPC++)) {
			case 0x00:
				RegA = ReadMemory(RegPC++);
				CyclesPending += 8;
				break;
			case 0x01:
				WriteHardware(ReadMemory(RegPC++), RegA);
				CyclesPending += 8;
				break;
			case 0x02:
				RegA = ReadHardware(ReadMemory(RegPC++));
				CyclesPending += 16;
				break;
			case 0x03:
				RegA = ReadMemory((ushort)(ReadMemory(RegPC++) + ReadMemory(RegPC++) * 256));
				CyclesPending += 16;
				break;
			case 0x04:
				WriteMemory((ushort)(ReadMemory(RegPC++) + ReadMemory(RegPC++) * 256), RegA);
				CyclesPending += 24;
				break;
			case 0x05:
				RegPC = (ushort)(ReadMemory(RegPC++) + ReadMemory(RegPC++) * 256);
				CyclesPending += 24;
				break;
			default:
				// NOP
				CyclesPending += 4;
				break;
		}
	}

}
The CyclesPending variable is used for timing. Instructions take a variable length of time to run (depending on complexity, length of opcode, whether it needs to access memory and so on). This time is typically measured in the number of clock cycles taken for the CPU to execute the instruction.
Using the above CyclesPending += x style one can write a function that will execute a particular number of cycles:
partial class CpuEmulator {

	public void Tick(int cycles) {
		CyclesPending -= cycles;
		while (CyclesPending < 0) FetchExecute();
	}

}
For some truly terrifying code, an oldish version of Cogwheel's instruction decoding switch block. That code has been automatically generated from a text file, I didn't hand-type it all.
Um... that's pretty much all there is. The rest is reading datasheets! Your CPU would need to execute most (if not all) instructions correctly, updating its internal state (and registers) as the hardware would. The non-CPU hardware (video processor, sound processor, controllers and so on) would also need to conform to data reads and writes correctly.
As far as timing goes, various bits of hardware need to run at their own pace. One scanline (of the video processor) is a good value for the Master System. Cogwheel provides this method to run the emulator for a single frame:
public void RunFrame() {
	this.VDP.RunFramePending = false;
	while (!this.VDP.RunFramePending) {
		this.VDP.RasteriseLine();
		this.FetchExecute(228);
	}
}
In the Master System's case, one scanline is displayed every 228 clock cycles. Some programs update the VDP on every scanline (eg changing the background horizontal scroll offset to skew the image in a driving game).
The above is embarrassingly vague, so if anyone is interested enough to want clarification on anything I'd be happy to give it.
Let There Be Lightmaps
Monday, 30th July 2007
Eventually I gave up on my mod (double shotguns).
Heh, you might like the Killer Quake Pack.
I've added some primitive parsing and have now loaded the string table, instructions, functions and definitions from progs.dat but can't do a lot with them until I work out what the instructions are. Quake offers some predefined functions as well (quite a lot of them) so that'll require quite a lot of porting.
I seem to recall that the original Quake used "Truebright" colours (Which were either the first or last 16 colours in the palette), and these colours weren't affected by lighting. How the rendering was done, I've no idea.
I haven't looked at the data structures so could be making this up entirely: Quake does lighting using a colour map (a 2D structure with colour on one axis and brightness on the other). I'm assuming, therefore, that for the fullbright colours they map to the same colour for all brightnesses, rather than fade to black.
How could you simulate that? I guess that the quickest and dirtiest method would be to load each texture twice, once with the standard palette and once with the palette adjusted for the darkest brightness and use that as a luma texture. I believe Scet did some interesting and clever things with pixel shaders for DOOM, but that would end up playing merry Hell with 24-bit truecolour external textures.
Aye, it's fun.
I think I've cracked those blasted lightmaps.

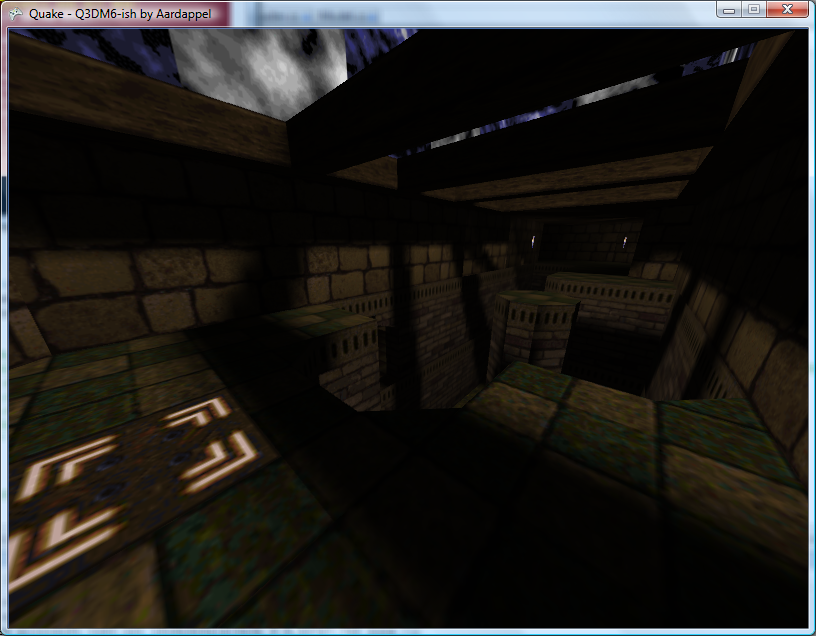
The lightmaps are small greyscale textures applied to faces to provide high-quality lighting effects with a very small performance overhead. Most of the visible faces have a lightmap.
They are stored in the BSP file. Extracting them has been a little awkward, not helped by a very stupid mistake I made.
Each face has a pointer to its lightmap. To get a meaningful texture out of the BSP we also need to know its width and height, which are based on the bounds of the face's vertices.
However, a lightmap is a 2D texture, and a face occupies three dimensional space. We need to scrap an axis!
Each face is associated with a plane. Each plane has a value which indicates which axis it closest lies orthogonal to. I could use this property to pick the component to discard!
This didn't work too well. Most of the textures were scrambled, and most of them were the same width. This should have rung warning bells, but I ignored this and moved on to other things. The problem was that each face (made up of edges) specifies which of the level's global list of edges comes first, and how many edges it uses (edges are stored consecutively).
// My code looked a bit like this:
for (int i = 0; i < Face.EdgeCount; ++i) {
    Edge = level.Edges[i];
    //
}

// It should have looked like this:
for (int i = 0; i < Face.EdgeCount; ++i) {
    Edge = level.Edges[i + Face.FirstEdge];
    //
}
With that all in position, sane lightmap textures appear as if by magic!
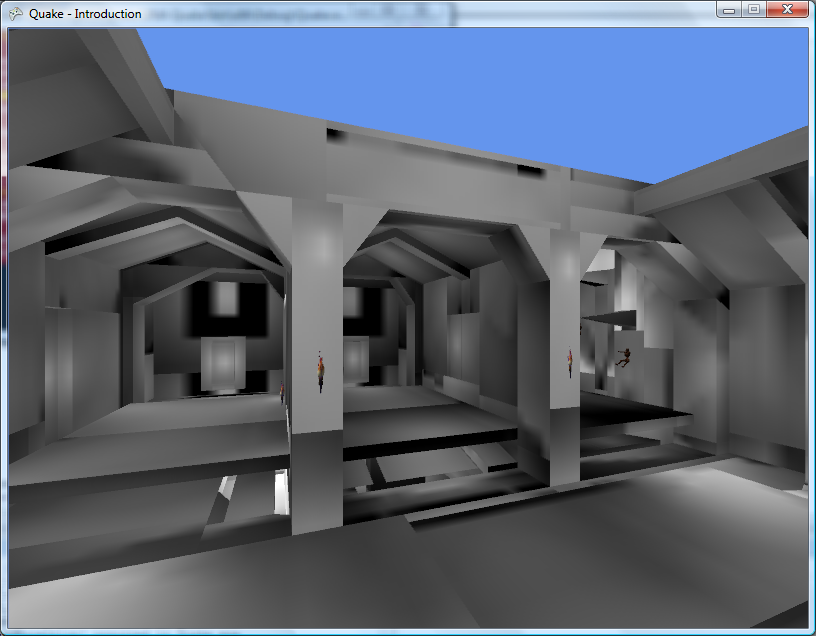
The textures aren't really orientated very well. Some are mirrored, some are rotated - and the textures of some are still clearly the wrong width and height. This 3D-to-2D conversion isn't working very well.
Each face references some texture information, including two vectors denoting the horizontal and vertical axes for aligning the texture. This information can surely also be used to align the lightmaps correctly (where 2D.X = Vector2.Dot(3D, Horizontal), 2D.Y = Vector2.Dot(3D, Vertical))?
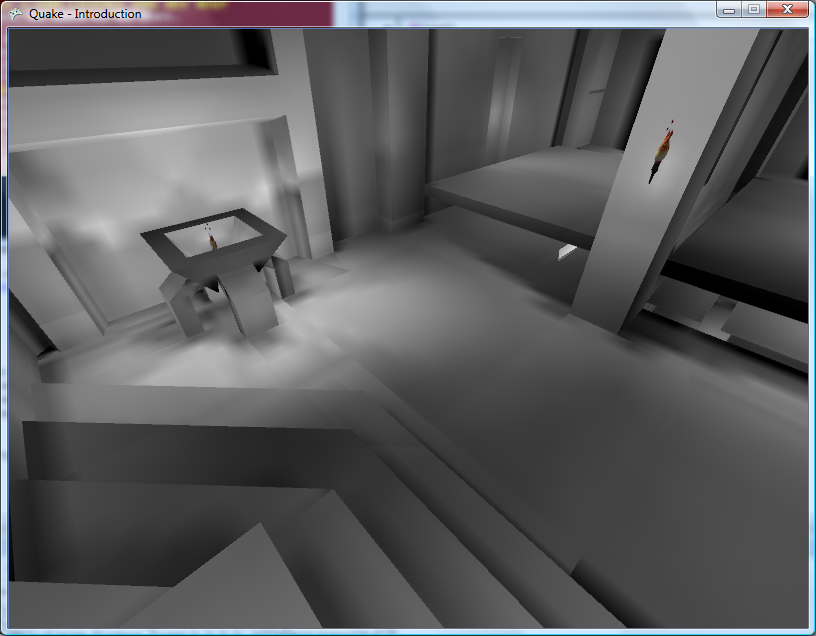
I now draw these textures after the main textures and before the luma textures.
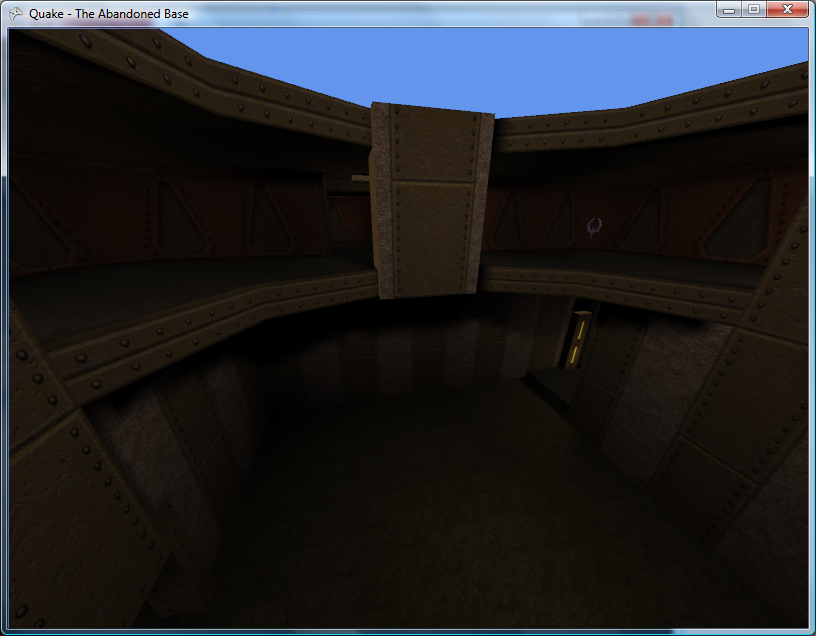

Problem: There are typically > 4000 lightmap textures. Rendering all of the lightmaps drops the > 200FPS framerate down to about 35FPS. This isn't great!
Coupling this problem with the other problem that drawing non-world BSP objects (such as ammo crates) isn't very practical at the moment gives me a good excuse to write a new renderer.
Quake uses a BSP tree to speed up rendering. Each leaf has a compressed visibility list attached to it, indicating which other leaves are visible from that one. Each leaf also contains information about which faces are inside it, and so by working out which leaf the camera is in you can easily get a list of which faces are available.
/// <summary>Gets the leaf that contains a particular position.</summary>
/// <param name="position">The position to find a leaf for.</param>
/// <returns>The containing leaf.</returns>
public Node.Leaf GetLeafFromPosition(Vector3 position) {
	// Start from the model's root node:
	Node SearchCamera = this.RootNode;
	for (; ; ) {
		// Are we in front of or behind the partition plane?
		if (Vector3.Dot(SearchCamera.Partition.Normal, position) > SearchCamera.Partition.D) {
			// We're in front of the partition plane.
			if (SearchCamera.FrontLeaf != null) {
				return SearchCamera.FrontLeaf;
			} else {
				SearchCamera = SearchCamera.FrontNode;
			}
		} else {
			// We're behind the partition plane.
			if (SearchCamera.BackLeaf != null) {
				return SearchCamera.BackLeaf;
			} else {
				SearchCamera = SearchCamera.BackNode;
			}
		}
	}
}
The following three screenshots show a wireframe view of going around a sharp corner using the visibility list information from the level's BSP file.
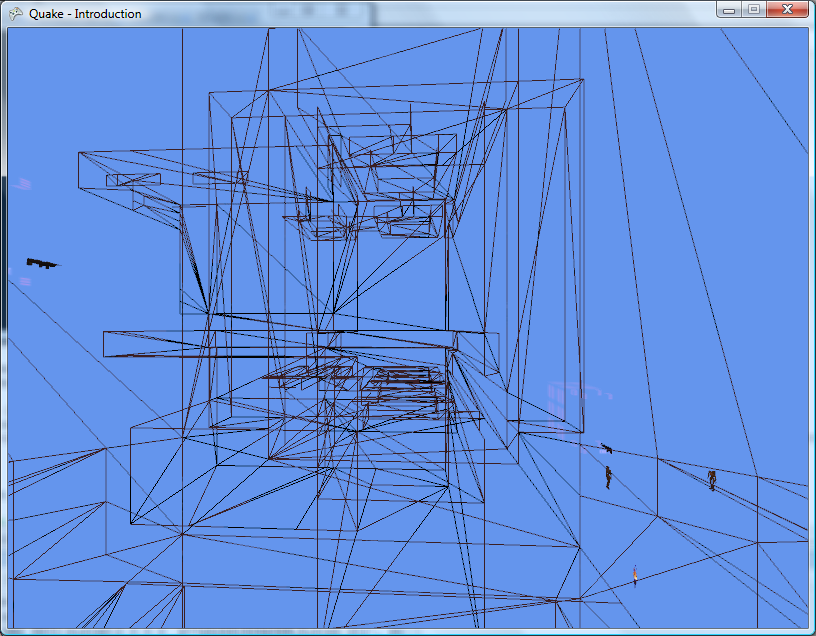
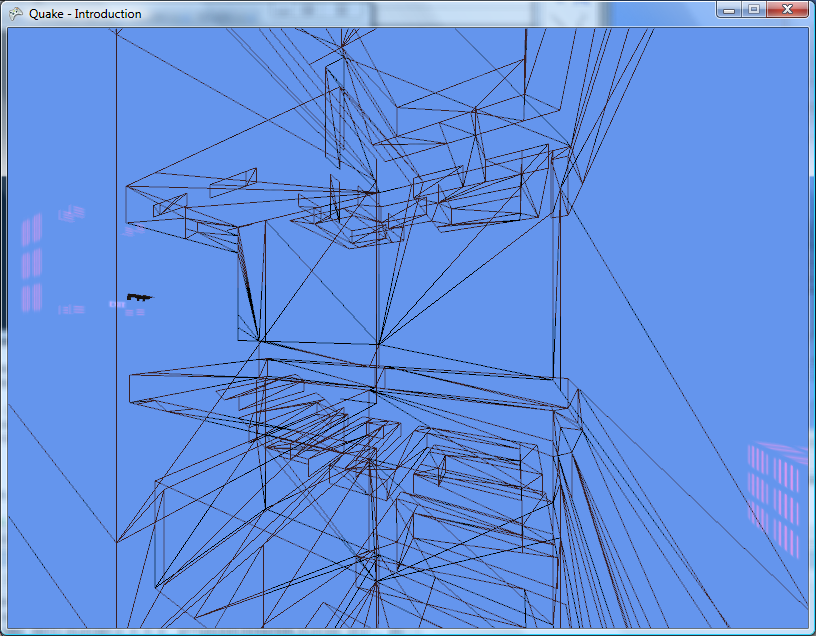
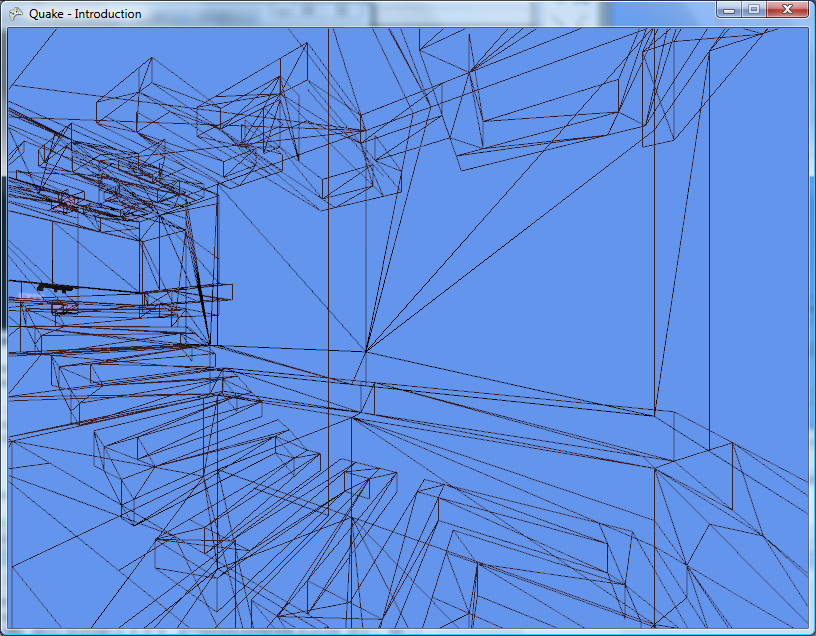
Another fix in the new renderer is the correction of faces that don't have a lightmap texture. Some faces - such as those which are completely dark, or the faces used for the sky texture - don't have such information, and are currently rendered at full brightness.

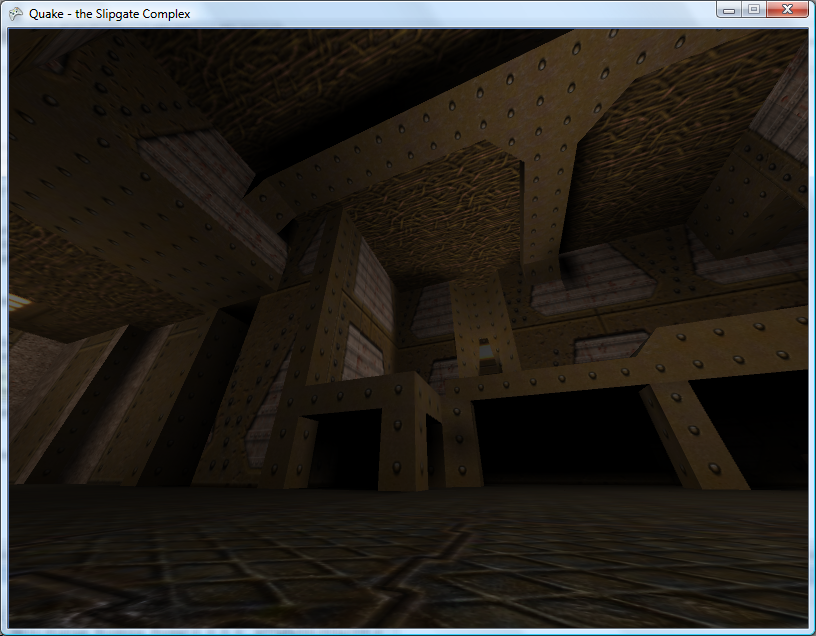
Before and after the fix
If the renderer encounters a lightmap-less face, it enables lighting, sets the ambient light to the face's brightness level, draws the face, then disables lighting again. As you can see from the screenshots this looks a lot better.
The new renderer not only renders the levels using the BSP tree - it also breaks them down into individual models. A level file contains multiple models. The first model is the main level architecture. Other models form parts of the level that can be moved.
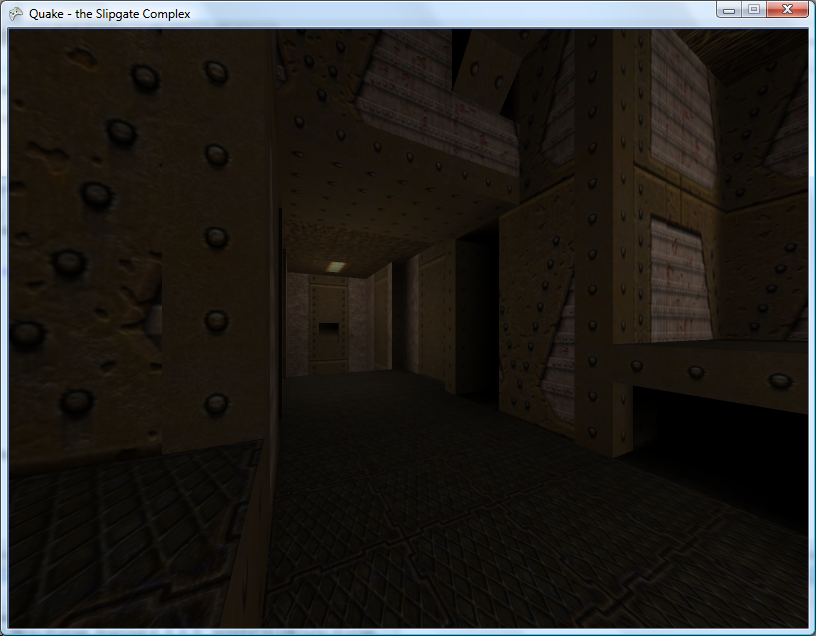
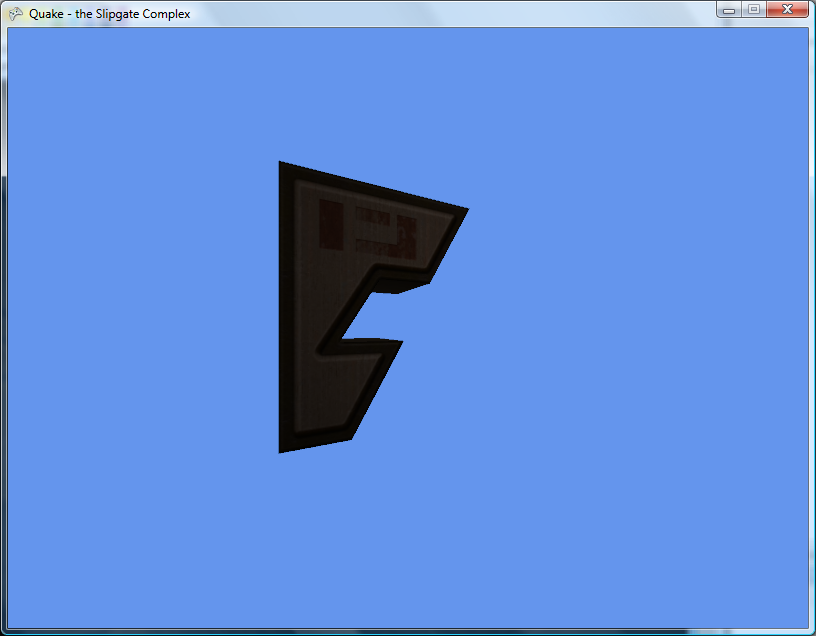
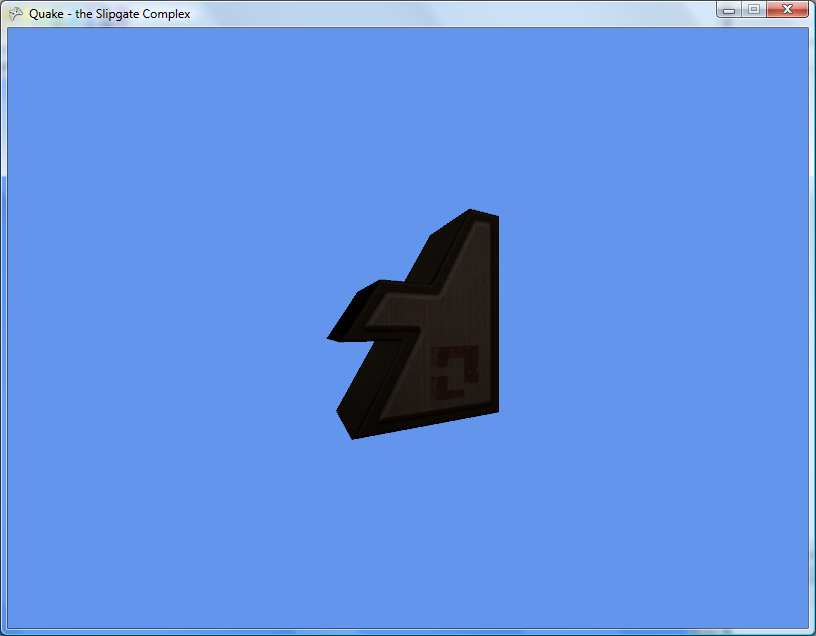
Models 0, 1 and 2 of The Slipgate Complex
Having multiple BSP renderer objects means that I can now render the ammo boxes and health packs.
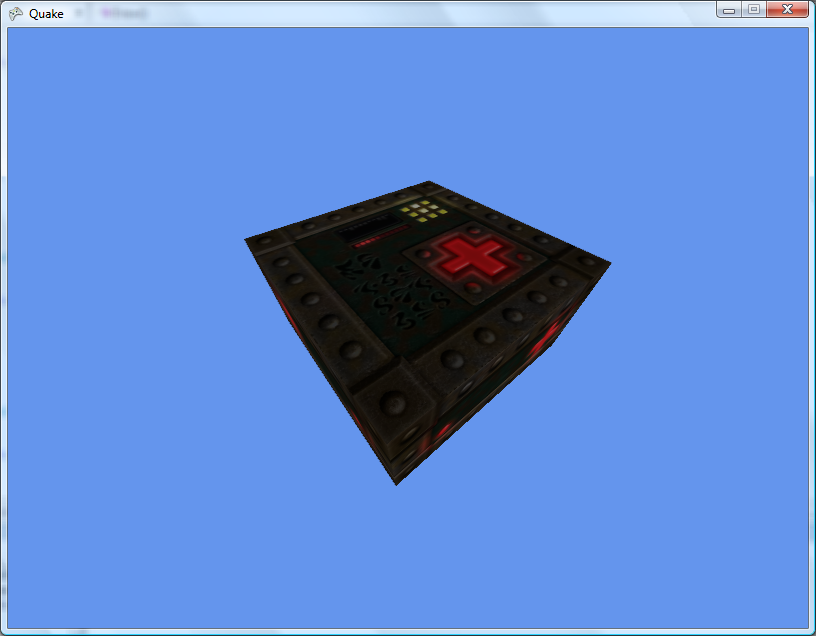
maps/b_bh25.bsp
I'm not sure what advantage there is to using BSP models instead of Alias models for these items.
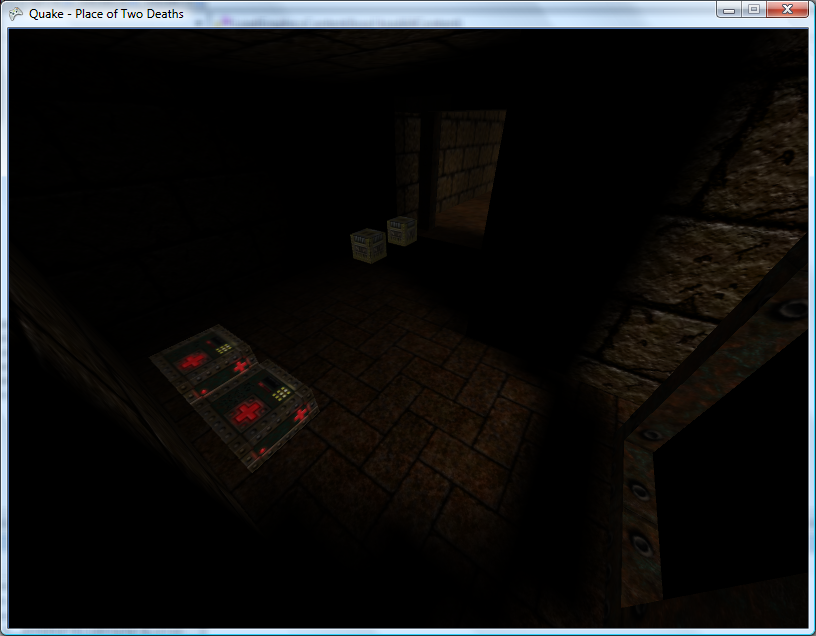
Place of Two Deaths has a Place of Two Medikits
High-Resolution/Luma Textures and Monsters
Thursday, 26th July 2007
Yup, I've done soem QuakeC modding before. The progs.dat is basically all the game code, and quake.exe is all the engine code. if you can load progs.dat properly, you should be able to get behaviour exactly like the original Quake.
Progs.dat is responsible for all monster types AI, and I think you're right about triggers and bridges and stuff.
Ah, makes sense! According to the Unofficial Quake Specs it's p-code, which at least makes parsing easier. Working out which opcodes do what will (I assume) require a perusal of the Quake/QuakeC compiler source.
One quick and dirty way to (possibly) improve Quake's elderly graphics is to use a modern texture pack, which provides high-resolution reinterpretations of Quake's own offerings.
Personally, I'm not too keen on these packs - high-resolution textures on low-poly structures emphasises their sharp edges, and texture alignment issues - Quake's textures are aligned pretty badly in places - are made even more obvious. In the same vein, low-resolution textures look very bad to me when magnified using a smoothing filter - I'd much rather see chunky pixels.
Anyway, adding support for them is very simple. When loading textures from the BSP, I simply check to see if a file textures/texturename.tga is available, and if so load that instead.
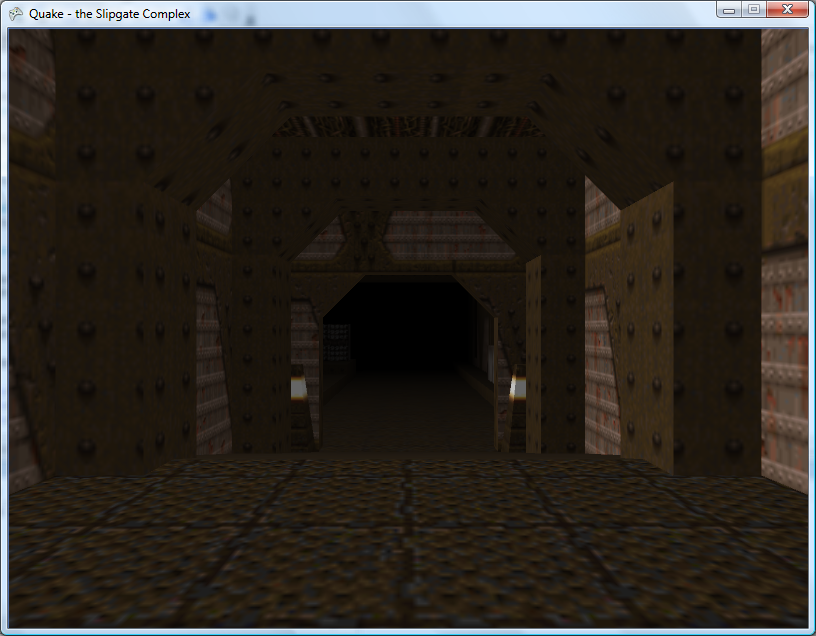
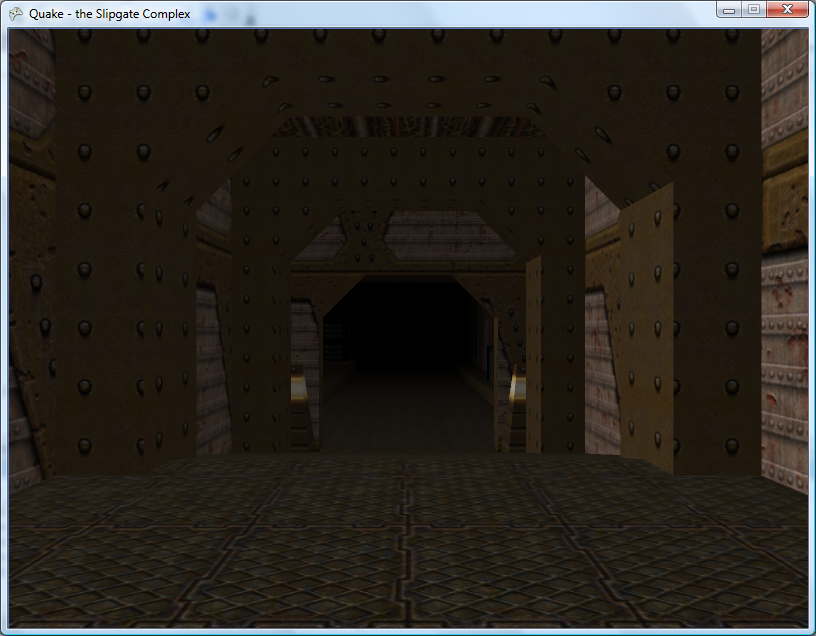
The Slipgate Complex with the original and high-resolution textures.
One advantage of these high resolution texture packs are their luma variations. These are available for certain textures that need to 'glow', such as lights, computer displays or runes. These are mostly black textures with the only the part that lights up drawn.
I draw the world geometry twice. The first time I draw it normally. The second time I disable lighting and fog, enable alpha blending, use an additive blend function and the luma textures instead of the regular textures.

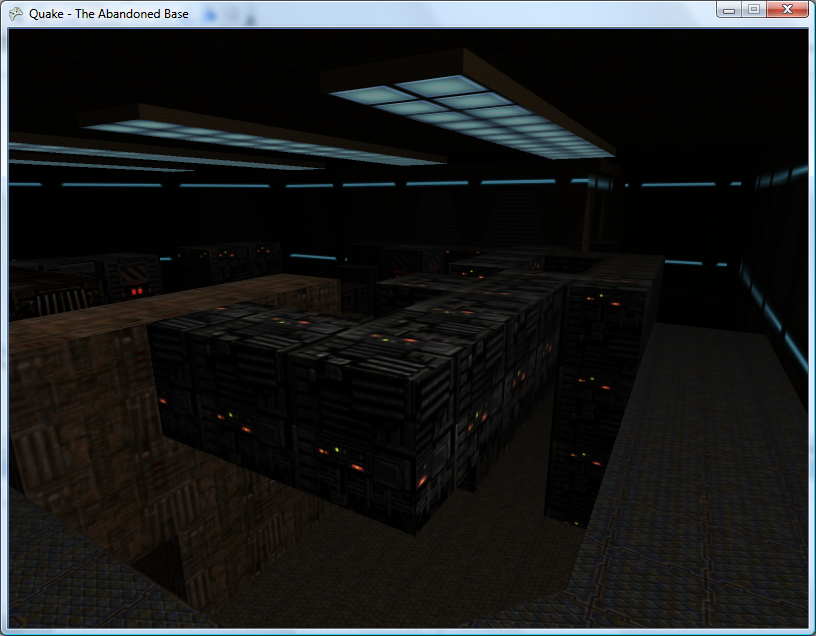
The Abandoned Base before and after the addition of luma textures.
Quake's maps have limited support for animated textures. If the texture is named +0xyz (where xyz is the descriptive name of the texture) then chances there's a +1xyz, +2xyz (and so on) texture to go with it. Once a level's textures have been loaded, I go through looking for any names starting with +0. From this I can search for the indices of its other frames.
Texture2D OldFirstWall = this.WallTextures[ATD.TextureIds[0]];
Texture2D OldFirstLuma = this.LumaTextures[ATD.TextureIds[0]];
for (int i = 0; i < ATD.TextureIds.Length - 1; ++i) {
	this.WallTextures[ATD.TextureIds[i]] = this.WallTextures[ATD.TextureIds[i + 1]];
	this.LumaTextures[ATD.TextureIds[i]] = this.LumaTextures[ATD.TextureIds[i + 1]];
}
this.WallTextures[ATD.TextureIds[ATD.TextureIds.Length - 1]] = OldFirstWall;
this.LumaTextures[ATD.TextureIds[ATD.TextureIds.Length - 1]] = OldFirstLuma;
Once I've collected up the indices of each animated texture's frames, I simply rotate them using the code above.
The levels do look rather lonely without the various monsters patrolling them. This can be remedied by parsing the entities lump. In the true brute-force tradition, the models are loaded once (at startup), but to render them I just loop through the entire entities block (which contains many irrelevant entities) hunting for types referencing a model - if so, I pull out their angle and offset and render the model at the specified position.

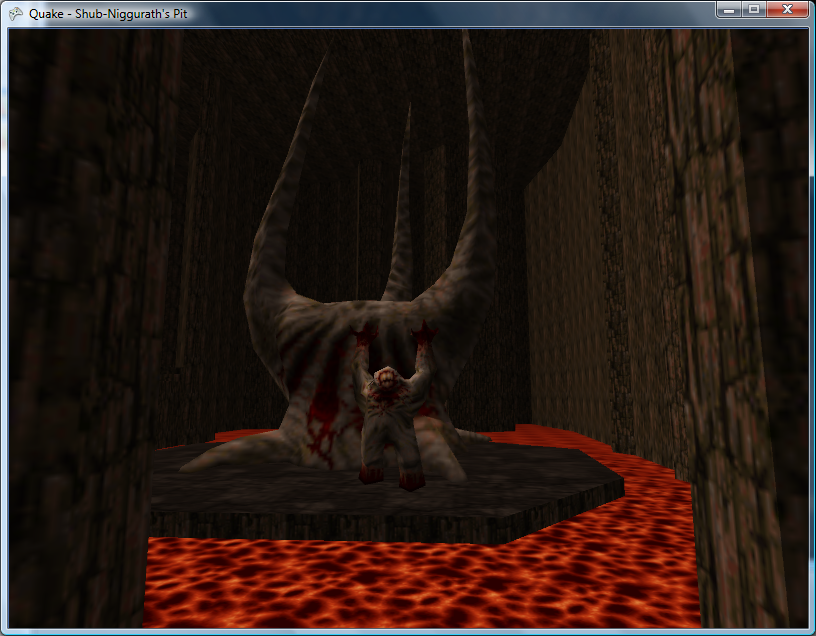
Most of the items spread out throughout the level - powerups, weapons and armour - are represented by Alias models, so adding support for those is easy enough:

Some of the other items - such as ammo crates - are represented by BSP models, so are currently not supported.
Event-Driven Keyboard Input for XNA
Friday, 6th July 2007
Edit: The following code has a bug in it. Please make sure you use the corrected code!
After a conversation with Thevenin regarding the Game class in XNA not letting you use event-driven keyboard input (useful, for example, for entering text) I rolled out this monstrosity.
/* * * * * * * * * * * * * * * * * * * * * * * * * * * * * * * * * * * * * * * * * * * * * * *
 * XnaTextInput.TextInputHandler - benryves@benryves.com                                     *
 * * * * * * * * * * * * * * * * * * * * * * * * * * * * * * * * * * * * * * * * * * * * * * *
 * This is quick and very, VERY dirty.                                                       *
 * It uses Win32 message hooks to grab messages (as we don't get a nicely wrapped WndProc).  *
 * I couldn't get WH_KEYBOARD to work (accessing the data via its pointer resulted in access *
 * violation exceptions), nor could I get WH_CALLWNDPROC to work.                            *
 * Maybe someone who actually knows what they're  doing can work something out that's not so *
 * kludgy.                                                                                   *
 * * * * * * * * * * * * * * * * * * * * * * * * * * * * * * * * * * * * * * * * * * * * * * *
 * This quite obviously relies on a Win32 nastiness, so this is for Windows XNA games only!  *
 * * * * * * * * * * * * * * * * * * * * * * * * * * * * * * * * * * * * * * * * * * * * * * */

#region Using Statements
using System;
using System.Runtime.InteropServices;
using System.Windows.Forms; // This class exposes WinForms-style key events.
#endregion

namespace XnaTextInput {

	/// <summary>
	/// A class to provide text input capabilities to an XNA application via Win32 hooks.
	/// </summary>
	class TextInputHandler : IDisposable {

		#region Win32

		/// <summary>
		/// Types of hook that can be installed using the SetWindwsHookEx function.
		/// </summary>
		public enum HookId {
			WH_CALLWNDPROC = 4,
			WH_CALLWNDPROCRET = 12,
			WH_CBT = 5,
			WH_DEBUG = 9,
			WH_FOREGROUNDIDLE = 11,
			WH_GETMESSAGE = 3,
			WH_HARDWARE = 8,
			WH_JOURNALPLAYBACK = 1,
			WH_JOURNALRECORD = 0,
			WH_KEYBOARD = 2,
			WH_KEYBOARD_LL = 13,
			WH_MAX = 11,
			WH_MAXHOOK = WH_MAX,
			WH_MIN = -1,
			WH_MINHOOK = WH_MIN,
			WH_MOUSE_LL = 14,
			WH_MSGFILTER = -1,
			WH_SHELL = 10,
			WH_SYSMSGFILTER = 6,
		};

		/// <summary>
		/// Window message types.
		/// </summary>
		/// <remarks>Heavily abridged, naturally.</remarks>
		public enum WindowMessage {
			WM_KEYDOWN = 0x100,
			WM_KEYUP = 0x101,
			WM_CHAR = 0x102,
		};

		/// <summary>
		/// A delegate used to create a hook callback.
		/// </summary>
		public delegate int GetMsgProc(int nCode, int wParam, ref Message msg);

		/// <summary>
		/// Install an application-defined hook procedure into a hook chain.
		/// </summary>
		/// <param name="idHook">Specifies the type of hook procedure to be installed.</param>
		/// <param name="lpfn">Pointer to the hook procedure.</param>
		/// <param name="hmod">Handle to the DLL containing the hook procedure pointed to by the lpfn parameter.</param>
		/// <param name="dwThreadId">Specifies the identifier of the thread with which the hook procedure is to be associated.</param>
		/// <returns>If the function succeeds, the return value is the handle to the hook procedure. Otherwise returns 0.</returns>
		[DllImport("user32.dll", EntryPoint = "SetWindowsHookExA")]
		public static extern IntPtr SetWindowsHookEx(HookId idHook, GetMsgProc lpfn, IntPtr hmod, int dwThreadId);

		/// <summary>
		/// Removes a hook procedure installed in a hook chain by the SetWindowsHookEx function.
		/// </summary>
		/// <param name="hHook">Handle to the hook to be removed. This parameter is a hook handle obtained by a previous call to SetWindowsHookEx.</param>
		/// <returns>If the function fails, the return value is zero. To get extended error information, call GetLastError.</returns>
		[DllImport("user32.dll")]
		public static extern int UnhookWindowsHookEx(IntPtr hHook);

		/// <summary>
		/// Passes the hook information to the next hook procedure in the current hook chain.
		/// </summary>
		/// <param name="hHook">Ignored.</param>
		/// <param name="ncode">Specifies the hook code passed to the current hook procedure.</param>
		/// <param name="wParam">Specifies the wParam value passed to the current hook procedure.</param>
		/// <param name="lParam">Specifies the lParam value passed to the current hook procedure.</param>
		/// <returns>This value is returned by the next hook procedure in the chain.</returns>
		[DllImport("user32.dll")]
		public static extern int CallNextHookEx(int hHook, int ncode, int wParam, ref Message lParam);

		/// <summary>
		/// Translates virtual-key messages into character messages.
		/// </summary>
		/// <param name="lpMsg">Pointer to an Message structure that contains message information retrieved from the calling thread's message queue.</param>
		/// <returns>If the message is translated (that is, a character message is posted to the thread's message queue), the return value is true.</returns>
		[DllImport("user32.dll")]
		public static extern bool TranslateMessage(ref Message lpMsg);


		/// <summary>
		/// Retrieves the thread identifier of the calling thread.
		/// </summary>
		/// <returns>The thread identifier of the calling thread.</returns>
		[DllImport("kernel32.dll")]
		public static extern int GetCurrentThreadId();

		#endregion

		#region Hook management and class construction.

		/// <summary>Handle for the created hook.</summary>
		private readonly IntPtr HookHandle;

		/// <summary>Create an instance of the TextInputHandler.</summary>
		/// <param name="whnd">Handle of the window you wish to receive messages (and thus keyboard input) from.</param>
		public TextInputHandler(IntPtr whnd) {
			// Create the keyboard hook:
			this.HookHandle = SetWindowsHookEx(HookId.WH_GETMESSAGE, new GetMsgProc(ProcessMessages), IntPtr.Zero, GetCurrentThreadId());
		}

		public void Dispose() {
			// Remove the hook.
			if (this.HookHandle != IntPtr.Zero) UnhookWindowsHookEx(this.HookHandle);
		}

		#endregion

		#region Message processing

		private int ProcessMessages(int nCode, int wParam, ref Message msg) {
			// Check if we must process this message (and whether it has been retrieved via GetMessage):
			if (nCode == 0 && wParam == 1) {

					// We need character input, so use TranslateMessage to generate WM_CHAR messages.
					TranslateMessage(ref msg);

					// If it's one of the keyboard-related messages, raise an event for it:
					switch ((WindowMessage)msg.Msg) {
						case WindowMessage.WM_CHAR:
							this.OnKeyPress(new KeyPressEventArgs((char)msg.WParam));
							break;
						case WindowMessage.WM_KEYDOWN:
							this.OnKeyDown(new KeyEventArgs((Keys)msg.WParam));
							break;
						case WindowMessage.WM_KEYUP:
							this.OnKeyUp(new KeyEventArgs((Keys)msg.WParam));
							break;
					}

			}

			// Call next hook in chain:
			return CallNextHookEx(0, nCode, wParam, ref msg);
		}

		#endregion

		#region Events

		public event KeyEventHandler KeyUp;
		protected virtual void OnKeyUp(KeyEventArgs e) {
			if (this.KeyUp != null) this.KeyUp(this, e);
		}

		public event KeyEventHandler KeyDown;
		protected virtual void OnKeyDown(KeyEventArgs e) {
			if (this.KeyDown != null) this.KeyDown(this, e);
		}

		public event KeyPressEventHandler KeyPress;
		protected virtual void OnKeyPress(KeyPressEventArgs e) {
			if (this.KeyPress != null) this.KeyPress(this, e);
		}

		#endregion
	}
}
Might be useful if your Windows game needs text input. Win32 veterans, feel free to lambast my lack of skills.
Parallel-Port SMS Control Pad
Monday, 15th January 2007
I've been wanting to attach an SMS control pad to my PC (and be able to use it to play games with) for a while, so put in an order from those excellent chaps at Rapid for the parts needed.
The joypad (as I've now learned from disassembly) is very primitive - 6 normally-open switches, each connected between a pin on the DE-9 connector and ground. The accepted layout adapter uses the 25-pin parallel port, connecting ground to pin 18, power to pin 1 (not that the control pad uses this pin) and 7 further connections from D0 to D6 for the buttons.
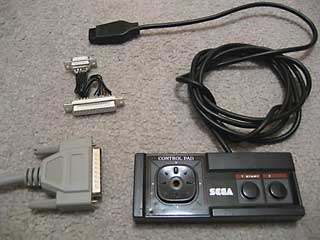
Master System Control Pad and a poorly-soldered DB-25 to DE-9 adapter.
I had been assured that the data lines on parallel ports (D0..D7) were pulled up, and so the layout seemed easy enough - D0..D6 will return highs normally, and when a button is pressed it is connected to ground.
Unfortunately, for whatever reason the data lines on the parallel port on my PC are not pulled up, at least not in any way that I can find to control. However, if you set the lines to be outputs (using bit 5 of the control register), set them all high, then flip them to inputs, they'll read as highs for a while until they float (slowly) back low again. I've used this to my advantage, and so have this:
/// <summary>Flags corresponding to which buttons are pressed.</summary>
[Flags]
public enum Buttons {
    None = 0x00,
    Up = 0x01,
    Down = 0x02,
    Left = 0x04,
    Right = 0x08,
    Button1 = 0x10,
    Button2 = 0x20,
    All = 0x3F,
}

// Retrieve the status of the port.
private Buttons GetRawStatus() {
    // Set D0..D7 as outputs.
    Output(this.BaseAddress + 2, 0x00);
    // Set them high:
    Output(this.BaseAddress + 0, 0xFF);
    // Set D0..D7 as inputs.
    Output(this.BaseAddress + 2, 0x20);
    // Retrieve, invert and mask the data lines.
    return (Buttons)(~(Input(this.BaseAddress + 0)) & (int)Buttons.All);
}
This works very well, with one small problem: nothing is debounced, so pressing any button causes 10 or so press/release actions to be detected until the contacts settle. Therefore, the exposed method for retrieving the status is this:
/// <summary>Gets the status of the buttons from the connected SMS joypad.</summary>
/// <returns>The status of the buttons.</returns>
public Buttons GetStatus() {
    if (!this.Debounced) {
        return GetRawStatus();
    } else {
        Buttons Last = GetRawStatus();
        Buttons Current;
        int MaximumIterations = 100;
        while (((Current = GetRawStatus()) != Last) && (MaximumIterations-- > 0)) {
            Last = Current;
            Thread.Sleep(0);
        }
        return Current;
    }
}
For some strange reason, this doesn't quite work; after a while (or rebooting, or reading/writing the EPP registers) the port starts reading nothing but zeroes again. Running another piece of software that uses the parallel port fixes it.
One missing feature of the emulator was support for the SMS pause button. This button is attached to the Z80's non-maskable interrupt line, so pressing it results in the CPU pushing the program counter to the stack then jumping to $0066.
For most games the pause button just pauses the game, but for some others it will display a menu - such as in Psycho Fox, which lets you use the items you have collected to change animal or use a power-up.
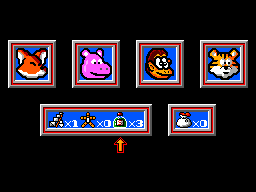
Psycho Fox's in-game menu
One major long-standing bug in the emulator has been interrupt handling by the CPU. I think I've (finally!) got it, though it's still not entirely perfect. How I've set it up now is that a flag is set - IntPending or NmiPending, depending on whether the maskable or non-maskable interrupt pin has been modified - when the interrupt is requested, and cleared when it's been handled.

Japanese Master System BIOS
I have updated the memory emulation to better support BIOS ROMs. Initially, the "Majesco" Game Gear BIOS and some of the "Snail Maze" SMS BIOS worked (though the SMS BIOS would display "Software Error" on several games). I've tested a few of them and they seem to work pretty well.
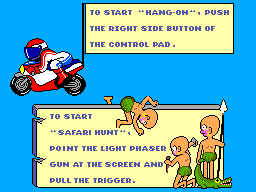
Hang On and Safari Hunt
Whilst the Japanese BIOS has (in my opinion) the best final effect, it's the M404 prototype BIOS that has the best effect overall:

Text mode graphics and help file indexing
Monday, 6th November 2006
In light of the TMDC, I thought I'd package up the .NET class for easy text-mode graphics I'd been throwing together.

Once initialised, all you need are two things; the Graphics object it provides to handle your drawing, and the Refresh() method to update the console with whatever it is you've been composing.
It relies on a fairly large palette (128KB) which is hugely wasted in the current version - it maps every 16-bit colour value (R5G6B5) to an attribute/character pair. For the purpose of not looking extremely ugly, the palette provided only uses a few basic characters, not the full range, hence that 128KB could be reduced somewhat.
If you want to provide your own palette, it's just a sequence of two byte pairs (character then attribute) for each of the 16-bit colour values.
You'll need to compile with the unsafe flag set.
Download VC♯ project (with a quick-and-dirty sample program - an oldschool flame that spins around, some curves and some alpha-blended text). ClearType does make the text look a bit odd.
// Set window to 80x50
TextSharp TS = new TextSharp(80, 50);

// Set window title text
TS.Title = "TextSharp Demo";

// Set up some pleasant antialiasing/filtering
TS.Graphics.SmoothingMode = SmoothingMode.HighQuality;
TS.Graphics.InterpolationMode = InterpolationMode.HighQualityBicubic;

// Now use the Graphics object like any other
TS.Graphics.Clear(Color.White);
TS.Graphics.DrawLine(Pens.Black, 0, 0, 80, 50);

// Update console window
TS.Refresh();
The document browser progresses (slowly) - it now exports and imports to/from a single file (the .docpack) and has a nifty search-as-you-type index.
Why is it that all you need to do to solve all your .NET WinForms woes is to make the control invisible then visible again? When clearing/adding large numbers of nodes to a TreeView control, you get a dancing scrollbar that pauses the app for a second or so - make the control invisible then visible again and it's instant. (This is using Clear and AddRange - it's not as if I'm adding them one-by-one).
Map Editing
Wednesday, 26th July 2006
I added five-level grey:
The greyscale effect is optional (adds about 8 lines of code, only runs once per frame and can be disabled with a single switch in the engine package's Settings.inc file.
Anyway, I've started throwing together a very primitive level editor. (GDI+)
Insert inserts a new vertex at the mouse location; delete removes the closest vertex. Point at a vertex, hold W, move to another vertex and release W to insert a new wall. (Single-sided, hold shift at the same time to add a double-sided wall). Use D to remove walls in the same way. That sort of thing.
The two different types of wall are represented with white lines (single-sided) and grey lines (double-sided). There are therefore 9 different sectors in the above image.
Imagine that the walls have been kept simple (fixed floor/ceiling heights, single segment) and can have one of 6 different 'colours' - from 0 (invisible/transparent) to 1 (white) through to 3 (50% grey) and finally 5 (black).
Therefore, for the sake of simplicity, assume that all of the double-sided grey walls in the above screenshot are invisible. The room in the south-west of the screenshot is an octogonal room with a doorway in the eastern wall and a square pillar in the middle.
The four double-sided walls in this south-western room are not redundant. You will notice that the level has been cut up into convex sectors. This has one small advantage - it reduces the number of walls that will need to be sorted, as I only need to sort entire sectors for occlusion purposes.
Also, I can see that I can get some sort of portal*-based system up and running. Suppose I use the editor to create this:
If I was to start in the left sector, I would go through and draw each wall. I'd hit the double-sided wall at some point, and know that after this sector I'd have to move into the sector in the middle. After that sector, I'd know that I'd have to move to the sector to the right. With me so far?
Let's do something radical and make that central sector a door, and close it (move the ceiling height down to meet the floor height). This time, when I move through the sectors, I'll hit this sector and see that it's closed. No matter, say I - rather than carry on walking through the sectors, I stop at that point.
By liberally sprinkling a world with doors, and keeping them shut most of the time, you can cut out a fair chunk of geometry. :)
I cannot think of the best way to handle sorting. I don't think I can just use the order in which I wander through the sectors - imagine this:
Imagine you're in the north 'triangle' and looking south. As you can see, you need to travel through more sectors to get to the larger rectangular room than the south triangular room - and using that for sorting is just wrong.
One potential workaround I can think of is that each sector has a visibility list - a list of in which order sectors appear (in front->back order - else we wouldn't be able to take advantage of portals). Problems; MASSIVE amount of data that grows exponentially with each added sector! From what I can also tell, that also seems a precomputed BSP list, done per sector (rather than work out which side of the split to follow each branch, it's already calculated for us). On the other side, this can also be used to calculate (through some nifty ray/plane intersection algorithm) which sectors will NEVER be visible from a particular sector... Hmm. I'm not afraid of 'wasting' RAM with gigantic tables - if we assume a smallish, plain level of 50 sectors, each sector would need a list of at most 49 other sectors. 49*50*2=4900B - not actually too bad. :
(Bah) Just realised that would not work (precomputed sorting based on sectors) at all.
Let's say the red line is your 'view' (not a wall, quick and dirty diagram). It intersects the front of two walls, so it appears that the sort should go north->east->west sectors. However, imagine I move to the other side of the sector and look the same way (mirror the diagram, basically). Now the order goes north->west->east, and I'm still in the same sector :( Do I just clump all the sectors together and sort them all together based on the distance to the central (average) coordinate of each and the camera? (Not fast!)
Thoughts?
*I hope that's the correct word.
Applications
Wednesday, 7th June 2006
I've been attempting to add native TI-83+/TI-73 application support to Brass. Testing with Flash Debugger has been an entertaining experience, not least thanks to helpful messages like:
I haven't managed to get a signed application running in Flash Debugger or on hardware yet - I suspect the header is wrong - but seeing as the demo application has a different header structure to what the header generator creates, and both have generally conflicting information, I need to find some better resources.
If you want to sign applications from C♯ via Wappsign, this wrapper around the COM object might be useful. You'd use it like this:
// Sign the app (where BinaryFile is the filename of the .hex file to sign)
try {

    AppSigner Signer = new AppSigner(AppSigner.Mode.DetectType);

    // Get the key file
    string KeyFile = Signer.GetKeyFile(BinaryFile);
    if (KeyFile == "") throw new Exception("Couldn't find the key file.");

    // Get the output filename
    string SignedAppFilename = Signer.FormatOutput(BinaryFile);
    if (SignedAppFilename == "") throw new Exception("Couldn't establish output filename.");

    // Sign the bugger
    int Signed = Signer.Sign(BinaryFile, KeyFile, SignedAppFilename);
    if (Signed != 0) throw new Exception(Signer.GetErrorMessage(Signed));

} catch (Exception ex) {
    // Didn't work as it should
    DisplayError(ErrorType.Error, "Could not sign application: " + ex.Message);
}
A productive weekend
Wednesday, 3rd May 2006
What with the weekend having an extra Monday tacked on for good measure (Labour Day), I felt the need to be productive.
I also felt the need to listen to VGM files converted to MIDI, so rustled up a VGM to MIDI converter. There already is one (available on the SMS Power! site), but I could never get it to work.
Having never really puzzled out the YM2413 ('OPLL', FM chip) I limited it to the square-wave generating PSG.
First of all, you need to be able to convert a tone register value (from 0 to 1023), the period of the output square wave, to a MIDI key value (0 to 127, where every 12 keys represent an octave).
This is easiest if you have a real frequency (in Hertz) to work with, so I have the formulae:
Frequency = ClockSpeed ÷ (32 × ToneReg)
Key = 12 × Log2|Frequency × Constant|
ClockSpeed is the clock speed of the PSG in Hertz. Constant is a precalculated constant used to scale the frequency to a range so that 440Hz ends up being played as key A, octave 5.
As it is unlikely you'll get a round number with this, I rely on adjusting the MIDI pitch wheel. Now it's a case of detecting attacks (when the volume of a channel increases) and releases (when the volume of a channel is set to 0) to create MIDI key press and release messages.
Percussion (white noise from the PSG) is handled the same way, except that instead of using mapping frequencies to keys and pitch wheels it plays one of 3 different drums corresponding to the 3 different pitches of noise.
It works fairly well, and you can download the software and source from the site here.
You can also listen to some samples:
- Power Strike 2 (GG) - Weapon Select
- Ristar (GG) - Du-Di-Da!
- Marble Madness - Tune 09
- The Flash - Trickster for Mayor
- Sega Chess - White Wins
- Sonic Chaos - Mecha Green Hill Zone
- Sonic the Hedgehog - Bonus Zone
- Ys - Holders of Power
The problem with sound-related apps is that they don't provide very interesting screenshots, so I took on a little side project that I hoped would. (After all, journals are a bit dull if they're plain text).


Yep, it's that 3MHz, 32-colour, 8KB powerhouse the Sega Game Gear again.
Looking on pouet.net, there is only one Game Gear demo on there. If I haven't got it in me to complete a full-blown game, I can at least try and contribute something.  After all, it's a relatively simple Z80 system to write programs for.
Have the typically poorly-shot video to see it in action:

(The odd flickering horizontal band that sometimes appears is a case of me using up the 8 sprite per scanline ration).
Next Latenite Beta
Thursday, 23rd February 2006
Seeing as the MaxCoderz fora have died (I can't read or post on them at the temporary hosting), and I know at least kv reads this... 
Latest beta: /bin/latenite/ (full install).
General
- No more hanging or locking up when running the PTI debugger (huzzah!) PindurTI debugger is still horribly, horribly incomplete :( (Boo!)
- Reworked icon extraction code works for all files (no more incorrect icons!)
- File tree plugins (bundled with .emr plugin) to expand certain files into a tree.
- Copy/Paste doesn't accidentally copy/paste if the text editor isn't selected (Ctrl+C/Ctrl+V doesn't work anywhere else, though).
- Minor bug fixes here and there; some visible, others invisible.
- Brass template has old defines added for backwards compatibility.
- Updated copy of Brass and Brass XML file.
- Minor tweaks to help file CSS.
- Blue icon bug in Windows versions prior to NT 5.1 (XP) should be fixed.
Known Issues
- Holding tab/shift+tab down adds lots of surplus tabs.
- Anything to do with the debugging (watch, breakpoints) has not been touched, and so old bugs remain there.
- PTI debugger doens't handle errors very gracefully (infinite messagebox loops). Make sure your ROMs are correctly installed!
EarlyMorning Link
For the EarlyMorning interface to work you need to associate .emr files with EarlyMorning. You can do this by double-clicking any .emr file, then browsing to the EarlyMorning binary when prompted. Without this information, Windows won't know where to find EarlyMorning when it wants to open an EarlyMorning file.
If you run Latenite, .emr files should now appear with the EarlyMorning icon, and a little [+] by them. Click this to expand them! Something a bit like this:
Double clicking on a resource should open it in EarlyMorning.
Bear in mind that I forgot to copy kv's PM to disk, so built the interface by guessing.
Also bear in mind that EarlyMorning (the version I have, at least) has a bug, as it loads itself and expects to load resources relative to the current working directory. Opening a subresource has a hack in Latenite to fix this behaviour, but opening an EMR file by right-click->open will cause EM to crash.
@kv, you need something like this:
private string FixPath(string RelativePath) {
    return Path.Combine(Application.StartupPath, RelativePath);
}

private void Something() {
    // ... and use it like this:
    LoadFromFile(FixPath("Some/Local/Path.ext"));
    // Rather than:
    LoadFromFile("Some/Local/Path.ext");
}Themes!
Wednesday, 23rd November 2005
Not the www2 theme though - a couple of XP theme glitches.
First up is the ListView control in .NET 2. If you switch on gridlines and scroll with the arrows on the scrollbar, it leaves the gridlines behind as nasty artefacts. This is what I came up with - and it appears to work.
Create a new class that inherits from ListView. Then add to it this code:
        /// <summary>
        /// Hacky override to fix the garbage lines.
        /// </summary>
        protected override void WndProc(ref Message m) {
            if (m.Msg == 0xF) { // 0xF is WM_PAINT
                GridLines = false;
                GridLines = true;
            }
            base.WndProc(ref m);
        }
...compile and that new class should appear in your toolbox. Use that instead of the normal ListView control.
If anyone could come up with a better solution, I'd love to hear it...
The other theme bug appeared last night in XP.
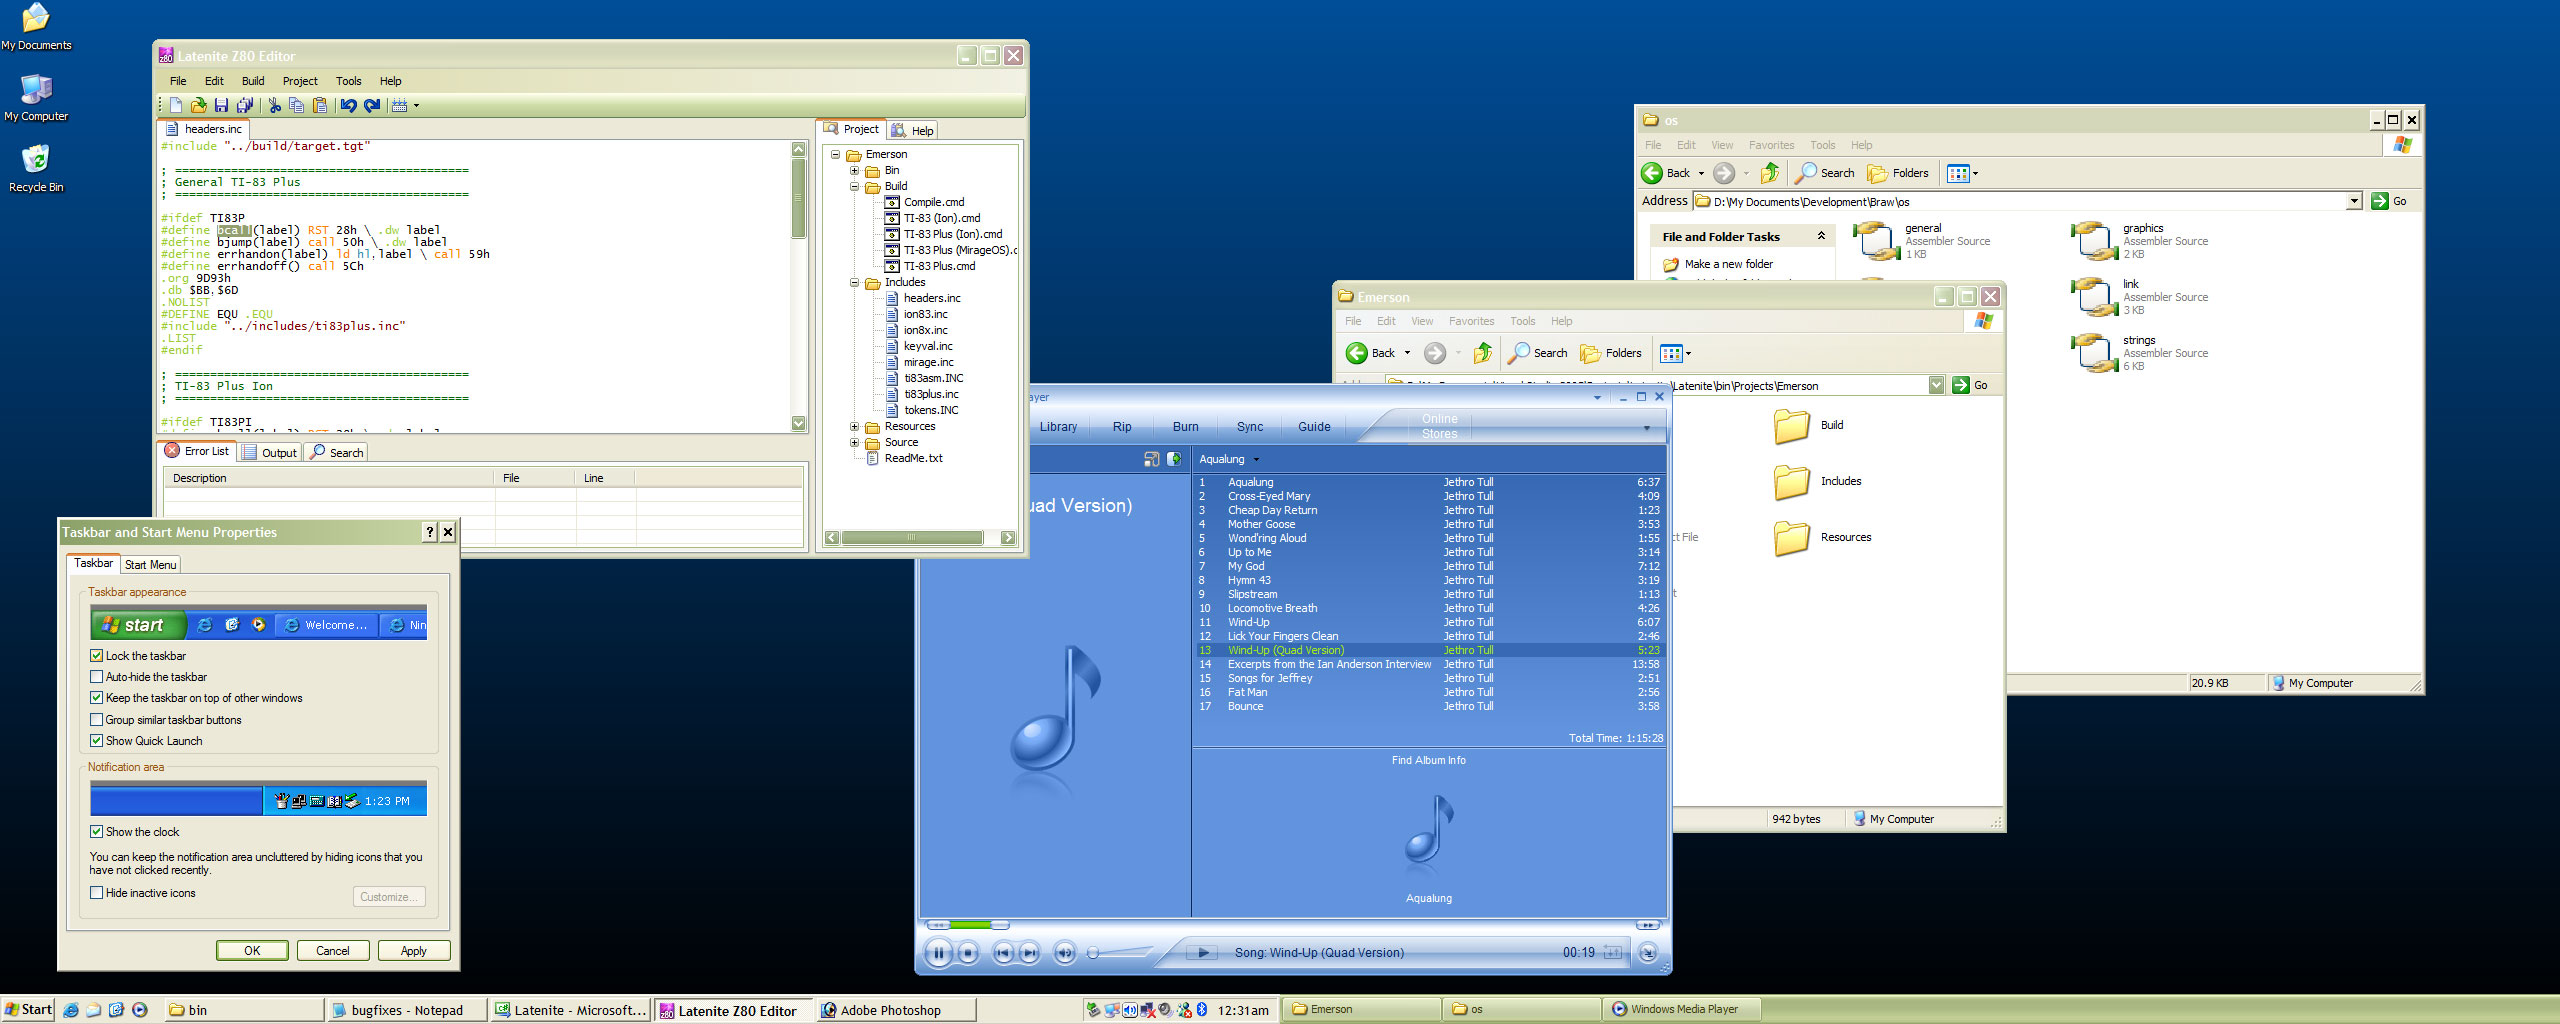
I guess it can't remember if it's using Windows Classic or Windows XP styling?
Subscribe to an RSS feed that only contains items with the C# tag.